Managing Users in Central
There are two types of user accounts in ODK Central: Web Users and App Users.
Web Users have accounts on the Central management website. These accounts are global across all Projects on the server. They can log into the web interface and perform administrative actions like user management, Form upload and management, and Submission data viewing and download. Which of these actions they can take depends on their Role.
App Users can use mobile data collection apps like ODK Collect to connect to Central. App Users exist at the Project level and can be further limited to only see certain Forms in the Project. Once connected through the app, they will be able to fill Forms and upload completed Submissions to those Forms.
Many data collection projects will involve both kinds of users: Web Users to upload Form definitions, App Users to fill out Forms from their mobile device, and Web Users to process and analyze the collected data. Projects that rely exclusively on Web Forms for data collection use Web Users only.
See also
Public Access Links are an alternative way to provide access to Web Forms for data collection.
Web User Roles
Central features Role-based User permissioning for Web Users. Web Users can either be system-level administrators which can perform all actions on all resources across the system, or they can be given specific Roles in one or more Projects.
Central currently defines three Project-level Roles:
Project Managers can perform any action on their assigned Project
Project Viewers only see created Forms, Submissions, and Entities within the Project they are assigned to, and cannot edit anything
Data Collectors may see the list of all Forms in the Project, and retrieve basic information about them, but may only create new Submissions. They cannot see any Submissions. This Role is similar to App Users except that Data Collectors always see every Form in a Project and only use Web Forms.
Note
When Entities are attached to or defined by a Form, their access is mediated by the Form. For example, Data Collectors and App Users can never view Entities directly, but they can view them in the context of filling out a Form they have access to.
Central Roles allow the following:
Action |
Administrator |
Project Manager |
Project Viewer |
Data Collector |
|---|---|---|---|---|
Projects |
||||
Create |
x |
|||
Edit details |
x |
x |
||
Archive |
x |
x |
||
Project Forms |
||||
Create |
x |
x |
||
List all |
x |
x |
x |
x |
Edit attachments |
x |
x |
||
Edit details |
x |
x |
||
Set state |
x |
x |
||
Delete |
x |
x |
||
Project Form Submissions |
||||
Create |
x |
x |
x |
|
Edit and review |
x |
x |
||
Comment |
x |
x |
x |
|
View and download |
x |
x |
x |
|
Access OData feed |
x |
x |
x |
|
Project Entity Lists Note: Data Collectors can view Entity Lists attached to Forms |
||||
Create |
x |
x |
||
List all |
x |
x |
x |
|
Add properties |
x |
x |
||
Update settings |
x |
x |
||
Project Entities Note: Data Collectors create Entities when they fill Entity-creating Forms |
||||
Create |
x |
x |
||
View and download |
x |
x |
x |
|
Access OData feed |
x |
x |
x |
|
Update data |
x |
x |
||
Delete |
x |
x |
||
View and download |
x |
x |
x |
|
Access OData feed |
x |
x |
x |
|
Project App Users |
||||
Create |
x |
x |
||
List all |
x |
x |
||
Revoke access |
x |
x |
||
See code |
x |
x |
||
Web Users |
||||
Create |
x |
|||
List all |
x |
|||
Edit details |
x |
|||
View email address |
x |
|||
Revoke password |
x |
|||
Delete |
x |
|||
Managing Web Users
To manage Web Users, navigate to at the top of the Central management website. You should see a listing of users that looks like this:
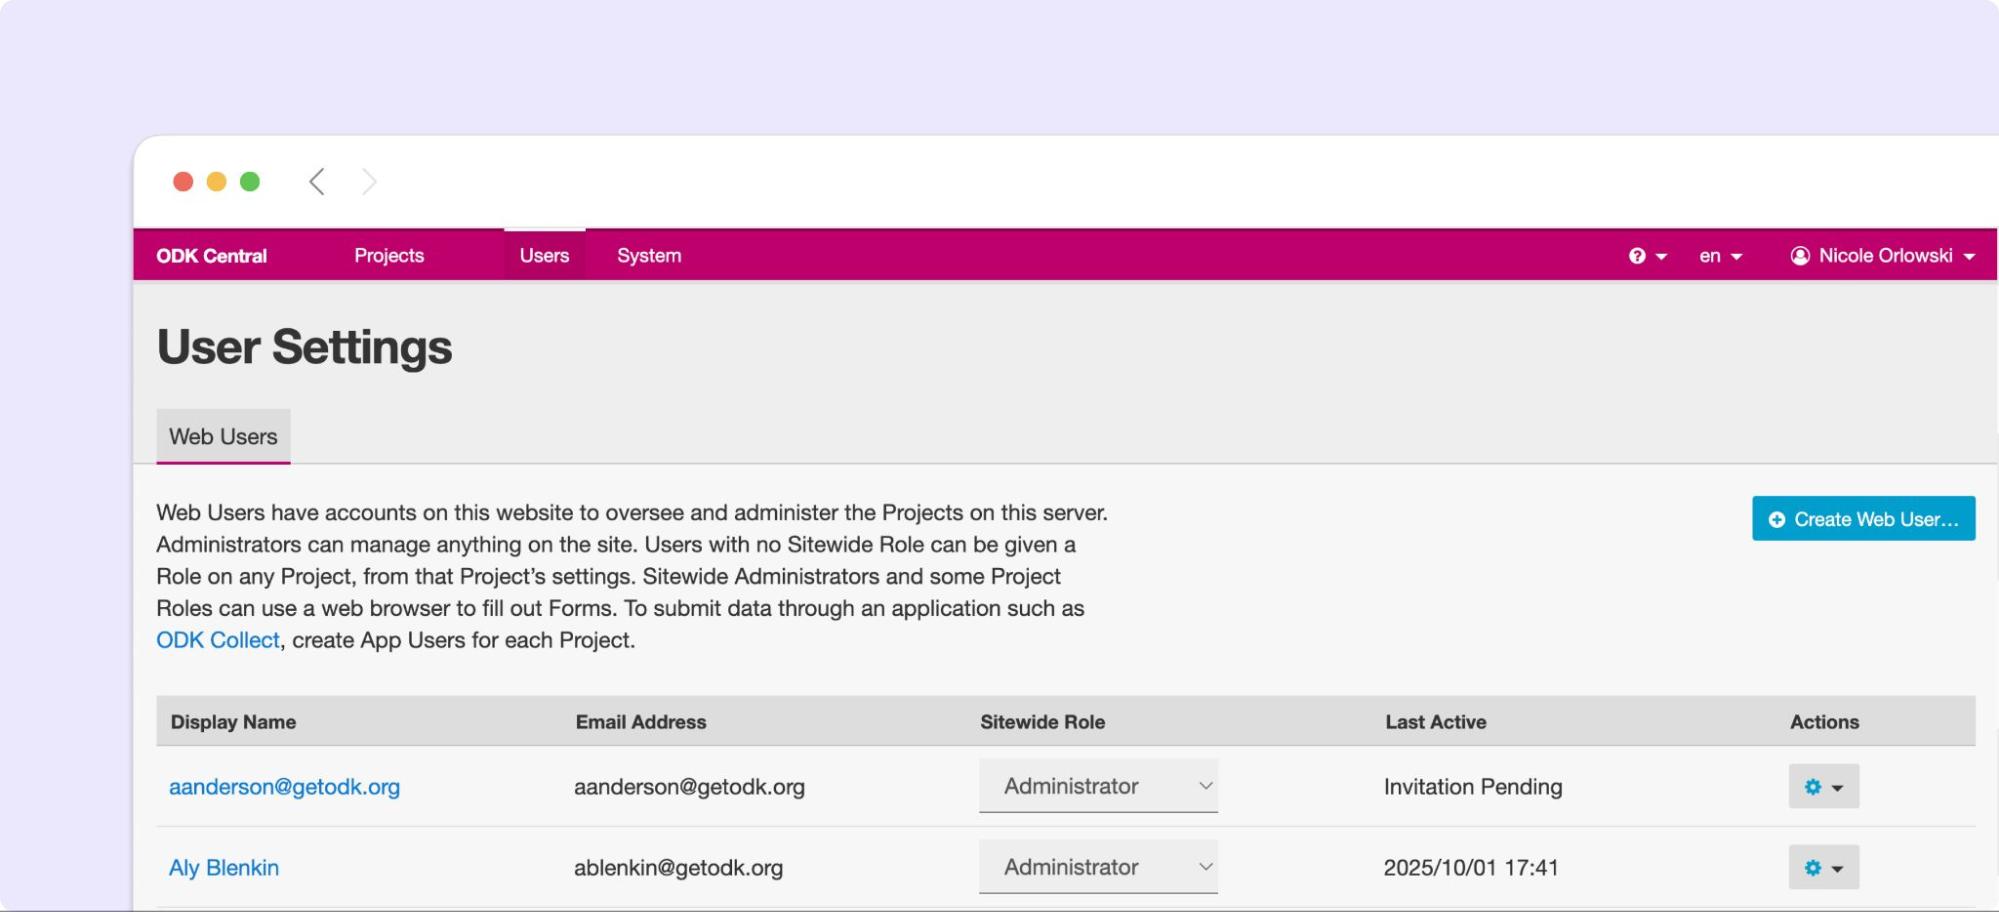
You can make Users into Administrators from the site-wide Users panel shown above, or you can assign them a Project-level Role on the Project Roles tab within the Project.
Creating a Web User
To create a new Web User, click on the Create web user button on the right side of the Web Users listing page. You will see a popup that looks like this:
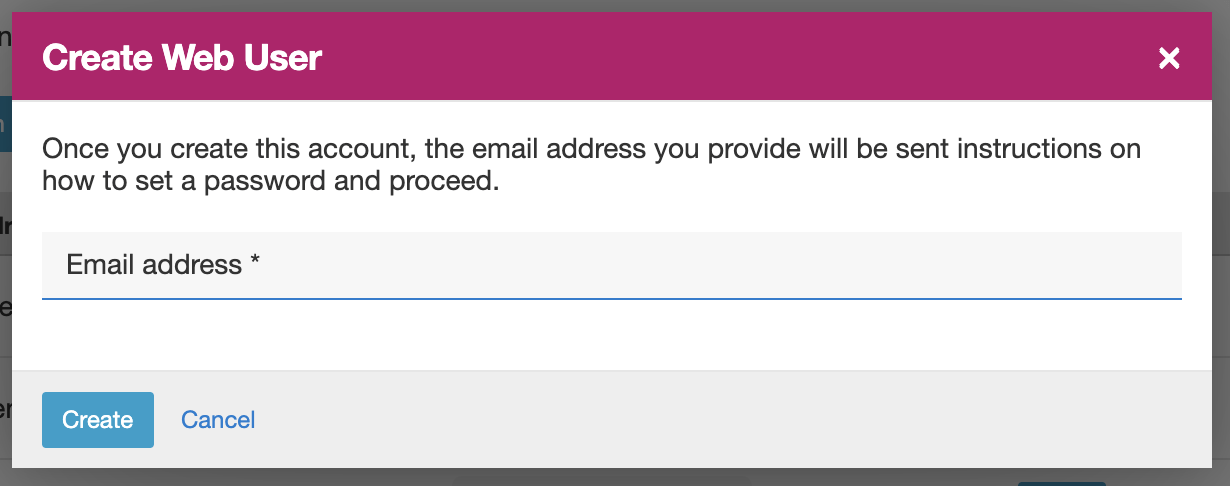
To create a new Web User, input the email address of the person who should receive access. Press Create once you are satisfied with the email address.
That email account will shortly receive an email with the subject line "ODK Central account created". If you do not see the email, check your spam folder. In the email, there will be a link which will allow the recipient to set a password for their new account, after which they will be able to log in.
The link is only valid for 24 hours. If 24 hours pass and it has not been used, you should use the Reset Password tool to send them a new link.
Newly created Web Users are only able to log in and edit their profile information. In order to give them access to do useful work on the server, please read the following section.
Assigning Web User Roles
As mentioned under Web User Roles above, there are four Roles you may assign to Web Users in the current release of ODK Central: Administrator, Project Manager, Project Viewer, and Data Collector.
To learn how to assign Project-level roles, please see the Managing Project Roles section in the Projects guide.
To assign an Administrator role, navigate to the Web Users administration panel. There, you should see a table like this one:
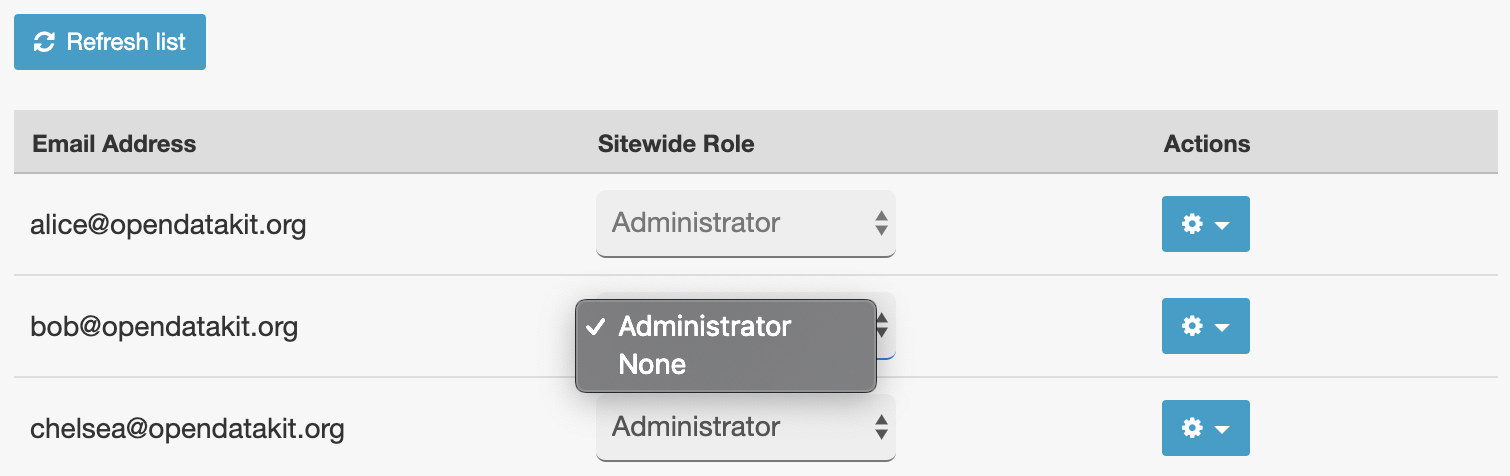
Under the Sitewide Role column in the table, you will see dropdown inputs with the options Administrator and None. To make a Web User an Administrator, change the dropdown next to their name to Administrator. You will see the page think for a moment, and then it will inform you that the action is done. To take away Administrator rights from a Web User, change the dropdown to None.
You will not be able to change your own Role in the system. To change your own Role, you will need to get somebody else to log in and change it for you.
Resetting a Web User password
Any user may request a reset of their own password by using the link at the bottom of the login screen:
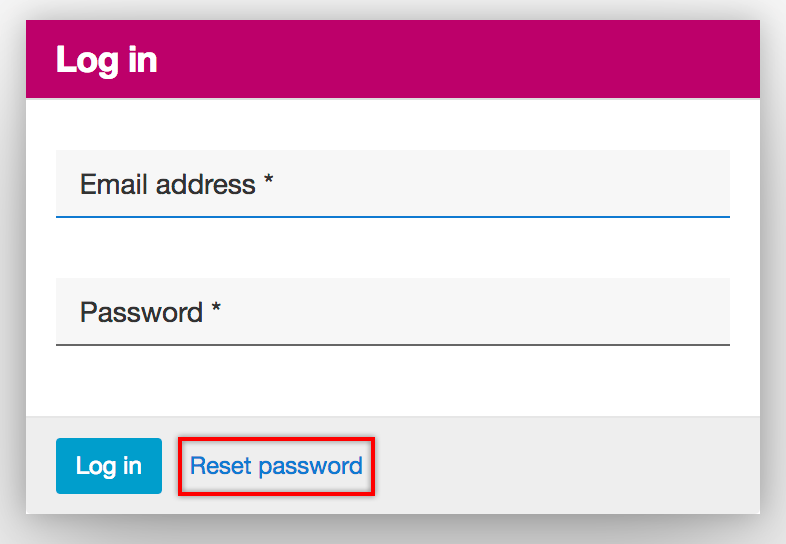
After submitting the reset form, the user should receive an email with the subject line "ODK Central account password reset". If they cannot find it, they should check their spam folder. When resetting a password this way, the user's current password continues to function until they actually use the link in the email to set a new one.
We also provide a separate way for administrators to directly reset any Web User's password in the administration panel for two reasons:
In case the user's password has been stolen and needs to be disabled immediately.
In case the user does not know how to do this themselves.
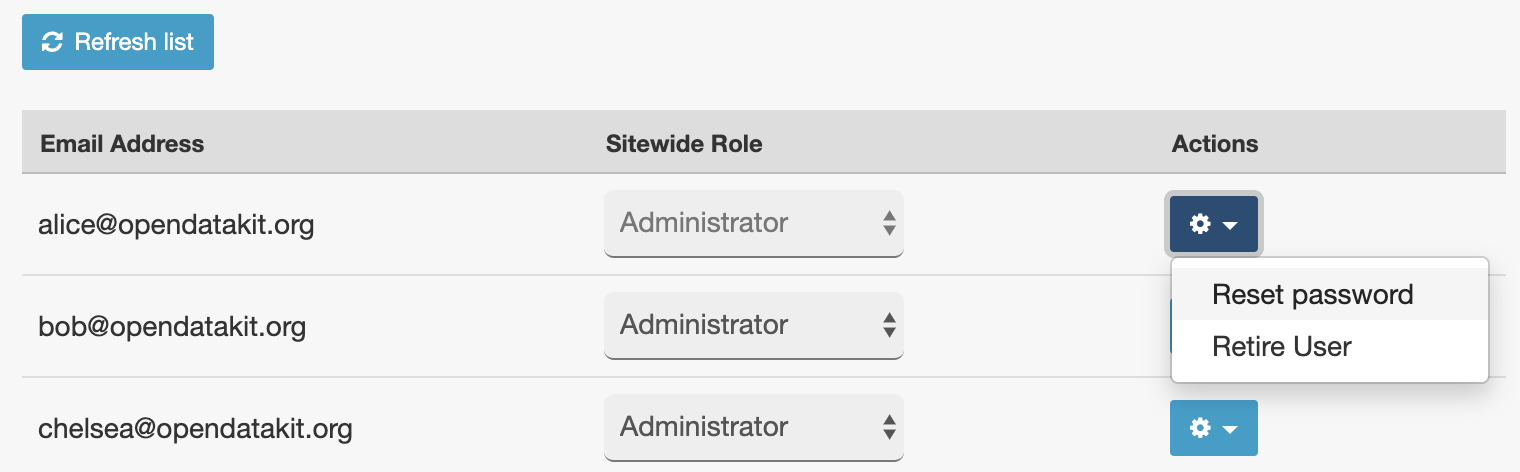
With the administrative reset, the user's password stops working immediately and they will be completely unable to log in until a new one is set. They will receive an email with instructions and a link on how to do this exactly as shown above. To perform the administrative reset, navigate to the Web Users listing page, and use the Actions menu at the right side of the table:
Retiring a Web User
When you retire a Web User, their login access will be revoked and they will be immediately signed out everywhere. They will disappear from the Web Users management list, but any records that trace their actions (submission uploader or form creator name, or audit log action initiator, for example) will still show their information.
If a retired Web User attempts to reset their password, they will receive a special email explaining that their account has been retired.
To retire a Web User, find them on the Web User administration panel, and open the Actions menu:
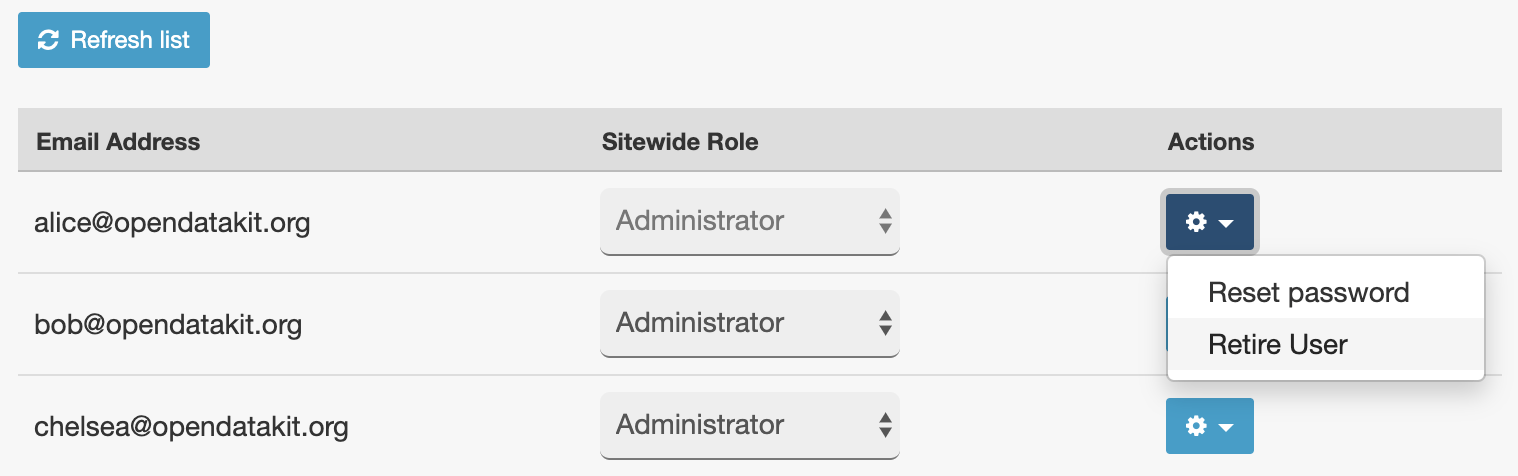
From here, select Retire User and follow the on-screen instructions.
Managing App Users
App Users never gain any access to the management website: they do not have email addresses or passwords associated with their account, only a Display Name so you can tell which is which.
Once a Web User creates an App User within a project, a settings QR code will be generated to grant a mobile device access to that project as that App User. The QR code includes a secret identifier just for that App User and should be kept private. See settings QR code documentation for more details. Access can be revoked at any time.
A newly created App User does not have access to any Forms. To give them access once they are created, use the Form Access tab on the Project. You will be able to allow access to particular Forms within the Project for each App User.
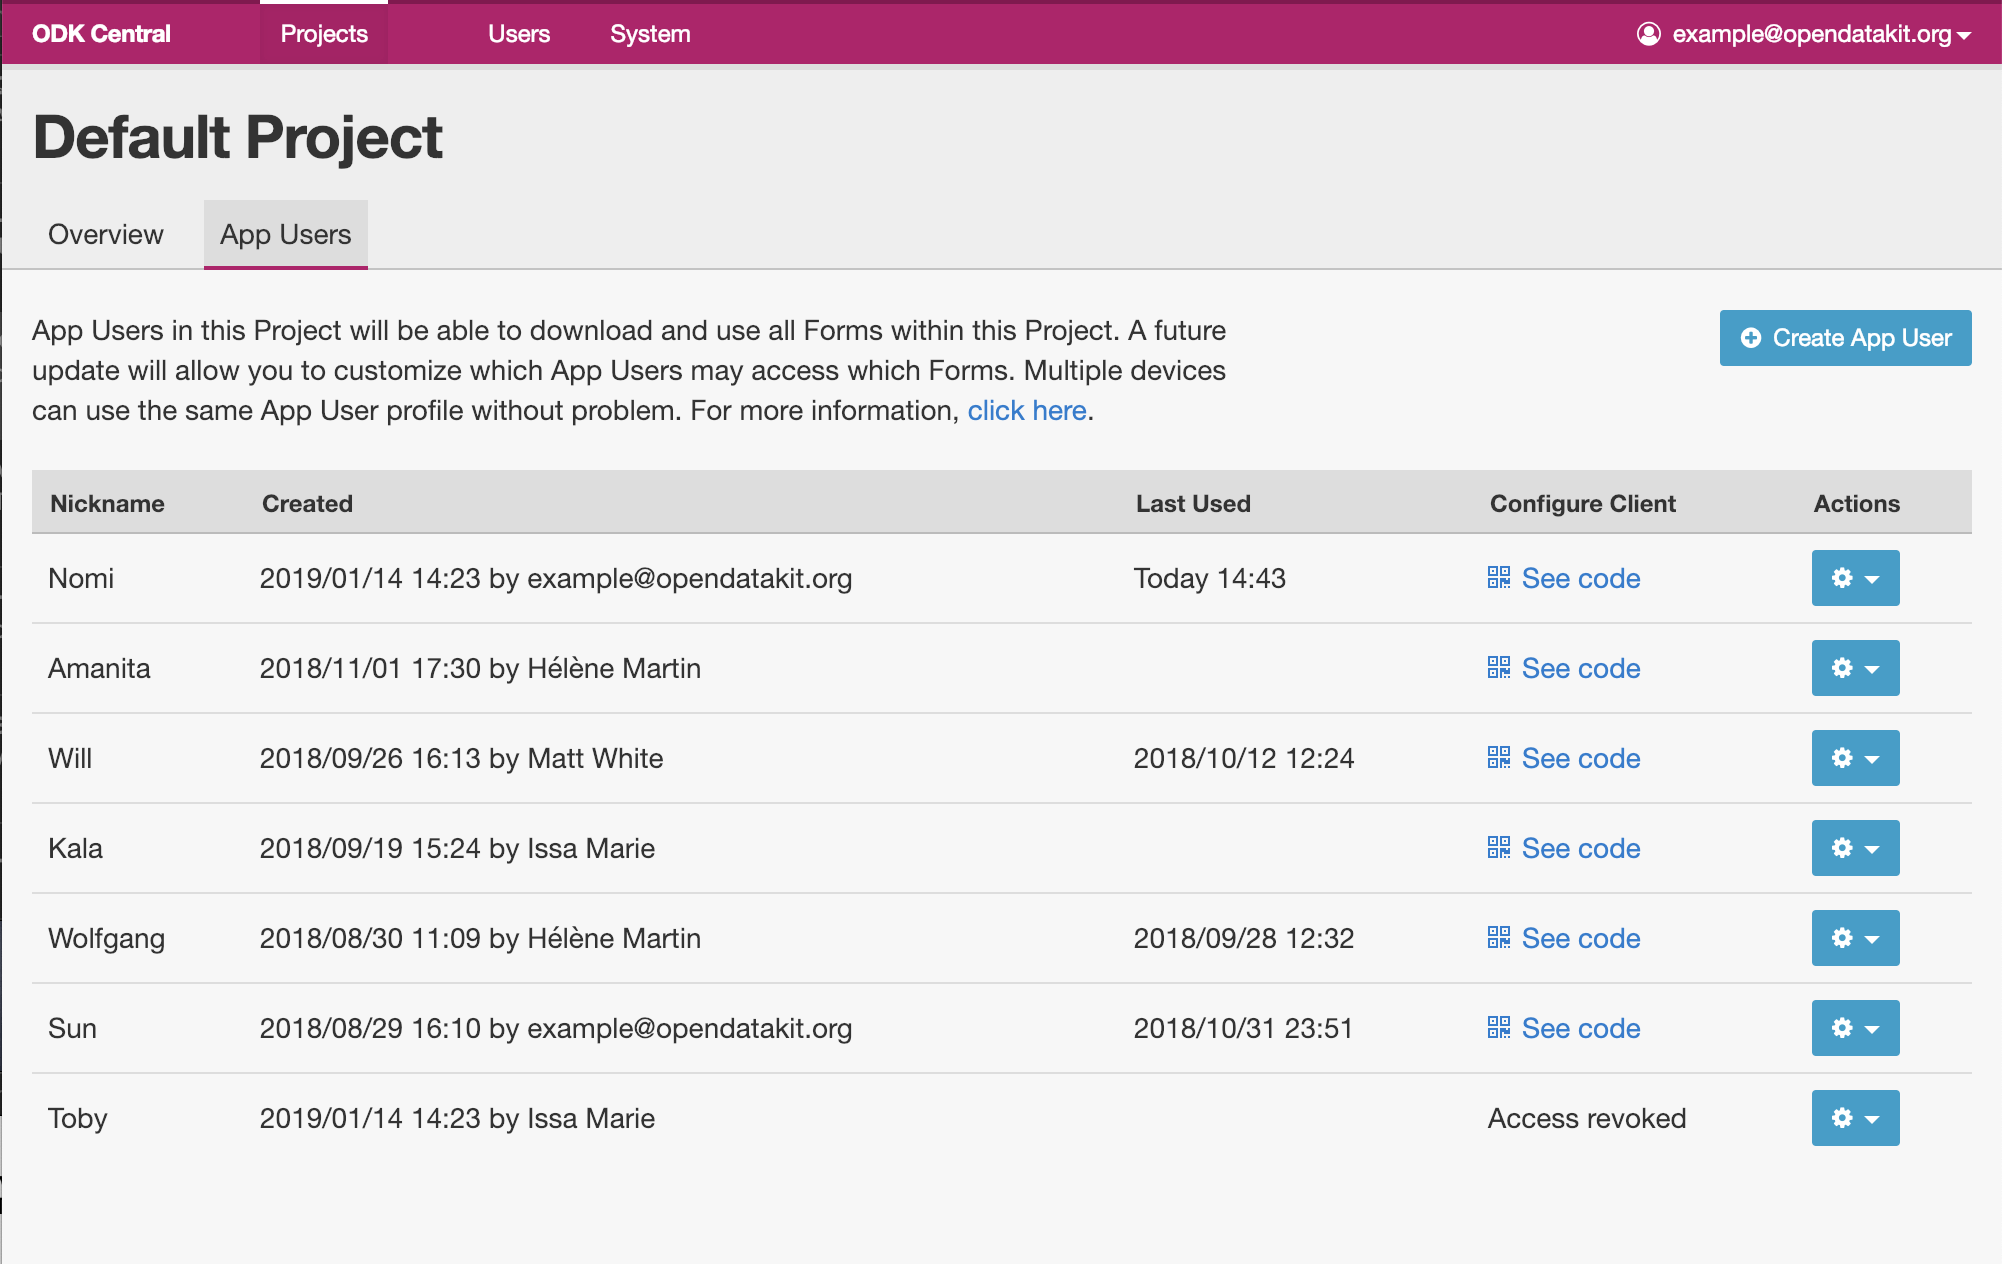
To manage App Users, navigate to the project whose App Users you wish to manage, and then click on the App Users tab just below the project name. You should see a listing of users that looks like this:
Creating an App User
To create a new App User, click on the Create app user button on the right side of the App Users listing page.
First, you will need to provide a Display Name for the new user. This name will appear in data tables, exports, and system logs.
Ideally, every individual involved in data collection gets their own App User account. This makes it easiest to track who did what and to ensure that only authorized individuals are submitting data. In that case, the App User Display Names are the names of the individuals. However, this is not always practical, especially if you have a lot of data collectors. If you have a lot of data collectors and want to give them each their own App User account, consider automating this by using something like this Python script to create many App Users and manage their form assignments (requires the ability to run Python and install pyodk).
Alternatively, App Users can represent devices (device1, device2) or roles (Hospital1 Nurse, Lab Tech). If using these options, make sure you know how you will track what individual users are doing. Some options for doing this include capturing metadata like deviceID or enumerator name as a question. To reduce redundant data entry, consider using the last saved value as a default.
You'll also need to design a way to distribute settings QR codes such that they remain private. See settings QR code documentation for ideas.
Once you provide a Display Name for the user, click Create. The user will be created, and you will see a screen that looks like this:

You can either immediately scan in the App User QR code into a device as described below or first give the new user access to Forms and then distribute the QR code later.
Warning
The App User QR Code contains the password needed to get blank forms and send finalized forms. Only share it with those who need to get blank forms and send finalized forms.
Configuring an App User mobile device
To access forms from a mobile device, you need to configure that device using an App User's Collect Settings QR Code.
The QR Code contains information about how to find your ODK Central server, and how to prove to the server that the mobile device belongs to a valid App User. It should be kept private.
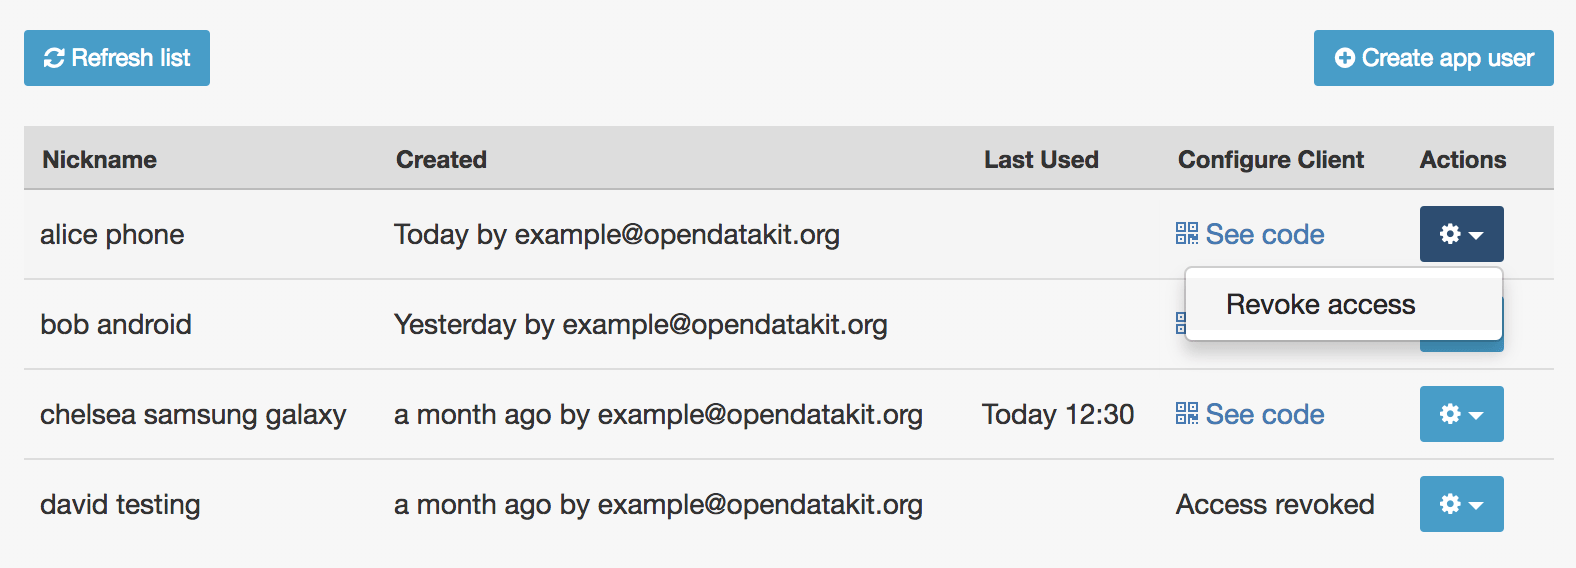
You can scan in or save the App User QR code at user creation time as described above. You can also access the QR Code by clicking on the See code link in the App User table:
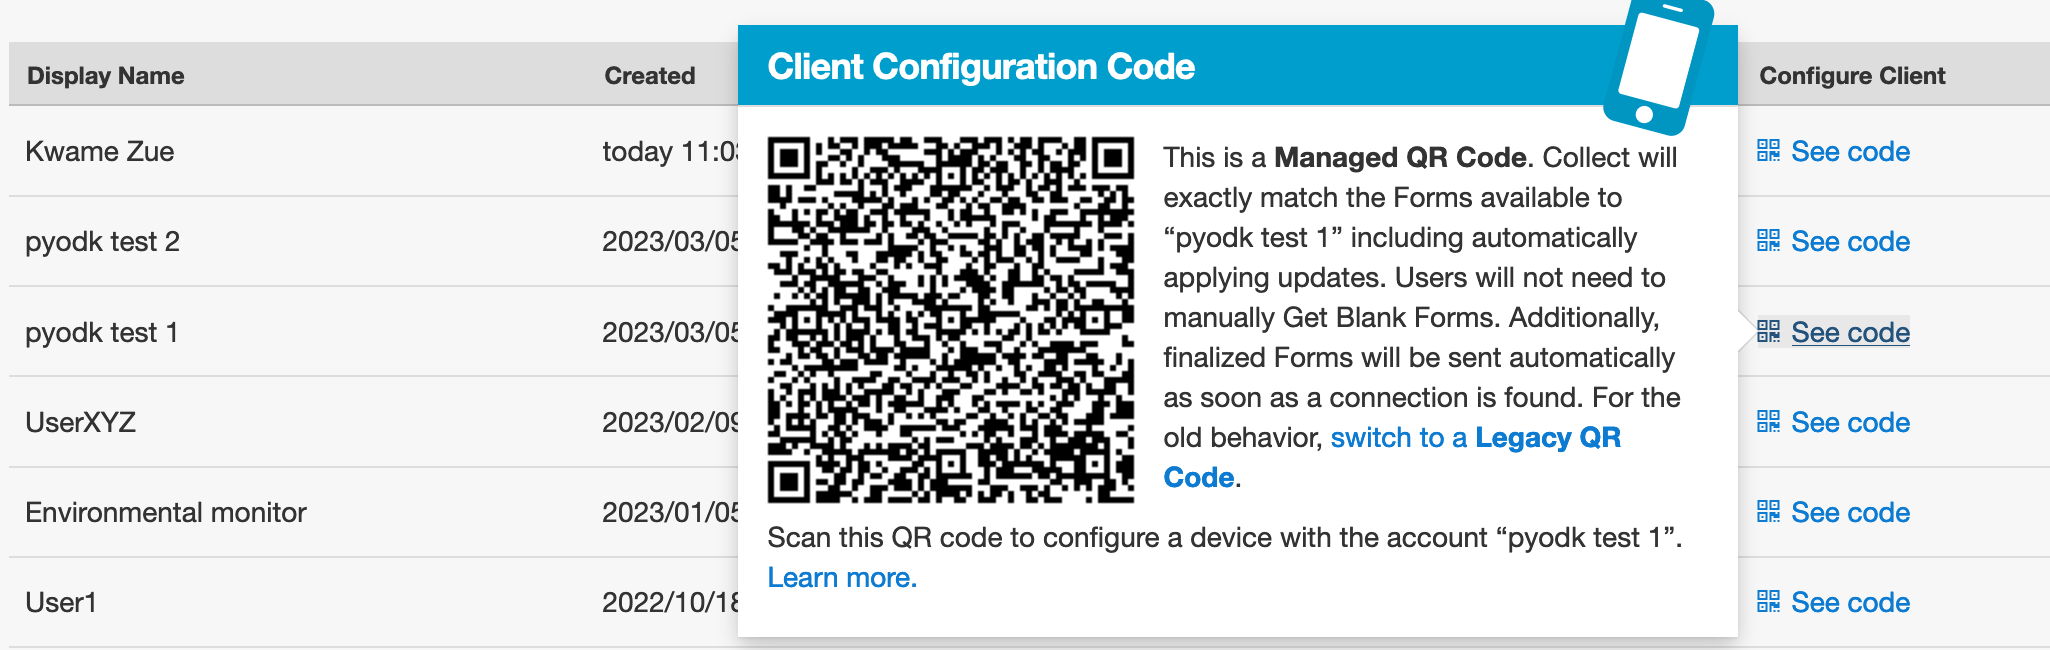
If instead of a See code link you see text that says Access revoked, that App User no longer has access to the server. Create a new App User if you need a new QR Code.
Once you have found the QR Code, distribute it to data collectors so they can configure ODK Collect. See settings QR codes to learn more.
Revoking an App User
You may wish to revoke an App User's access, for instance if their QR Code has been stolen or if they have left the organization. To do so, navigate to the App Users listing page, and use the Actions menu at the right side of the table:
App Users whose access has been revoked will still appear in the App Users listing table, and will still be visible as the submitter of any submissions they uploaded. However, they no longer have a valid QR Code with which they can configure an ODK Collect installation, and any mobile devices already configured with their code will no longer have access to the project.