Managing Forms in Collect
See also
For an overview on forms and form design, see ODK Forms.
Downloading forms from a server
A blank form or form definition is what users of ODK Collect fill out. Blank forms are usually created using XLSForm.
In order to fill out forms, you must first load blank forms into the Collect App. The preferred way of doing this is by automatically matching the forms provided by the server and this is the default when using Central App Users. You can also configure Collect so that blank forms must be manually selected and downloaded.
If you have connected ODK Collect to a server and Collect is not configured to automatically download forms from it, you will need to download the forms that you want to use.
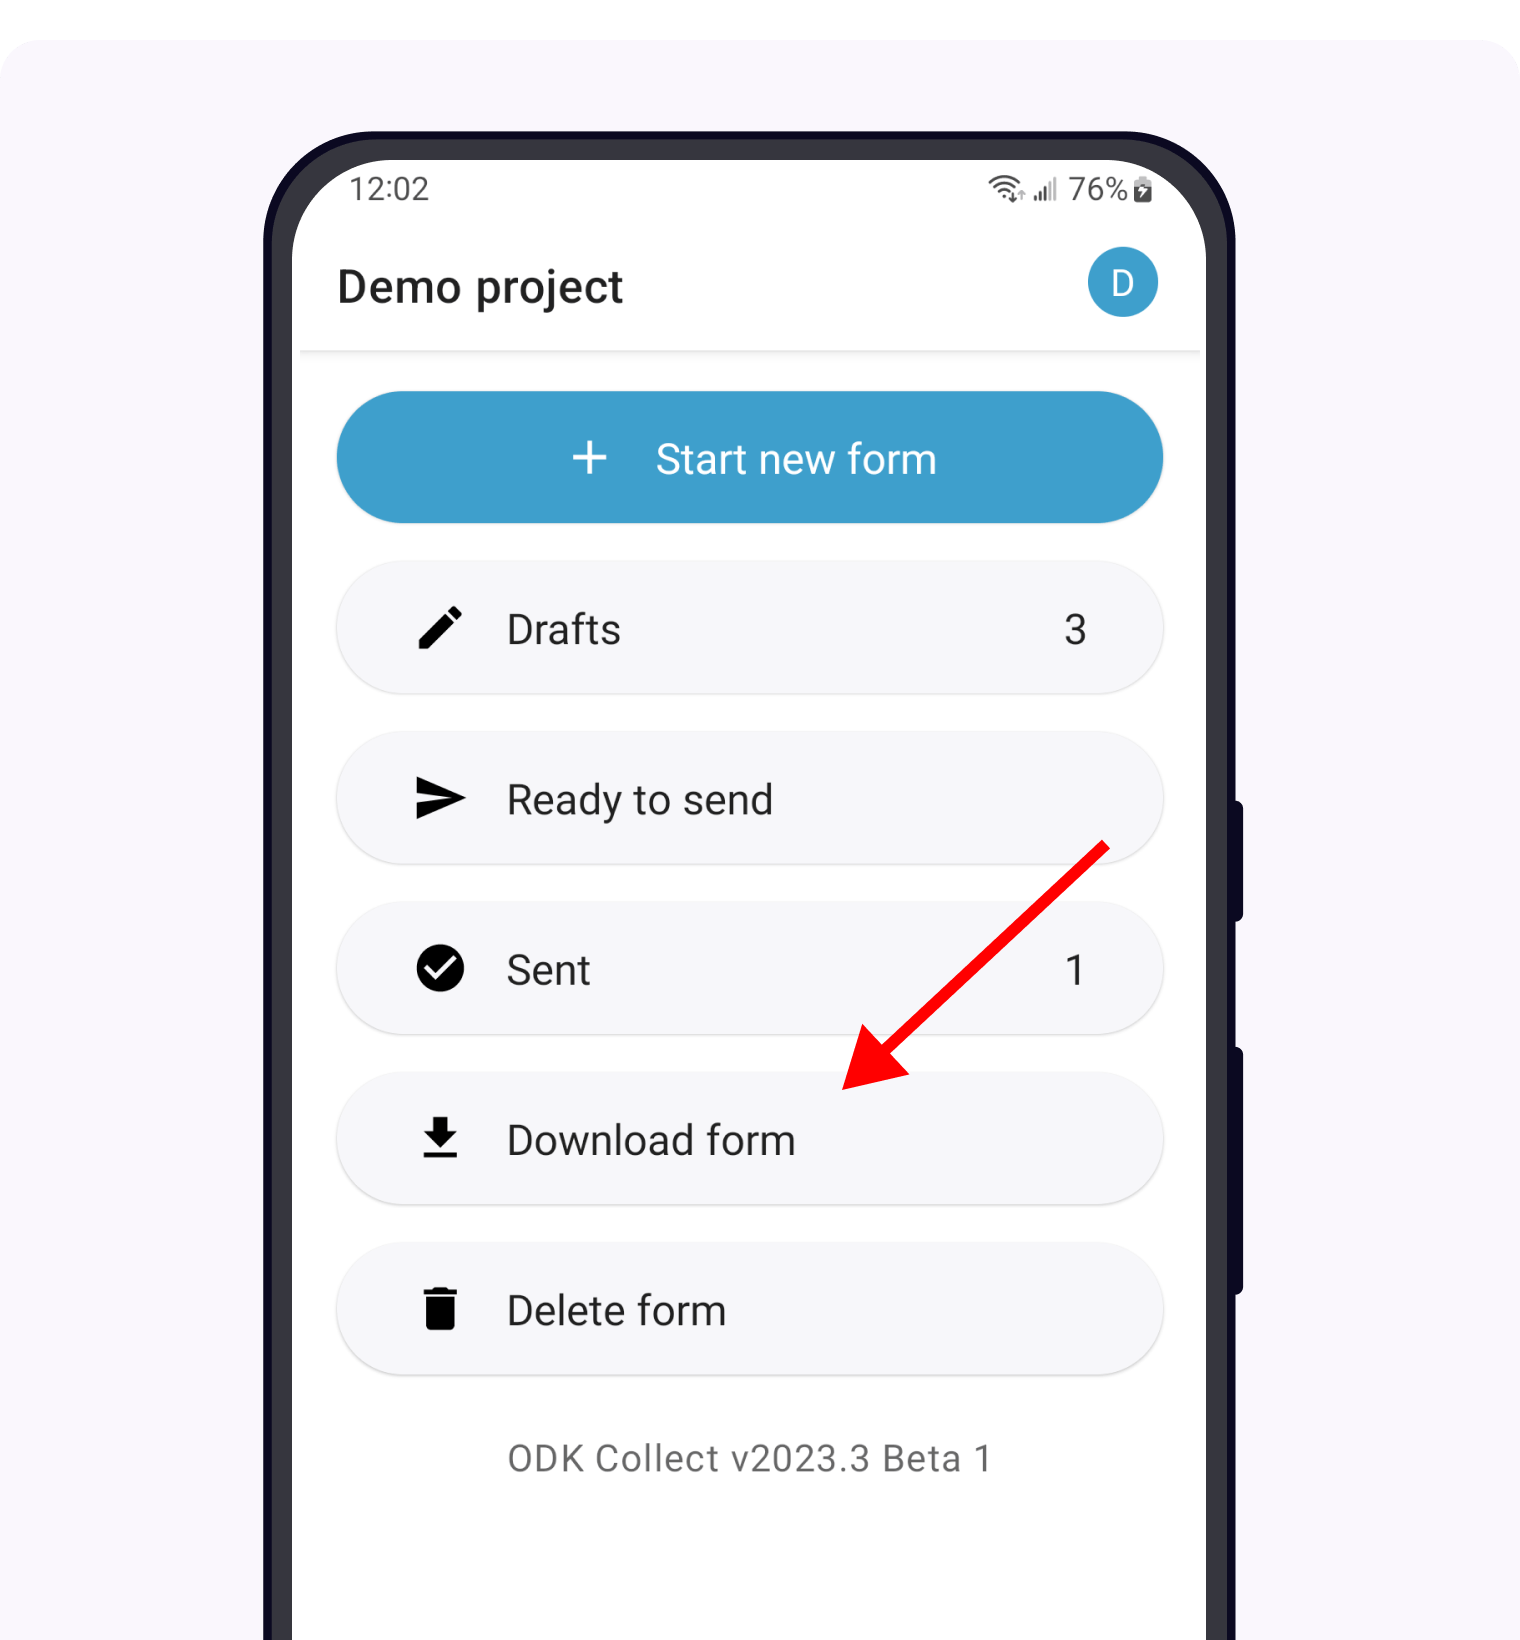
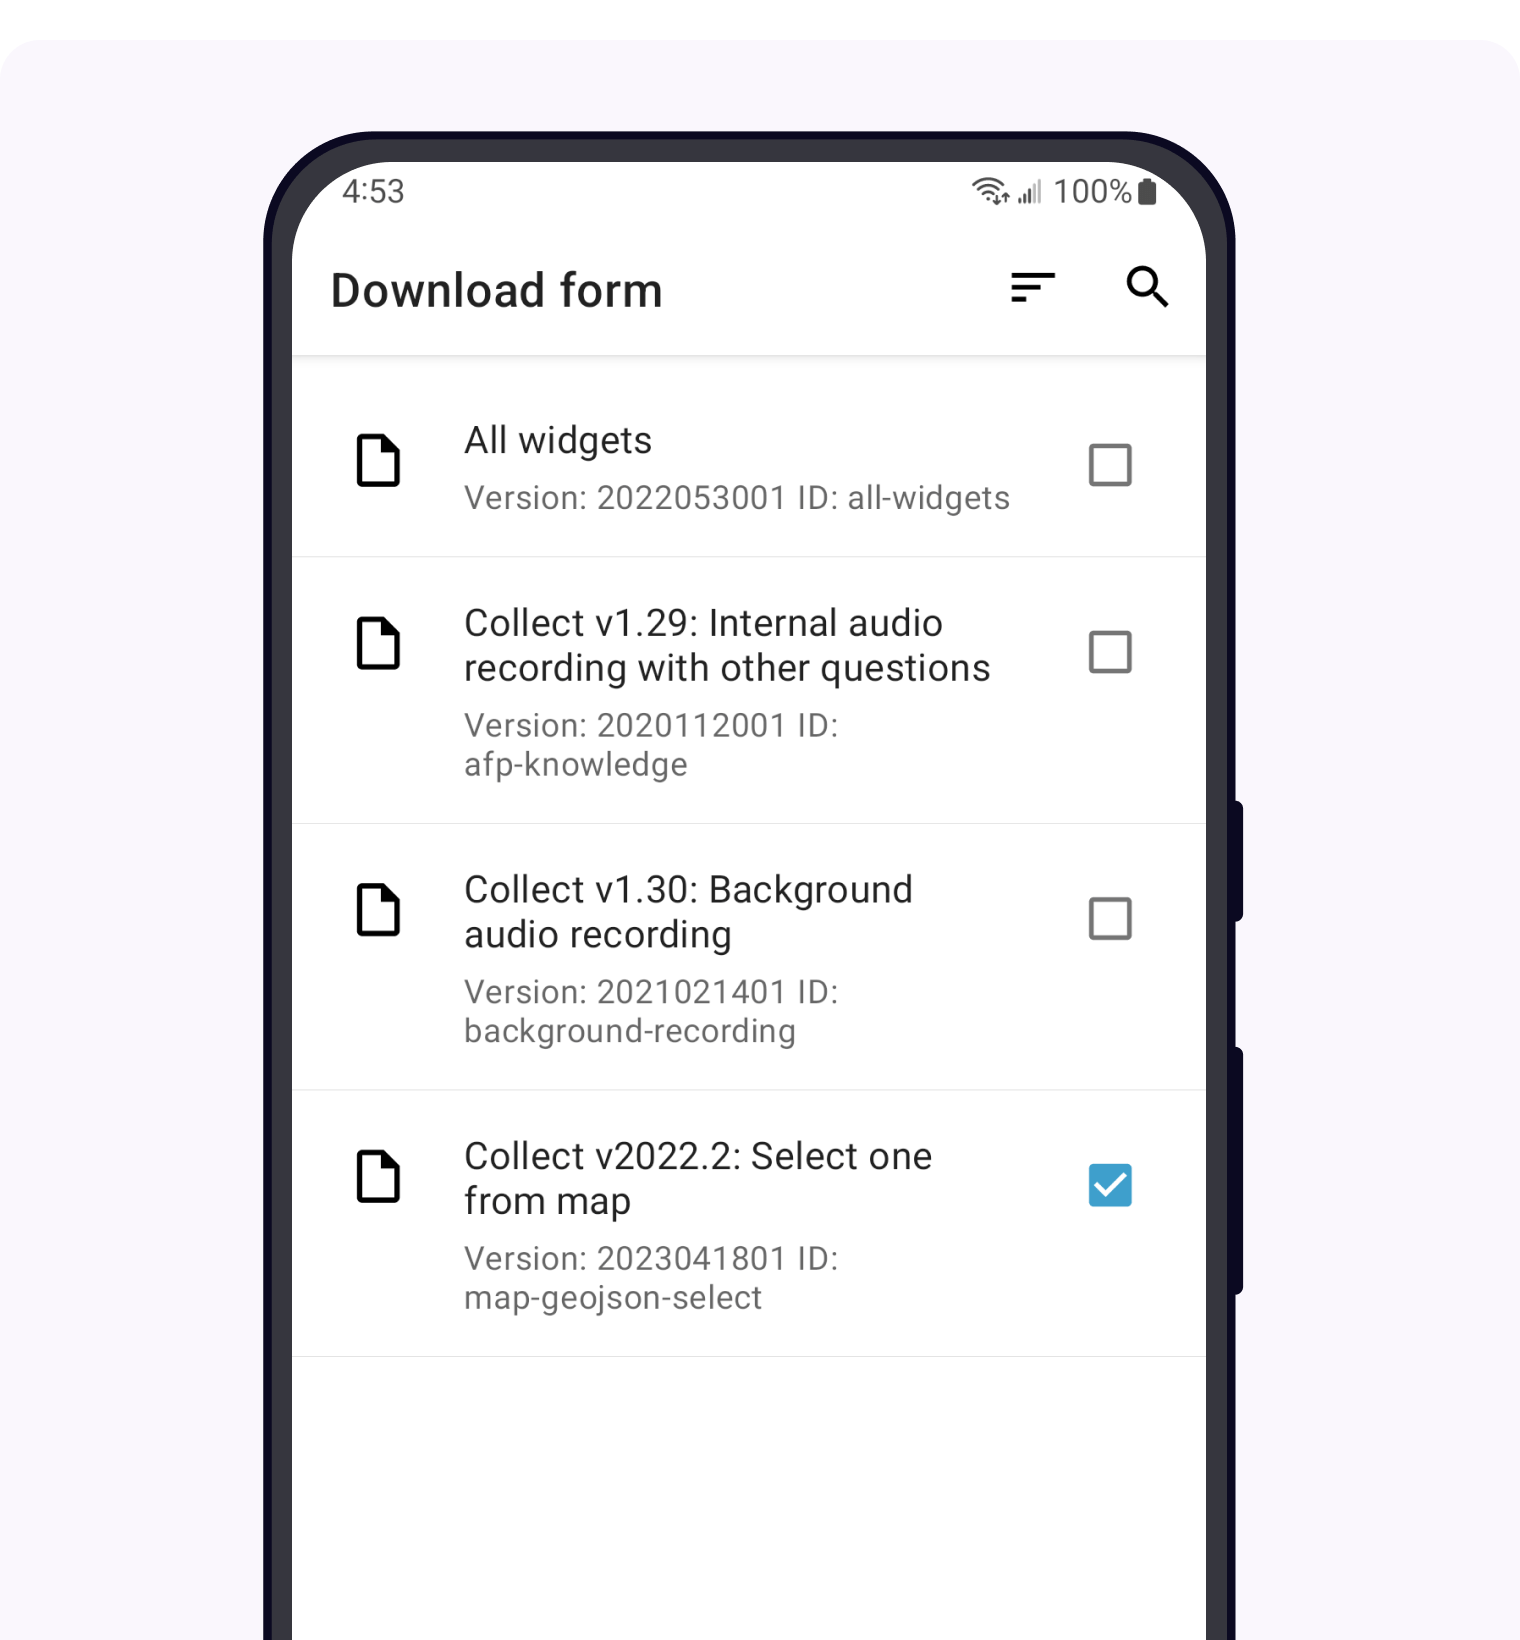
Select Download form on the app home screen to browse available forms and download them to your device. Select the ones you would like download, and tap Get Selected.
Note
Before downloading blank forms from your server to Collect, a form has to be uploaded. See Form Management in ODK Central.
Editing drafts
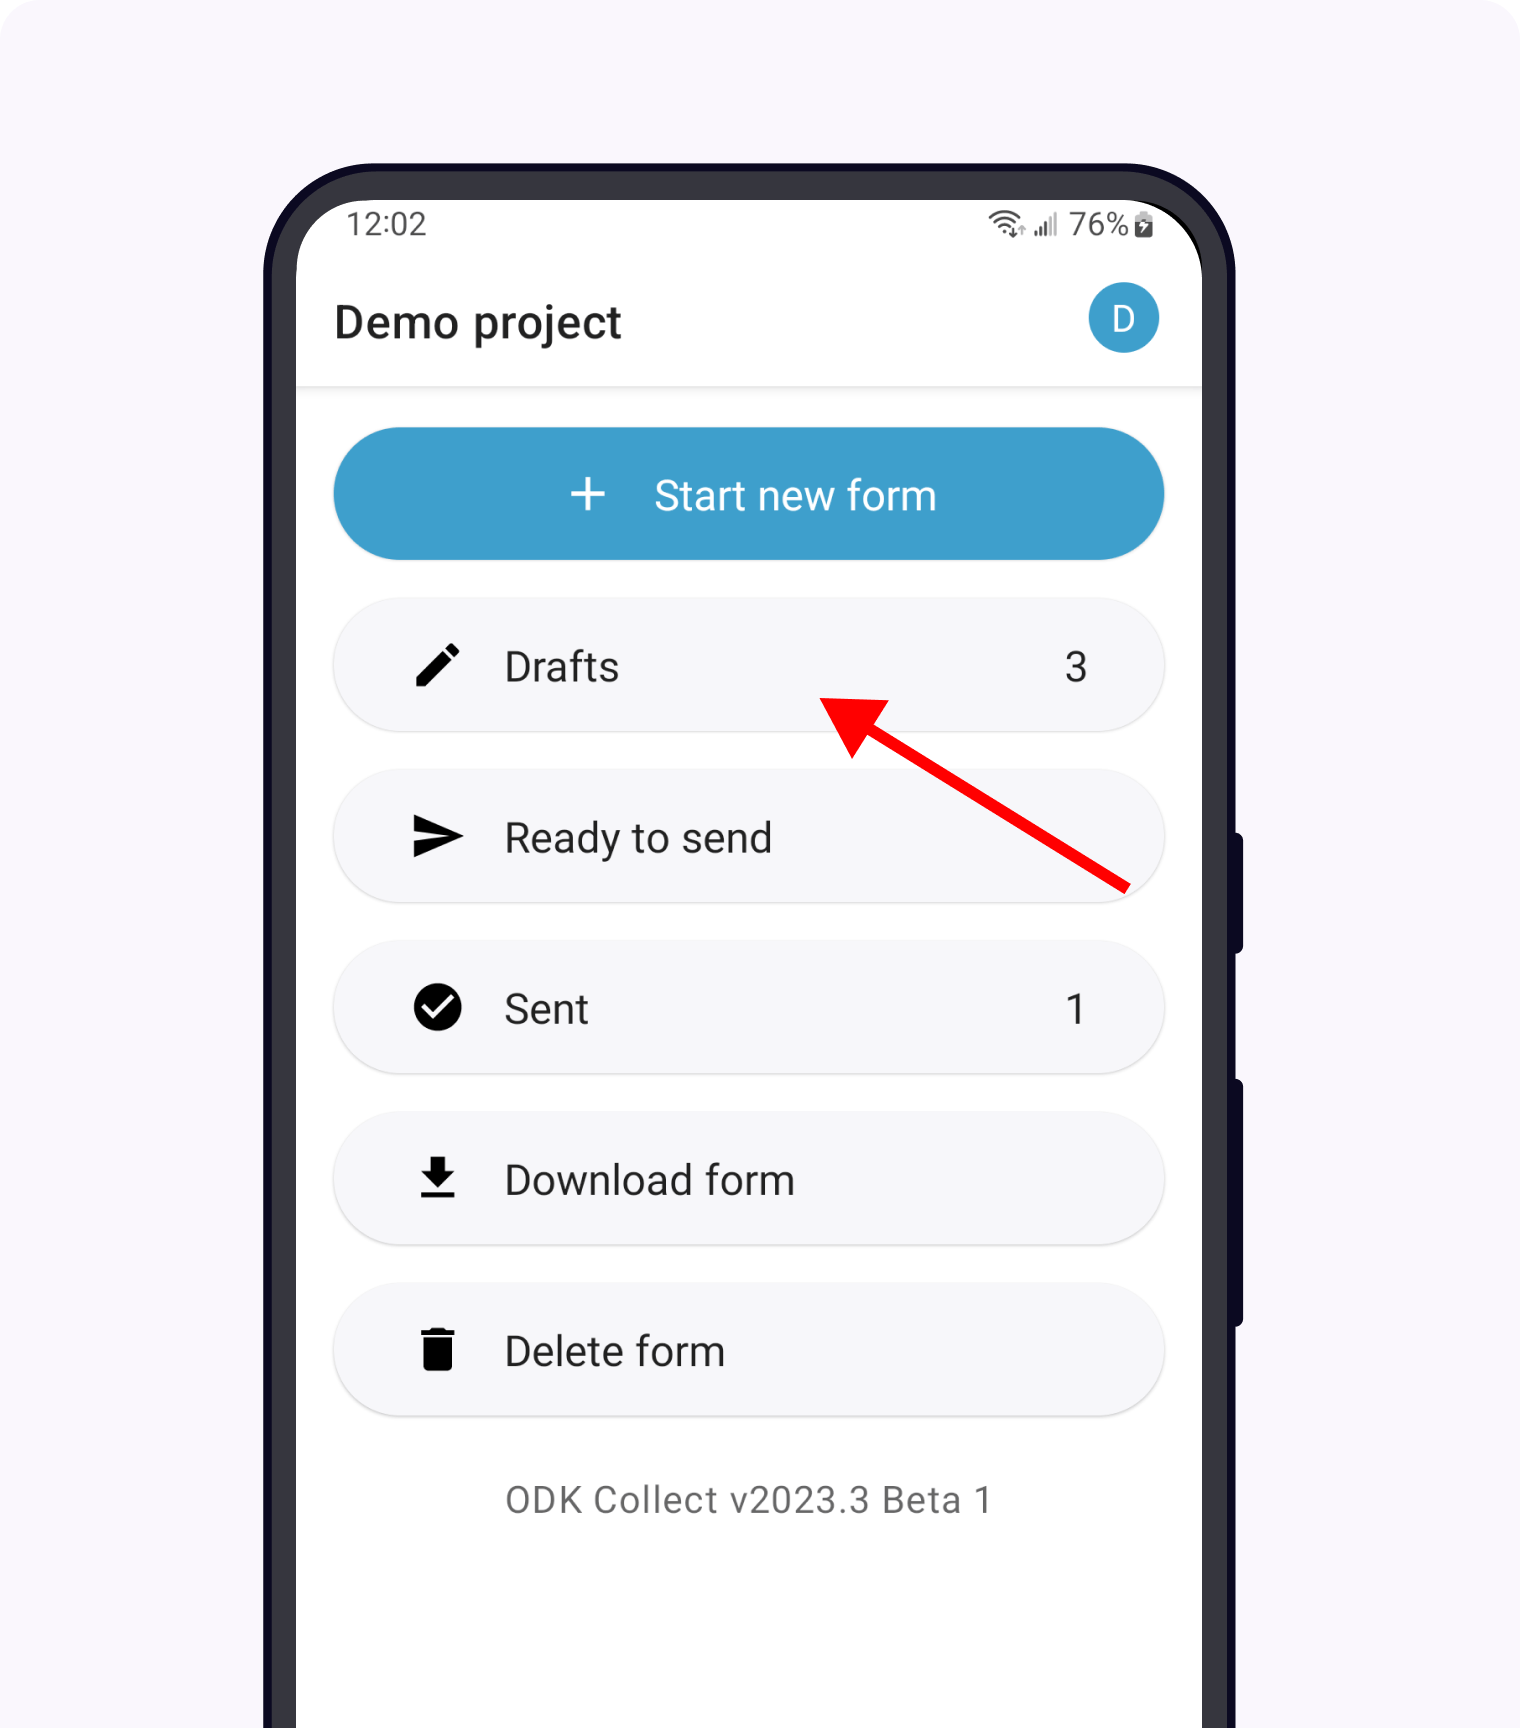
When filling out a form, you can save it as a draft and edit it later.
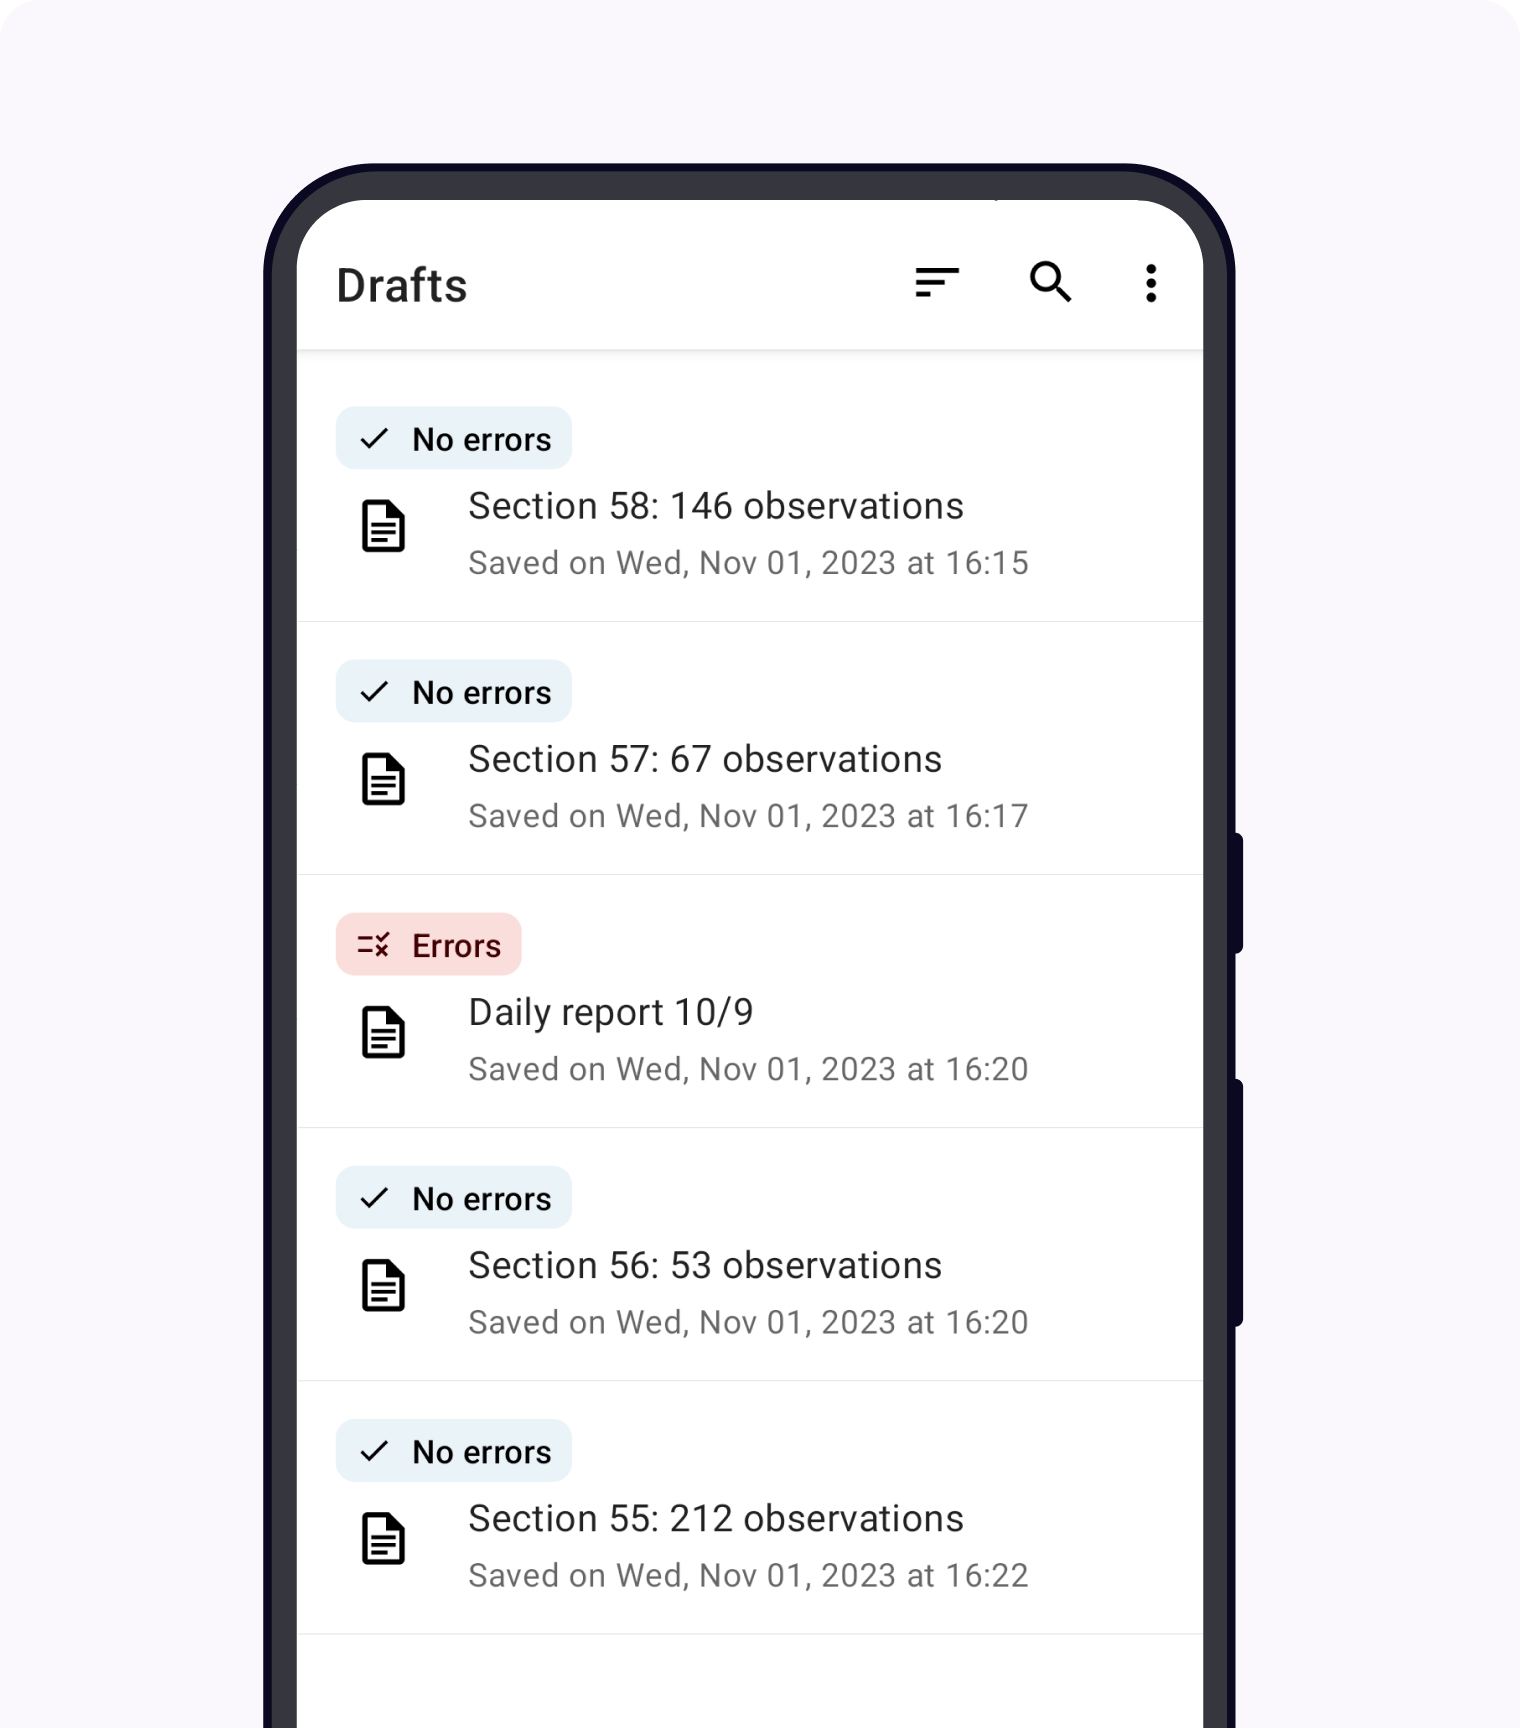
The Drafts list shows all drafts by their name which can include user-provided values from inside the draft. The expression for those names is specified in the form definition. By default, drafts are sorted alphabetically by name. When the sort order is changed, the selected order is maintained the next time that the draft list is opened. You can use the magnifying glass icon to for search drafts by name.
Each draft has a colored pill indicating its validation status. Drafts that have missing required questions or values that violate constraints are marked with a red Errors pill. Drafts in which all required questions have been filled out and that have no constraint violations are marked with a blue No errors pill.
Finalizing drafts
If your device is online and Collect is configured to automatically send, you can send a filled form immediately from the form end screen by tapping the Send button.
If your device is offline or Collect is not configured to send automatically, you will need to finalize a form before it can be sent. Finalized forms are available from the Ready to send screen where they can be viewed or sent but not edited. You can finalize a form from the end screen by tapping the Finalize button.
If your workflow involves adding or removing data up until form submission time, consider configuring Collect to hide the Finalize or Send button from the form end screen (see the form entry access control section of protected settings) and using bulk finalization with auto send instead.
Individual form definitions can also be configured to allow edits of finalized or sent forms.
Bulk finalizing drafts
Warning
Bulk finalization does not work with submission encryption.
If you want to continue modifying data up until the moment when forms are ready to sent, you will need to save those forms as drafts. When you're ready to send them, you could then open each draft, navigate to the form end screen, and tap the Finalize or Send button. However, this would be inconvenient if you have many drafts that are ready to be sent. In that case, you can use the option to finalize all drafts.
Open the Action Menu () and select Finalize all drafts:
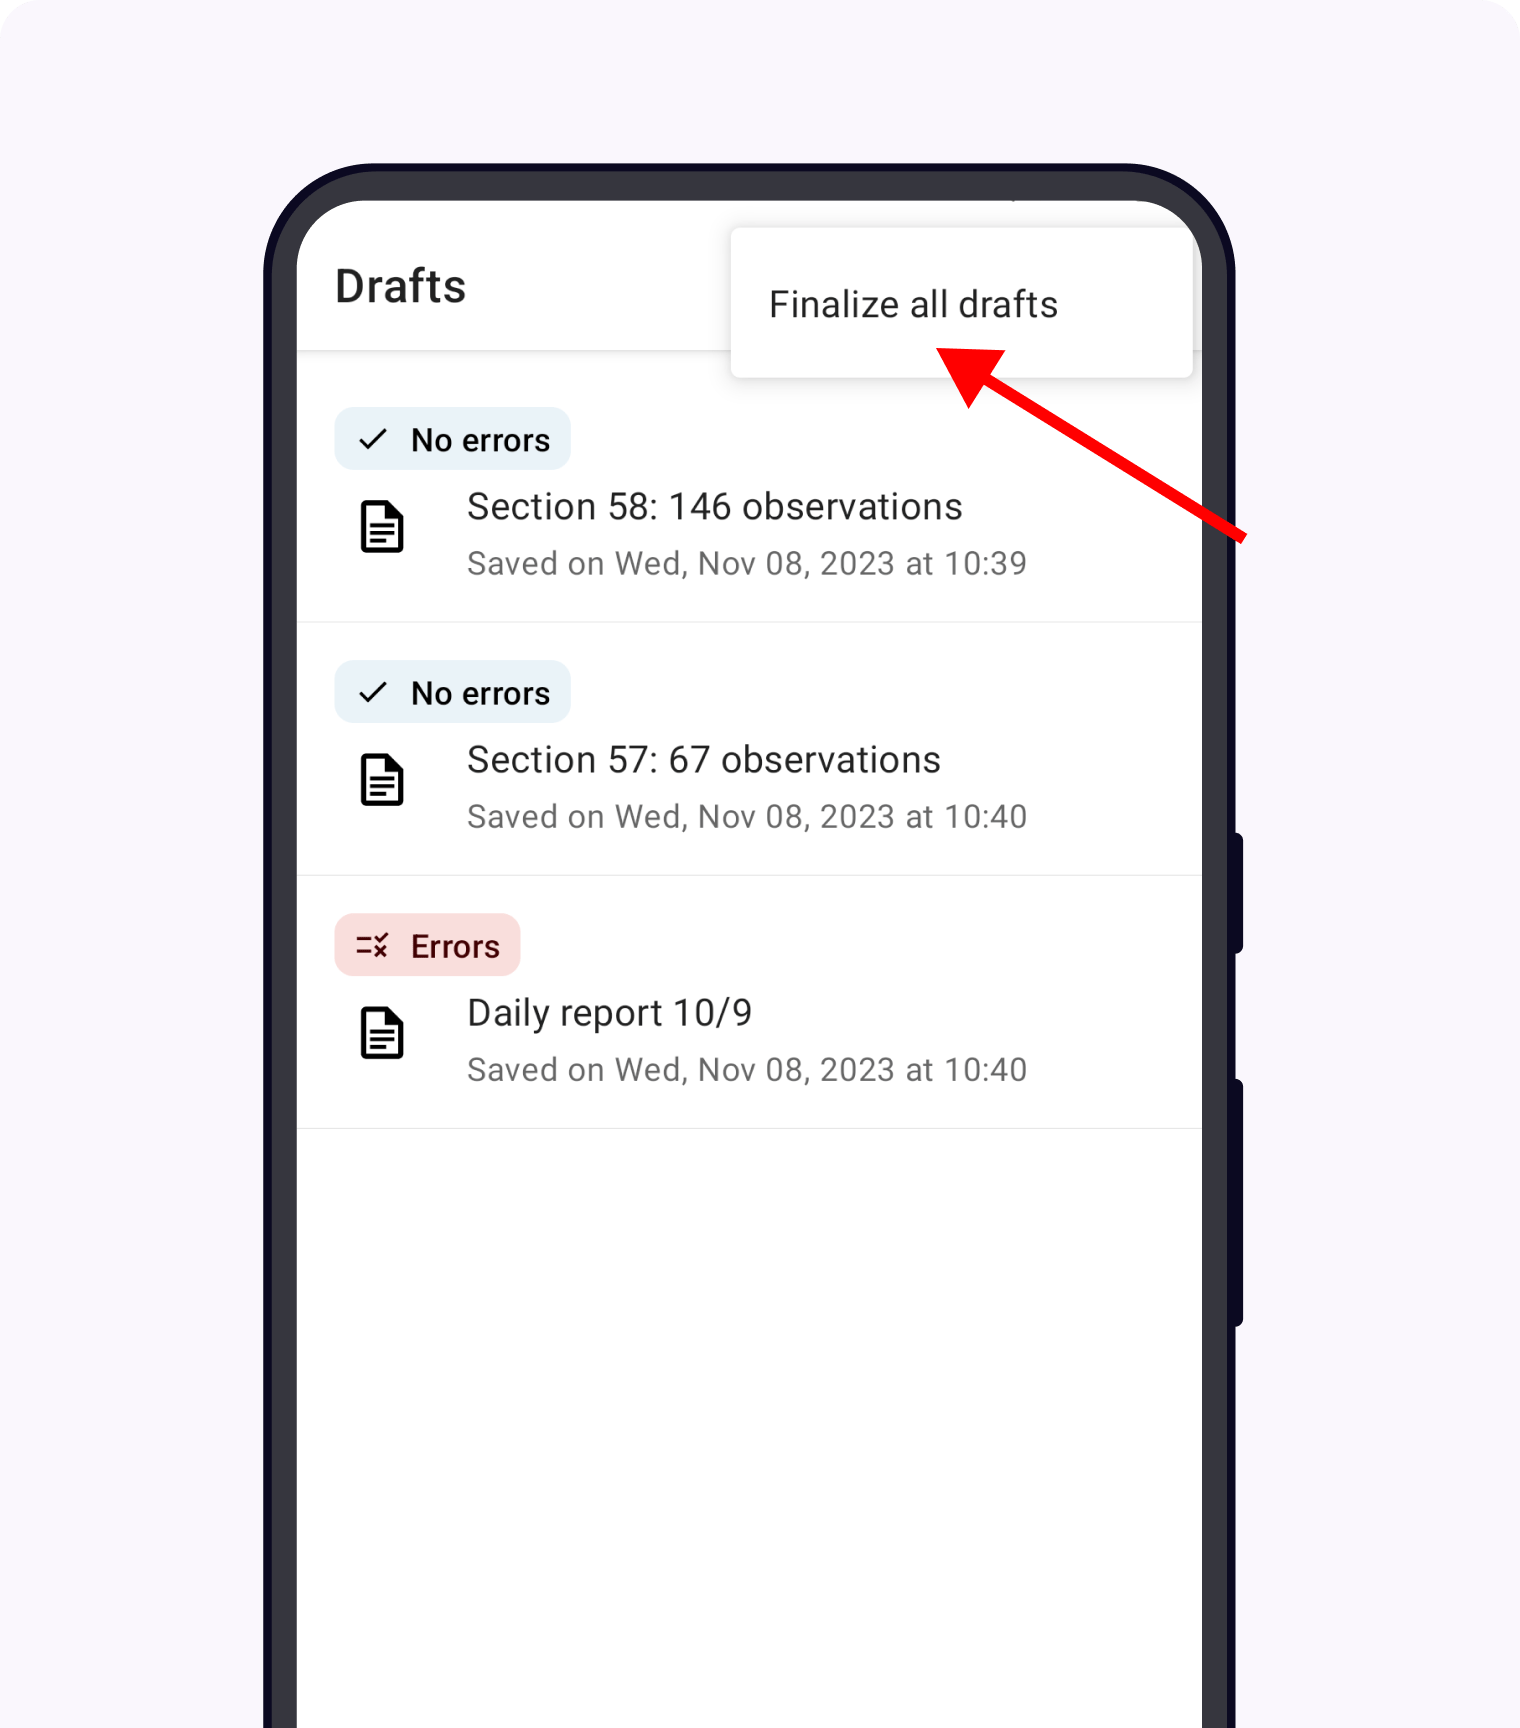
You will first see a confirmation dialog describing that bulk finalization cannot be undone. If you choose to bulk finalize, all drafts without errors will be finalized.
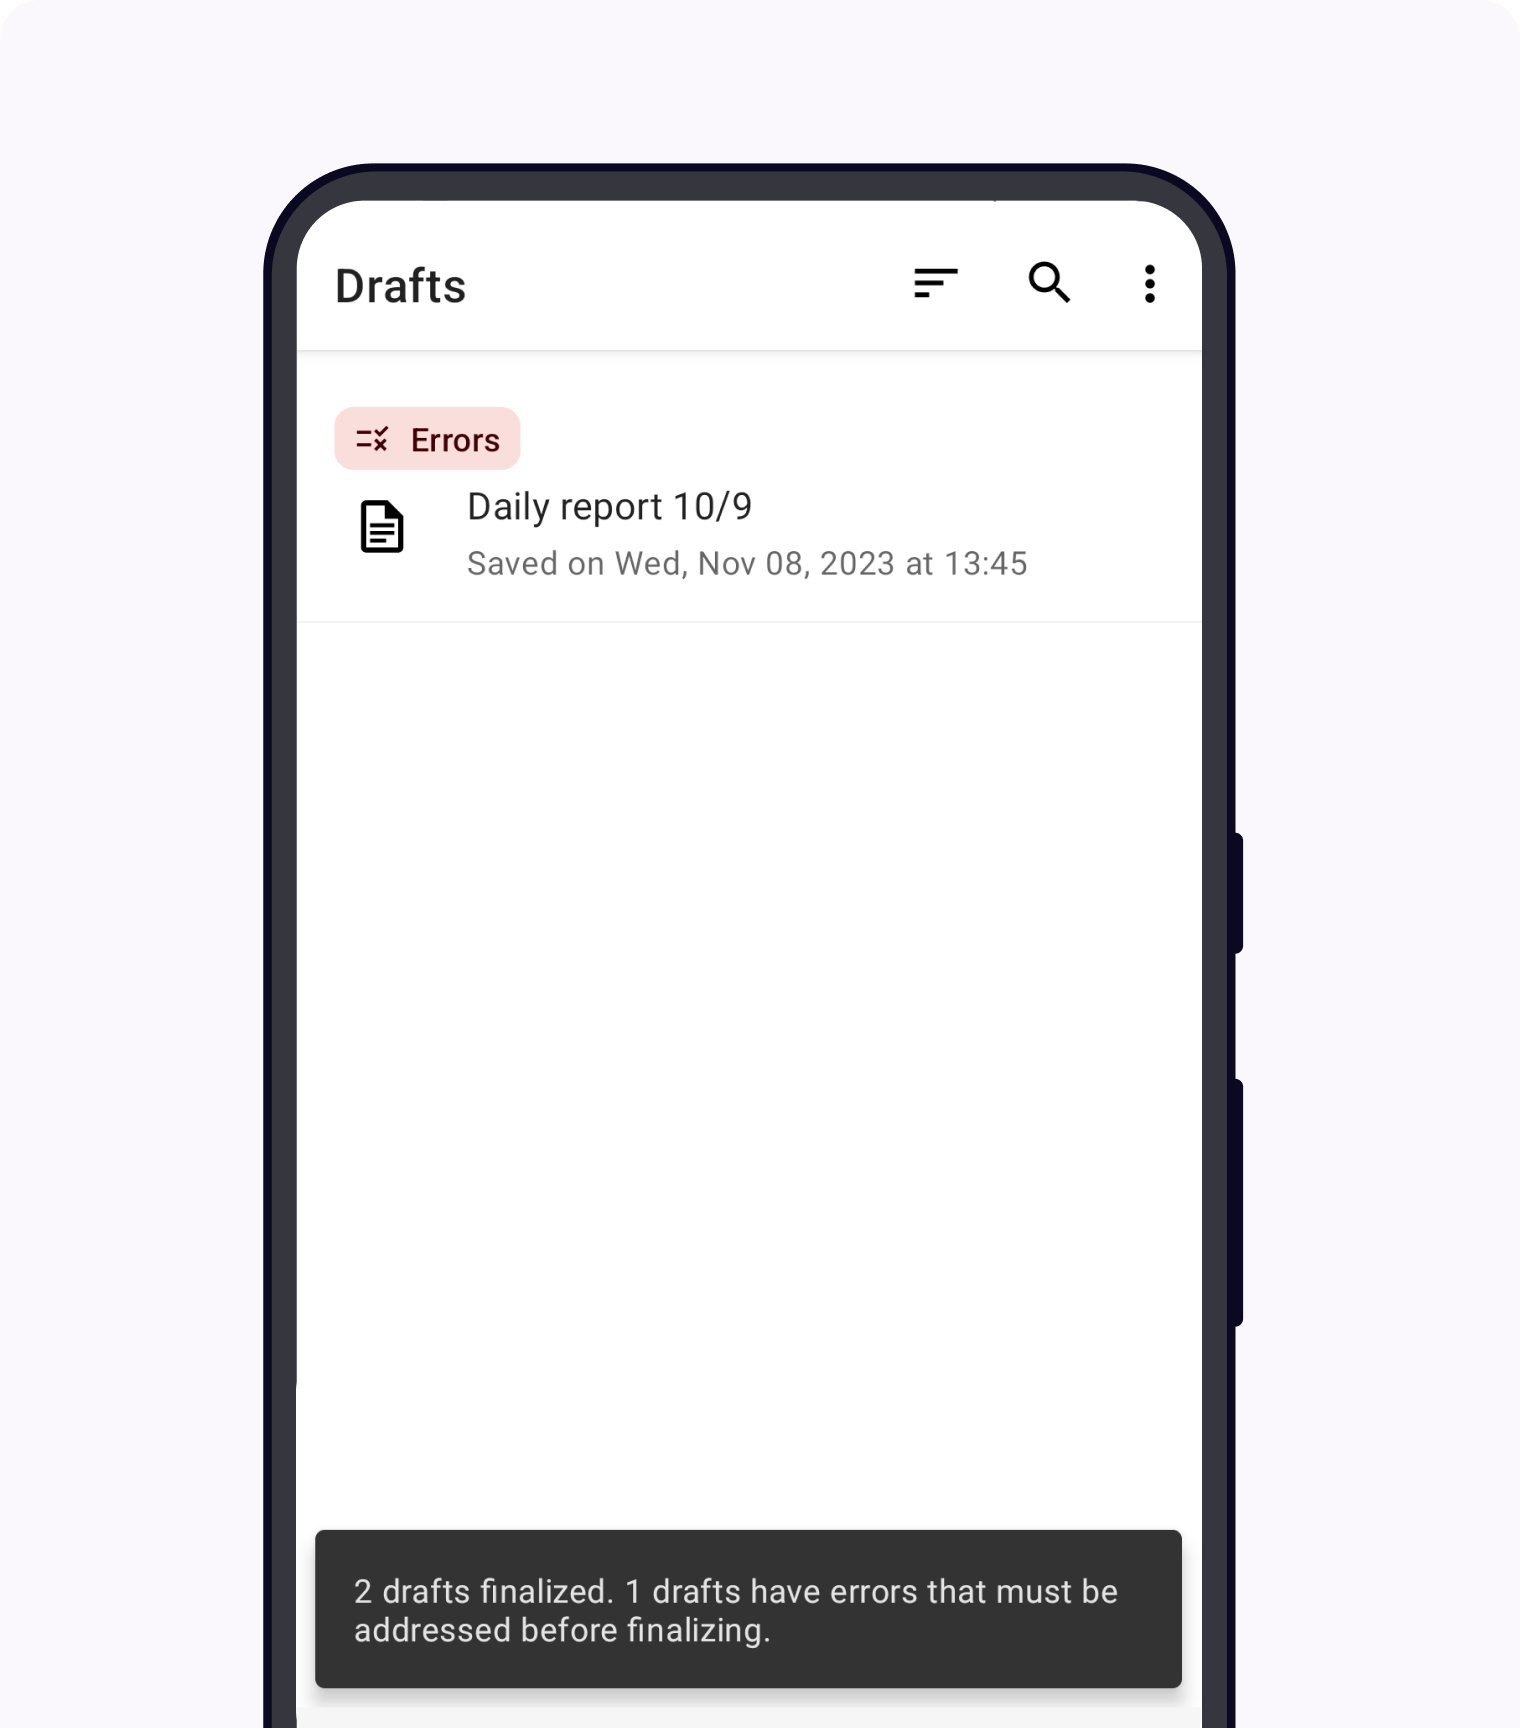
After bulk finalization is complete, you will see a message at the bottom of the screen describing how many drafts were and weren't finalized. Drafts with constraint violations or missing required questions can't be finalized and will remain on the drafts screen. Drafts with data recovered after a crash or forced quit also can't be bulk finalized, even if they are marked with No errors. You will need to open those drafts, decide whether or not to keep the recovered data, and then finalize them.
Bulk finalization will update any end fields in the forms (see metadata fields) but will not result in any entry in the audit log.
Sending finalized forms
To use data collected with the Collect app, you will need to get the filled forms off of the devices. The preferred way of doing this is by automatically sending submissions to a server as soon as they are finalized and this is the default when using Central App Users. To send forms, you will first need to configure a server.
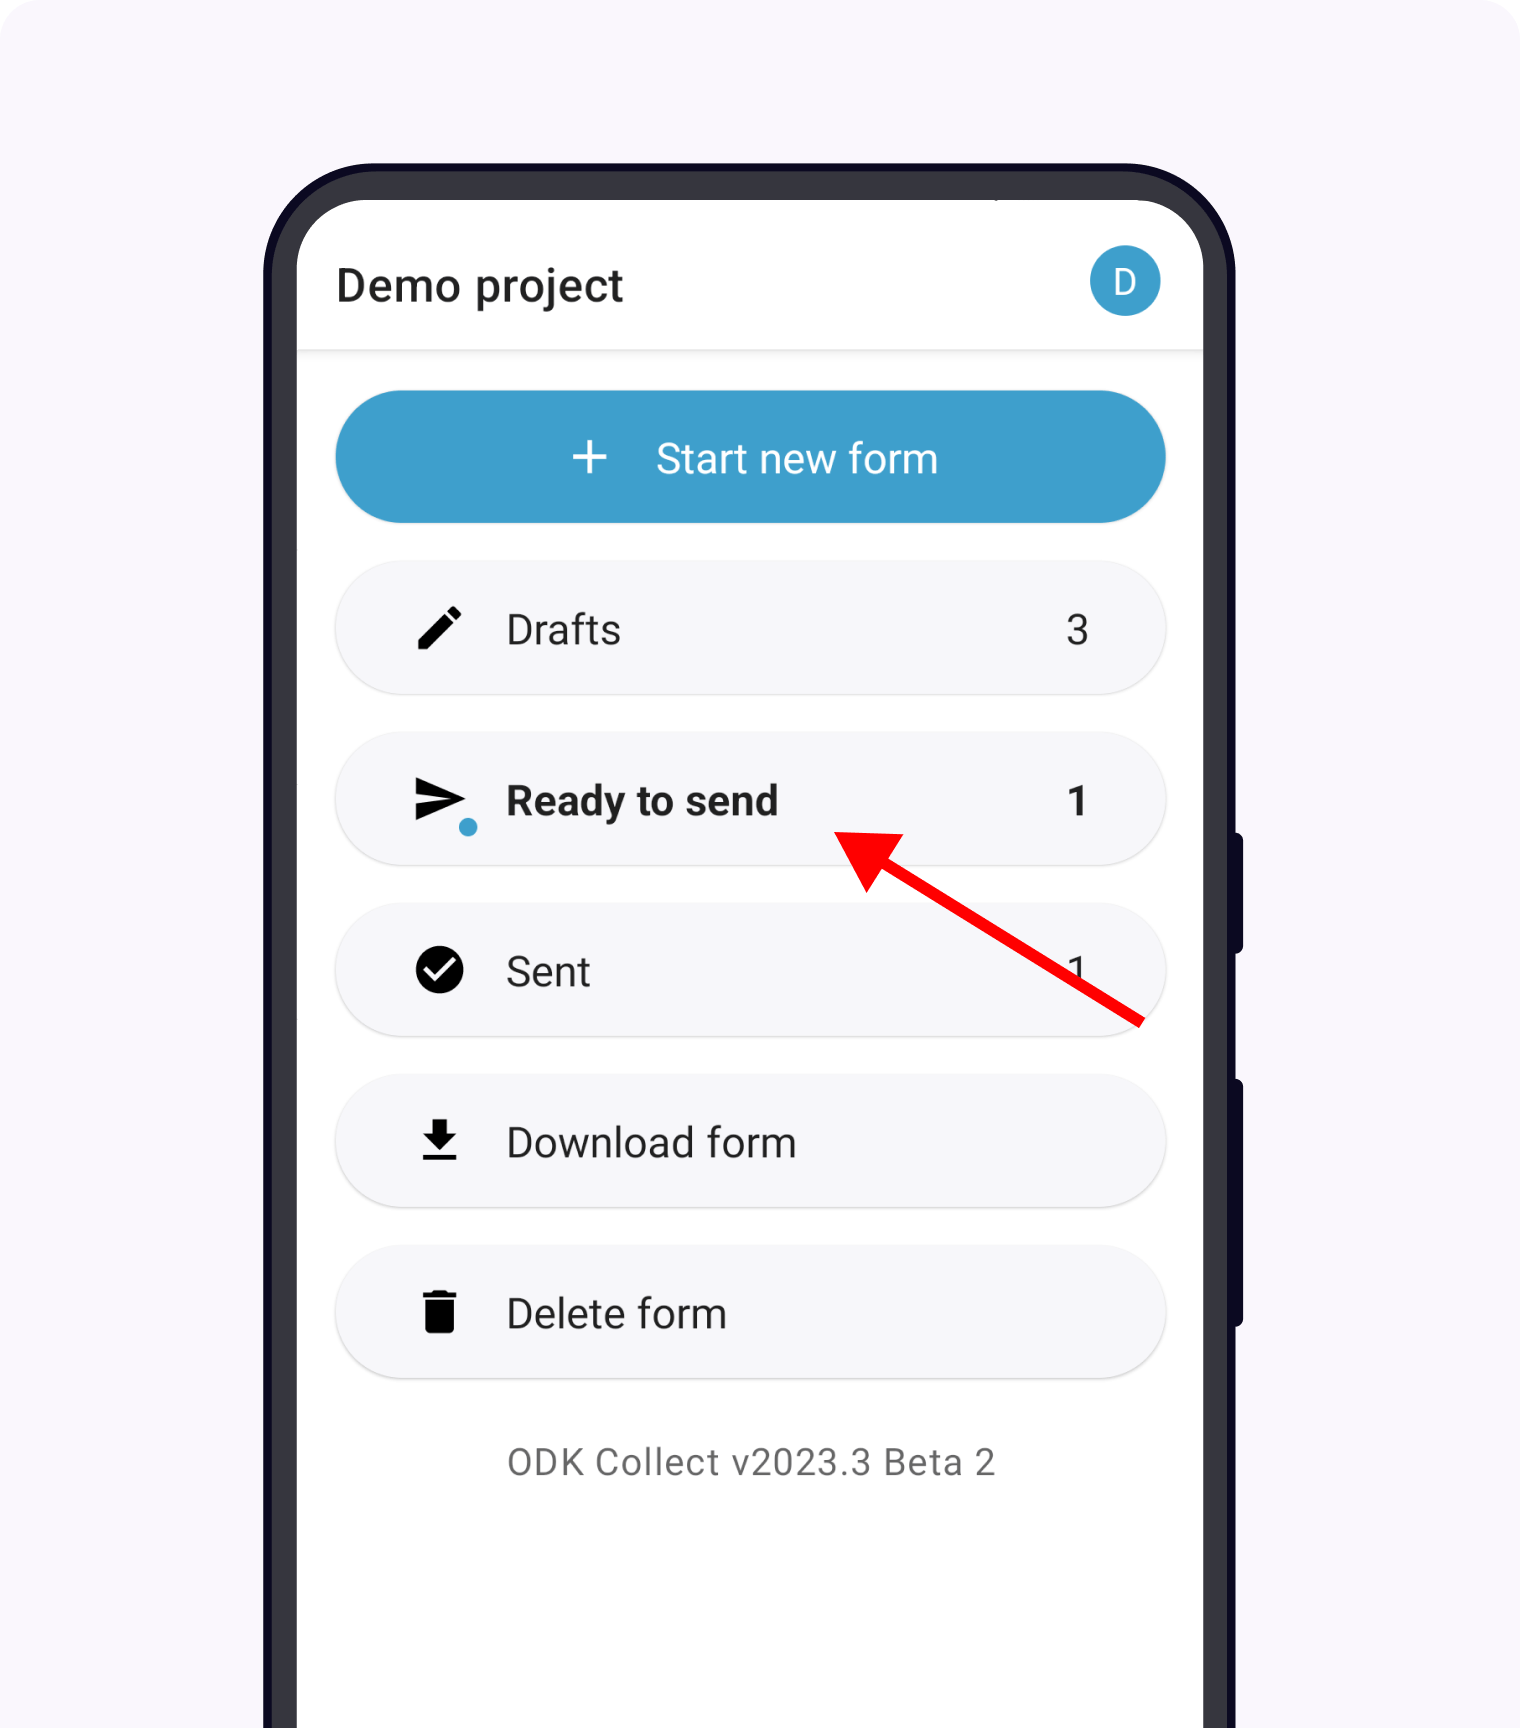
If you are offline or have turned automatic submission off in settings, you will find finalized forms in the Ready to send list, displayed by the name that the form definition specifies. When there are forms that are ready to send, you will see a blue notification badge on the Ready to send button and its title will become bold.
Uploading a filled form from within the Collect app changes that filled form's status from finalized to sent. Sent forms remain viewable from the Sent list until they are deleted.
Sending previously-sent forms
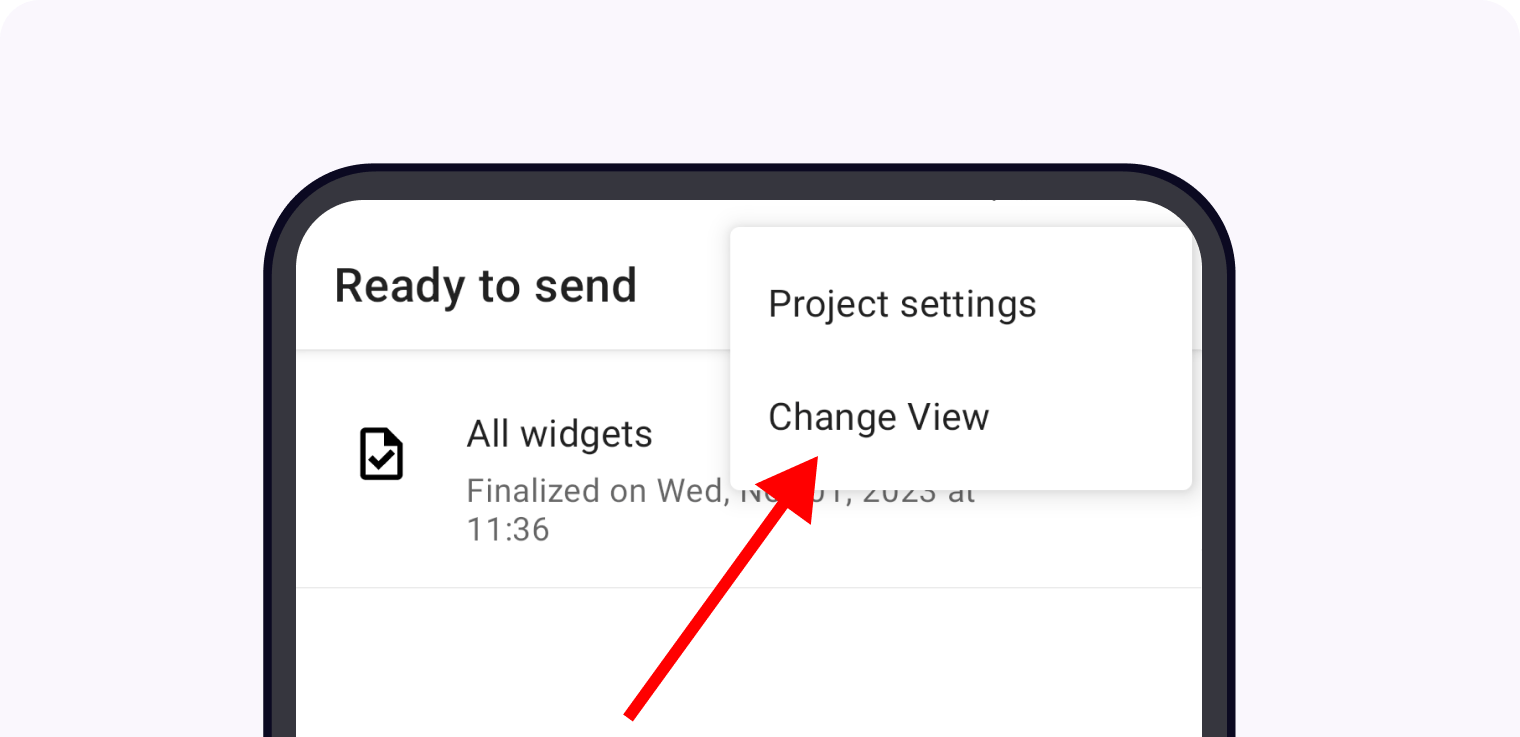
If you can't find a submission that you expect on your server or need to re-send a submission for other reasons, you can change the view of the Ready to send screen to show both sent and unsent forms.
- To show sent and unsent forms:
Editing finalized or sent forms
Added in version v2025.2.0: ODK Collect v2025.2.0, ODK Central v2025.1.4
Starting in ODK Collect v2025.2, data collectors can edit finalized or sent submissions that are still on their device. This feature is off by default and must be explicitly enabled in the form definition. It's useful in contexts where data collectors may get new information or be asked to make corrections.
Unlike edits to drafts, edits to finalized or sent submissions are tracked in Central and shown in the submission activity feed. A data collector can make a series of edits to a single submission from Collect and each will result in a separate entry in the activity feed. Once an edit to a specific submission is made from Central, however, it is no longer possible to edit that one from Collect.
Unlike with Central-based edits, Collect-based edits use the version of the form that was active when the form was originally filled, NOT the latest one. That means you can turn off edits to new submissions by changing the form definition but existing submissions will continue to be editable.
Edits to submissions that create or update Entities are allowed but they will only modify the submission, not the corresponding Entity.
If you manually send submissions from Ready to send, edits must be sent in order. If you attempt to send a later edit before an earlier one, you will get an error.
To allow editing of finalized or sent submissions on device, the form definition must be modified. Add a client_editable column to the settings sheet in your XLSForm and set its value to true:
XLSForm — enabling edits from Collect
form_title |
form_id |
version |
client_editable |
|---|---|---|---|
My form |
my_form |
2026031201 |
true |
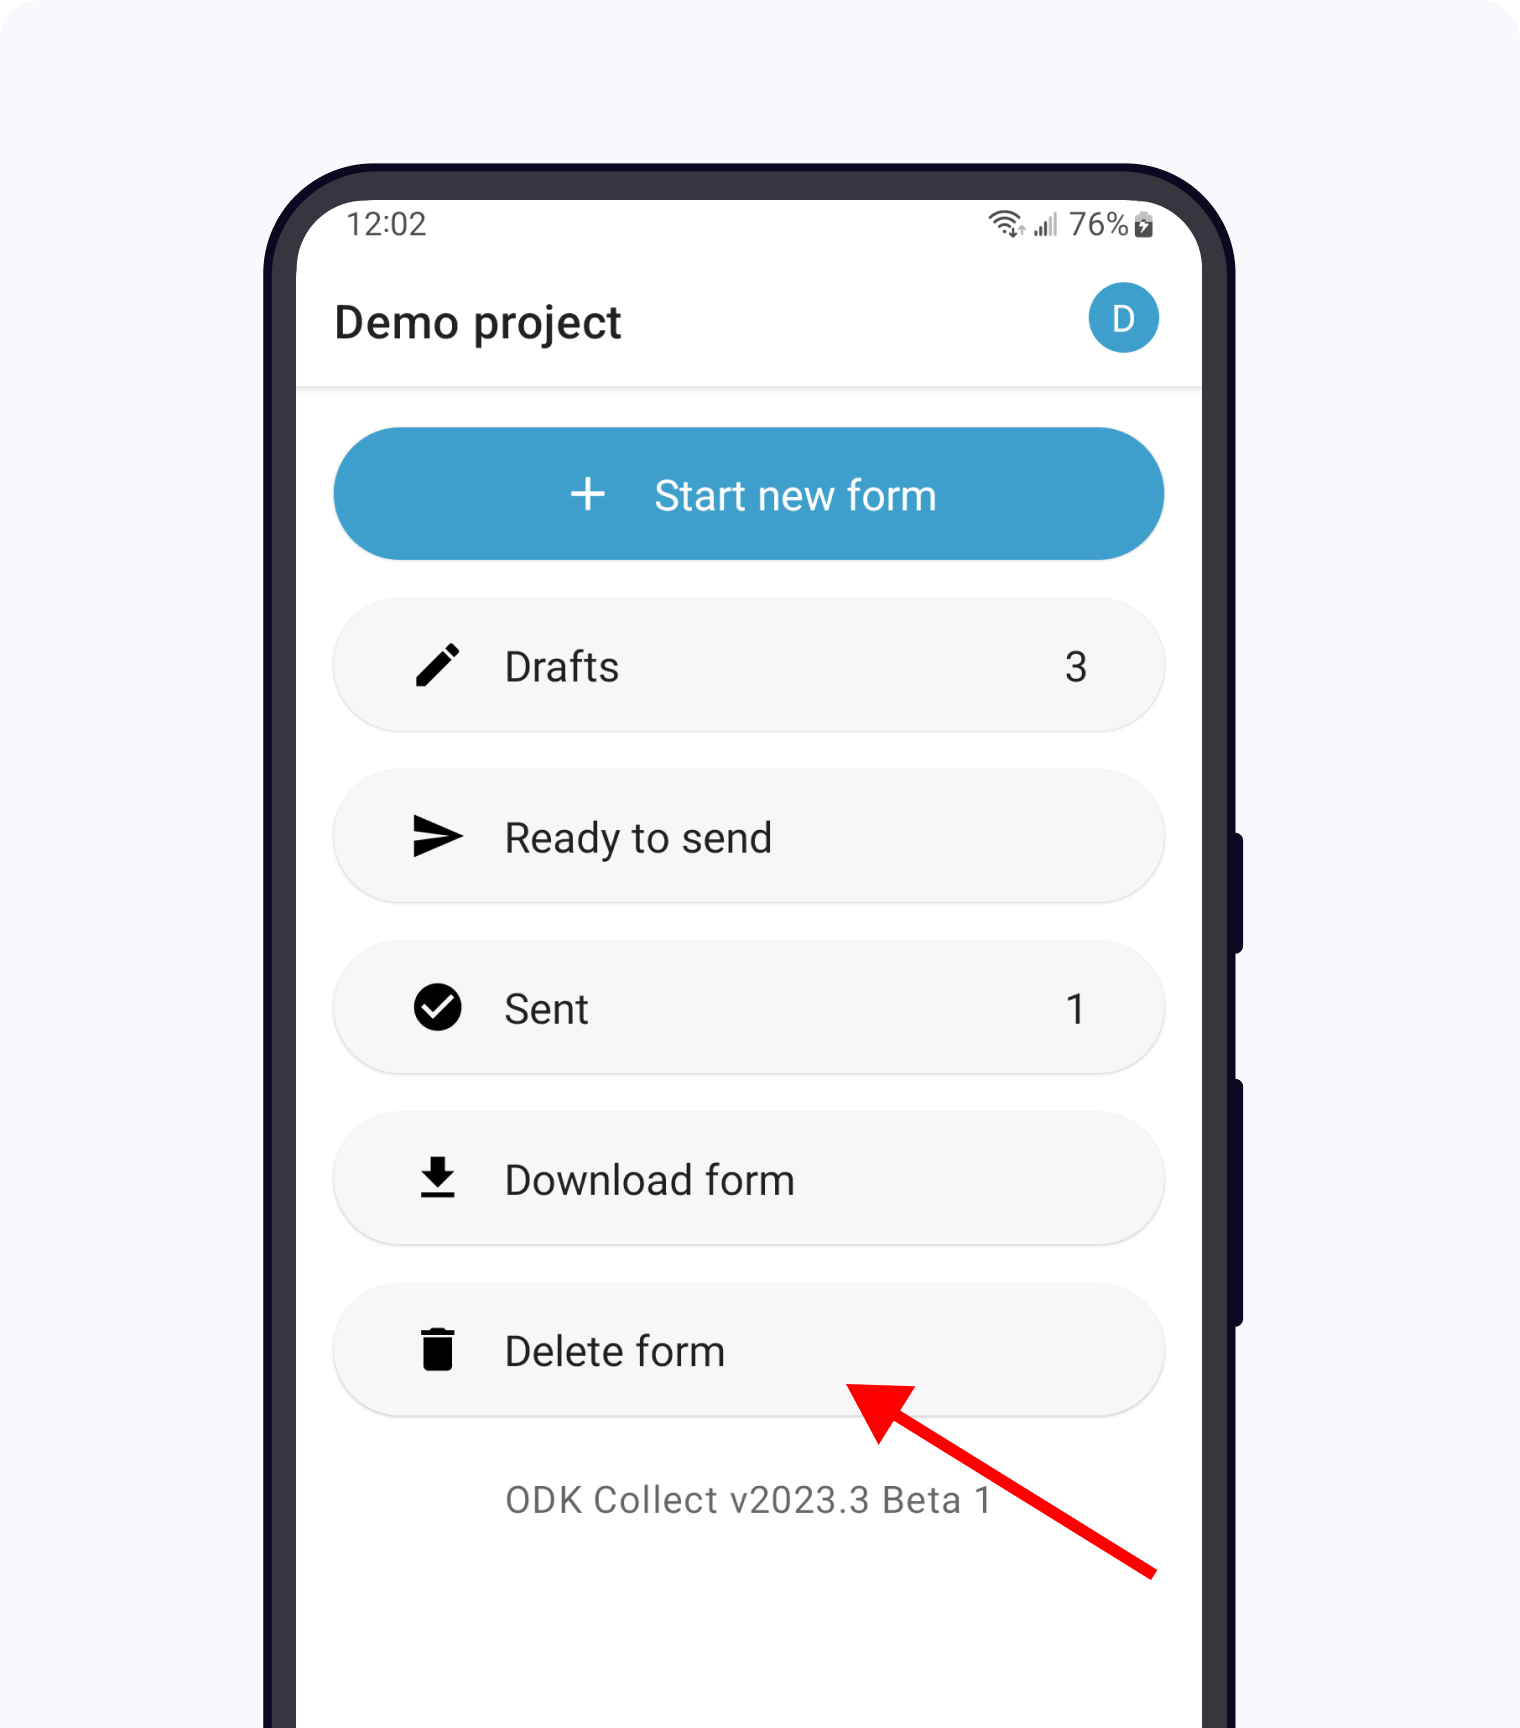
Deleting forms
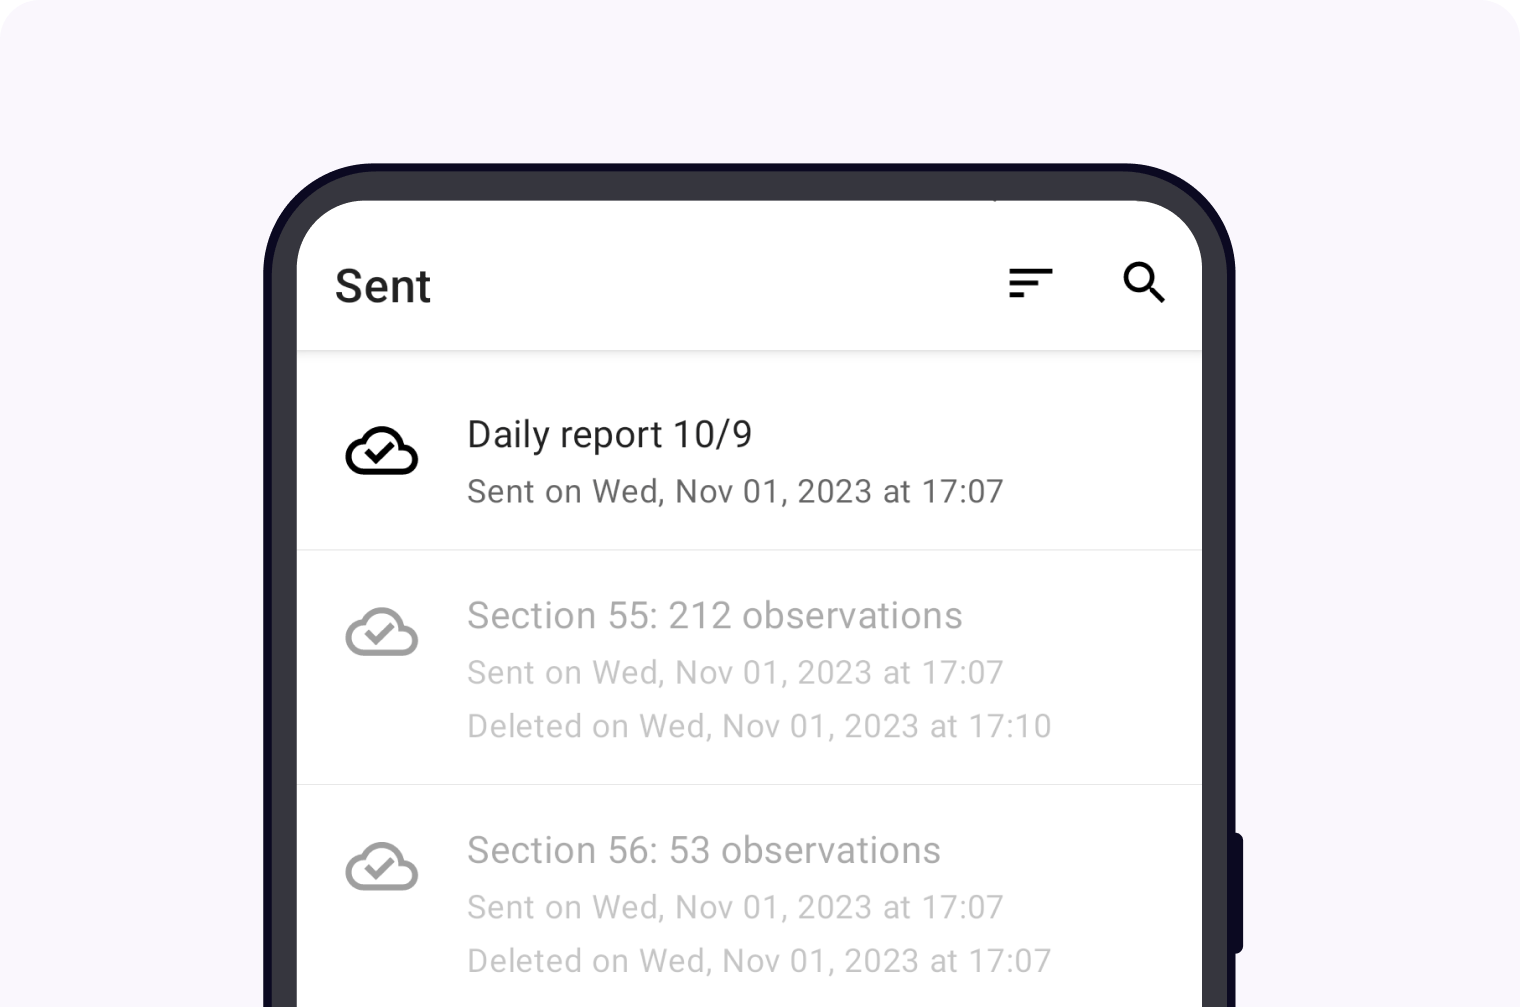
You can delete filled forms in any state (Draft, Finalized, or Sent). Deleting a Sent form deletes the form contents but metadata associated with it including the deletion date and the instance name are maintained for display in the Sent list.
If your device is not configured to exactly match the forms provided by the server, you can delete Blank forms. When Collect is configured to exactly match the forms provided by the server, any previously-downloaded forms that is closed or deleted from the server will automatically be deleted by Collect.
When a blank form is deleted, it is completely removed from the device if it has no filled forms associated with it. However, if there are filled forms that were created with that form definition, it will be hidden from Start new form but will still be available on the device so that the remaining filled forms can be opened. Once all the related filled forms are deleted, the form definition and its media files will be permanently deleted as well.
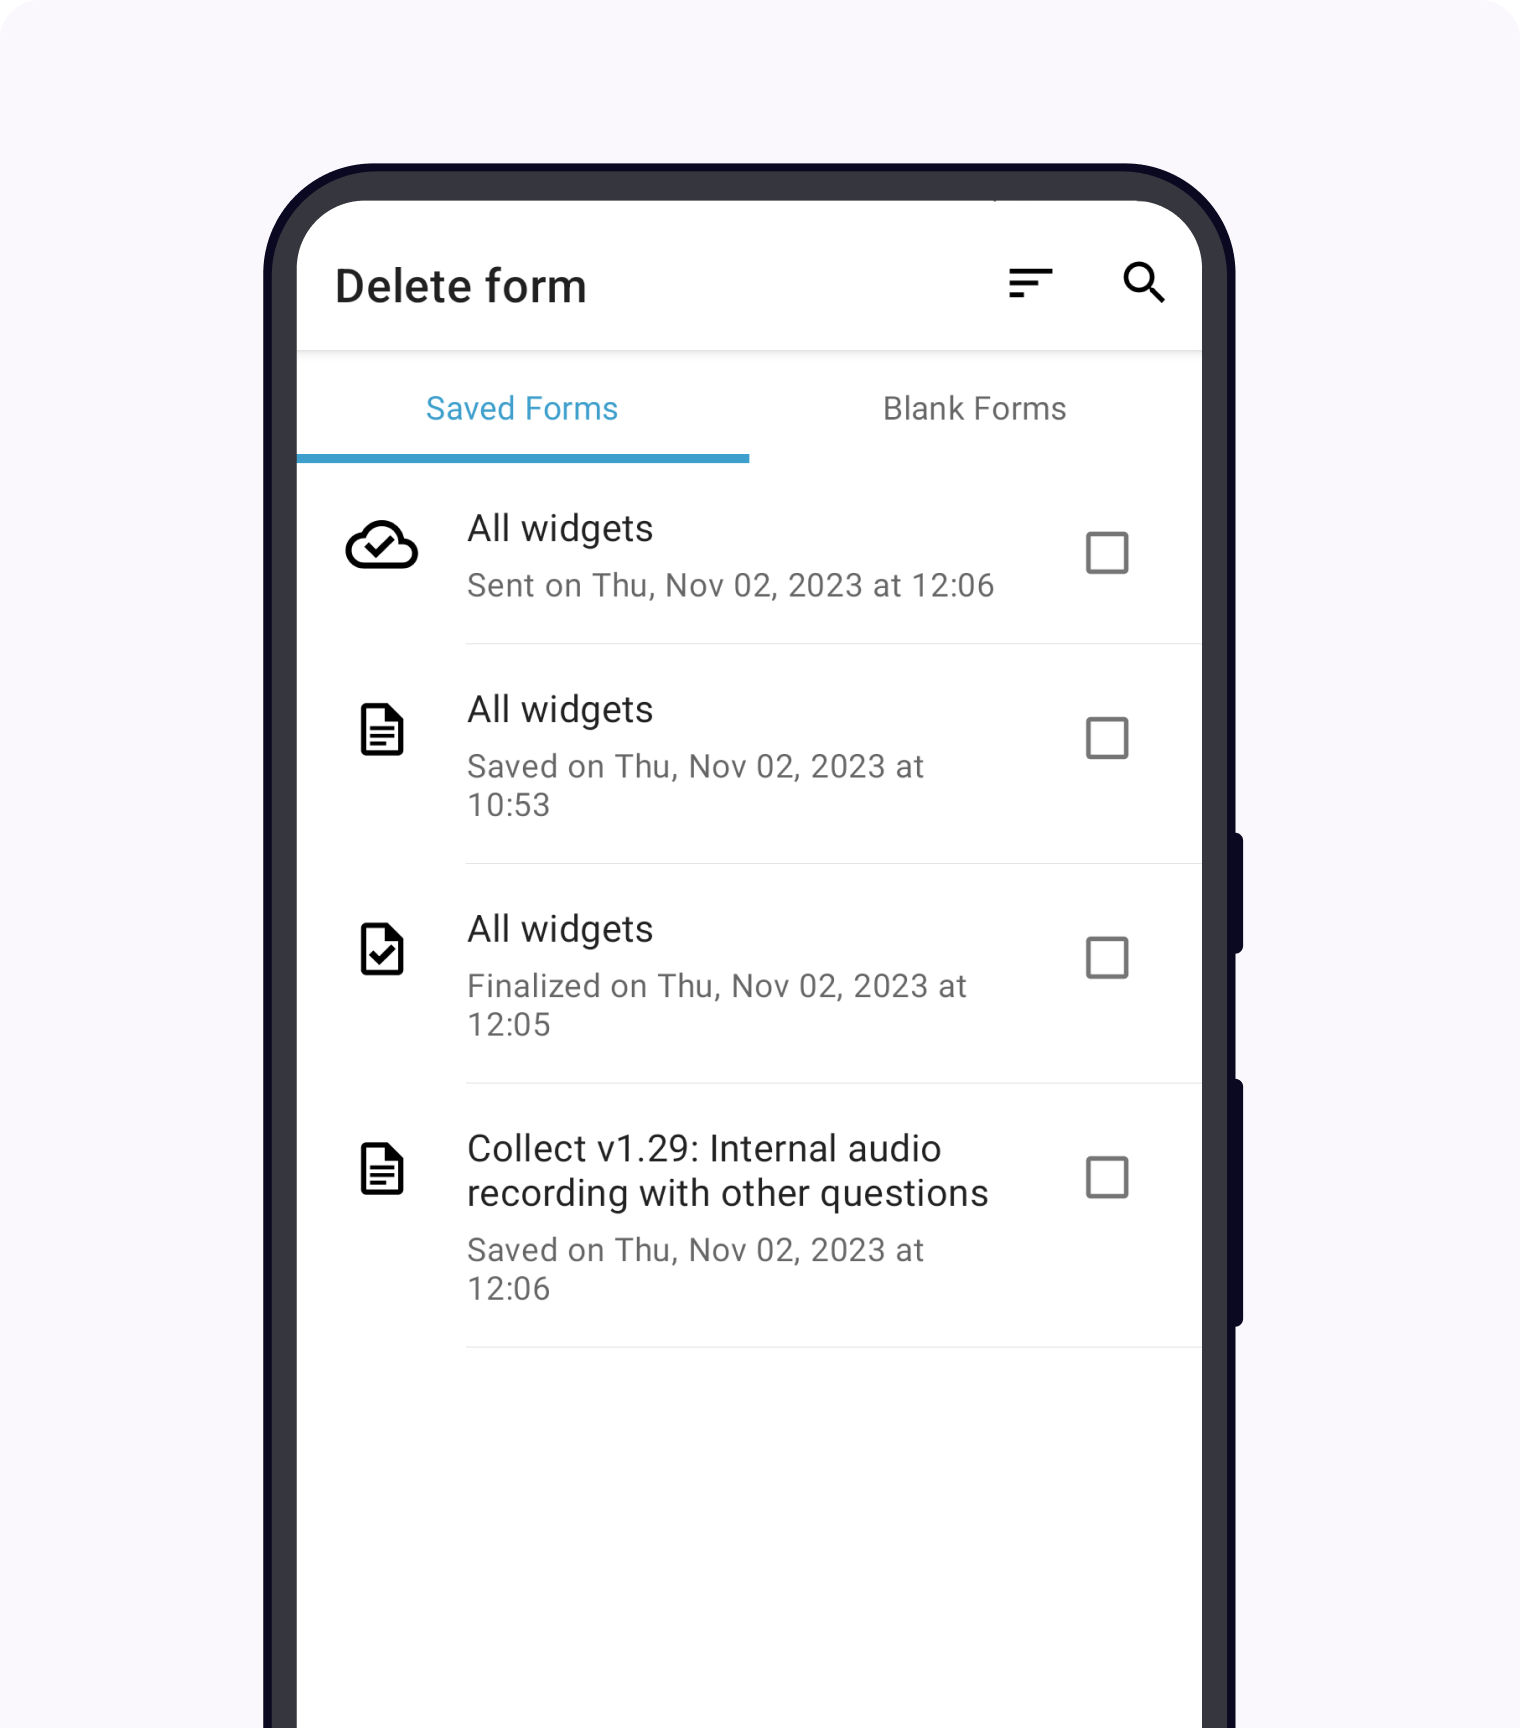
Select Delete from the Collect Main Menu. You can use the Saved Forms and Blank Forms tabs to toggle between a list of all filled forms in any state and a list of all blank forms.
Note
When sent forms are deleted, they are listed in the Sent page, but are grayed out and can't be viewed. This lets you see confirmation of filled forms that have been sent without keeping all of the data on the device.
Managing forms without a server
If you are working entirely offline with a small group of data collectors, you may find it convenient to manage forms by plugging devices into a computer rather than using a server.
These approaches can also be helpful in case of problems that require troubleshooting.
Loading forms directly
Loading forms with adb
You can load forms directly from a computer to your device's Collect directory via USB, using Android Debug Bridge.
$ adb push path/to/form.xml <collect-directory>/forms/form.xml
Loading forms from device storage
You can also download forms to your device via a web browser, and move them to the forms/ directory, using the device's file manager ().
Go to the Settings menu (⚙) on your device and find . The settings menu may look different on your device.

From the internal storage screen, select to open the file manager. The Explore option opens a file manager that you can use to move forms into Collect.

Loading form media
If a form includes images or other media, those files have to be loaded to the device along with the form.
Media files must be placed in a folder labeled form-name-media.
When using ODK Central, first upload your form definition. Central will then prompt you to add media files if necessary. The files are downloaded automatically when fetching blank forms.
If loading forms directly to your device, the
-mediafolder needs to be placed in theformssubdirectory of your Collect directory, alongside the form itself.
Pulling forms into Briefcase
ODK Briefcase is a desktop application that can be used to pull filled forms to your local computer. You will first need to transfer the filled forms to your computer. This will not update the state of the form to Sent.
Deleting forms with adb
You can also delete form instances directly with Android Debug Bridge. They are stored in the instances subdirectory of your Collect directory, with a directory for each instance.