Installing Aggregate on Google App Engine
Warning
ODK Aggregate is no longer being updated. Please use ODK Central instead.
Warning
This document only applies ODK Aggregate v1.x. See why we are removing App Engine support for more information.
Note
There is no charge to set up an Aggregate server on App Engine, and lightly used instances will usually incur no charges.
Before you begin…
Make sure Java 8.0.221 or higher is installed on your system. We recommend using OpenJDK 11 LTS from AdoptOpenJDK.
You will need a Gmail account to use App Engine. This Gmail account will be the owner of the Google Cloud Platform project under which your App Engine will execute.
You will need to provide a credit card or banking details to verify your identify to the Google Cloud Platform.
Read the Google Cloud Platform terms of service.
Download the ODK Aggregate installer. Select the latest release for your operating system.
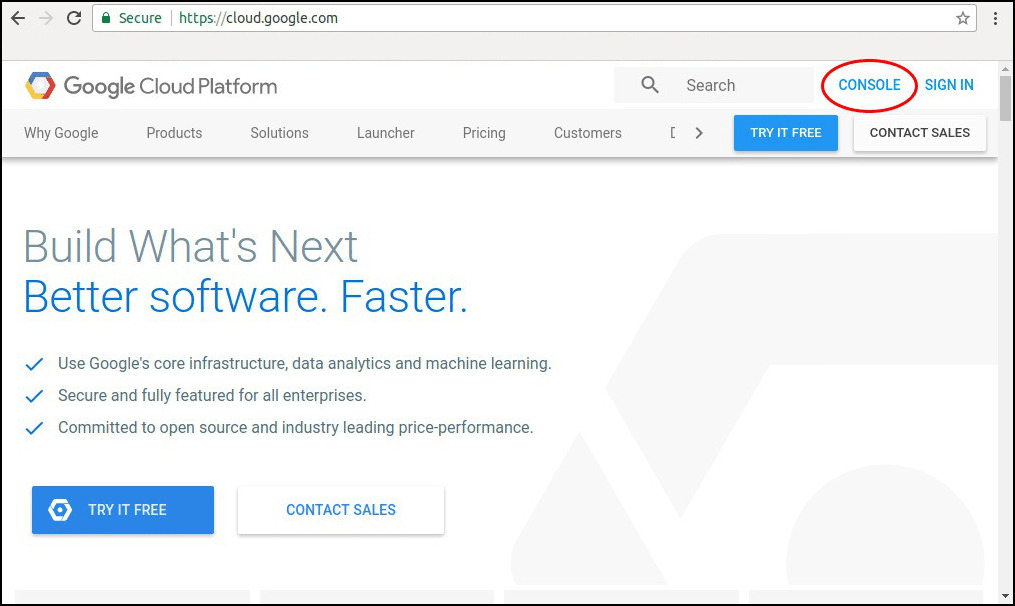
Go to Google Cloud Platform and click on Console in the top right corner.
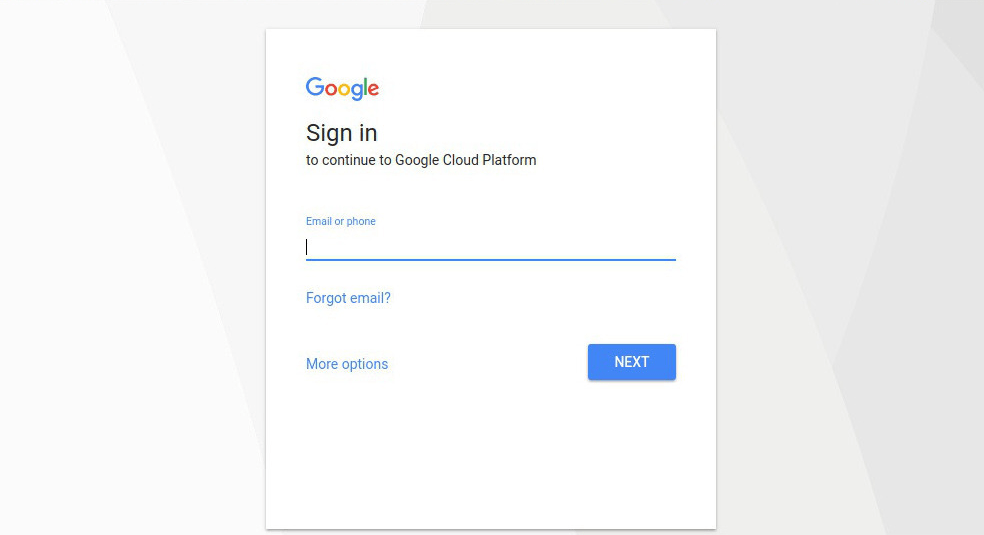
Sign in with the Gmail/Google account you wish to use.
If you have never configured a Google Cloud Platform project, click on Create an Empty Project.
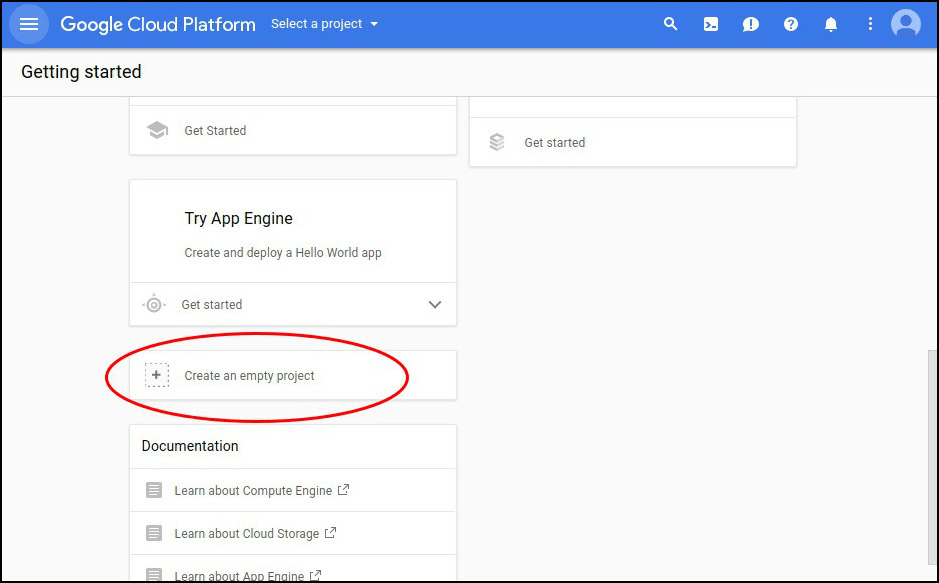
If you have configured a Google Cloud Platform project before, you may see a listing of all your projects and a button labeled Create Project. Click that button.
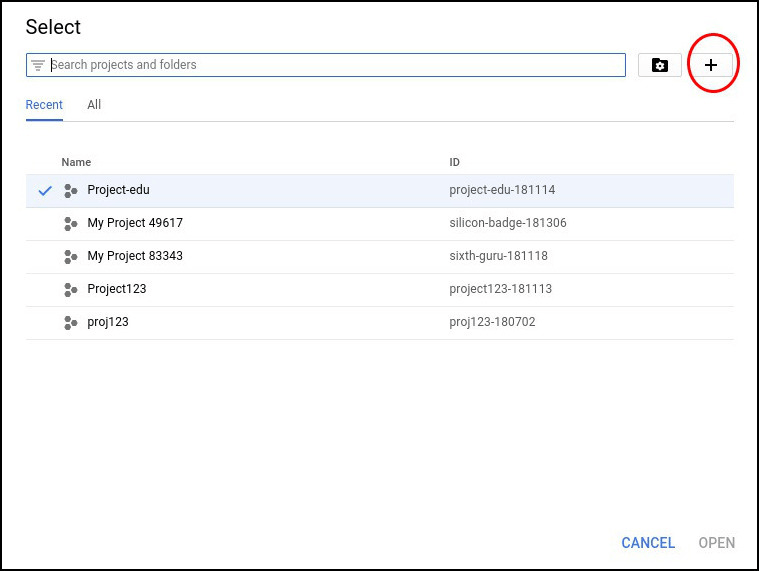
If instead you see the console for one of your existing projects, click on the project name at the top of the window. In the example image below, the older project is Project-edu.
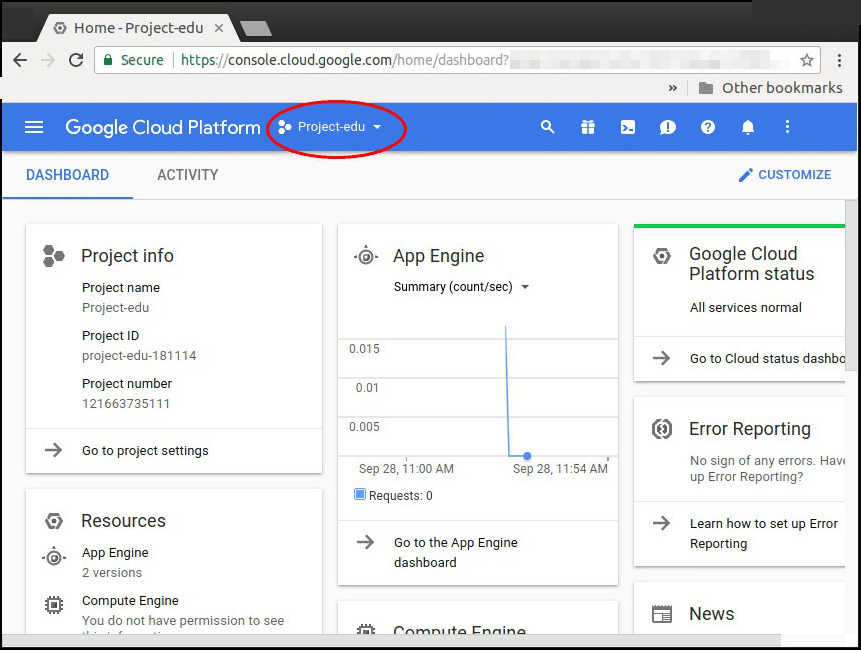
Upon clicking the project name, a window appears with a + symbol. Click on it to create a new project.
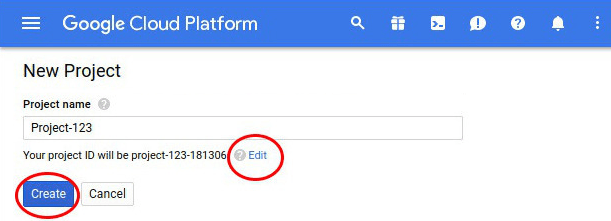
Name your project.
On the project-creation popup dialog, type in a project name that makes sense to you. If you want to edit the project ID, which will be a part of your project URI, click the small Edit link. When you are done, click Create.
Tip
You may want to use a project id that combines your organization name and the name of your data collection group or project.
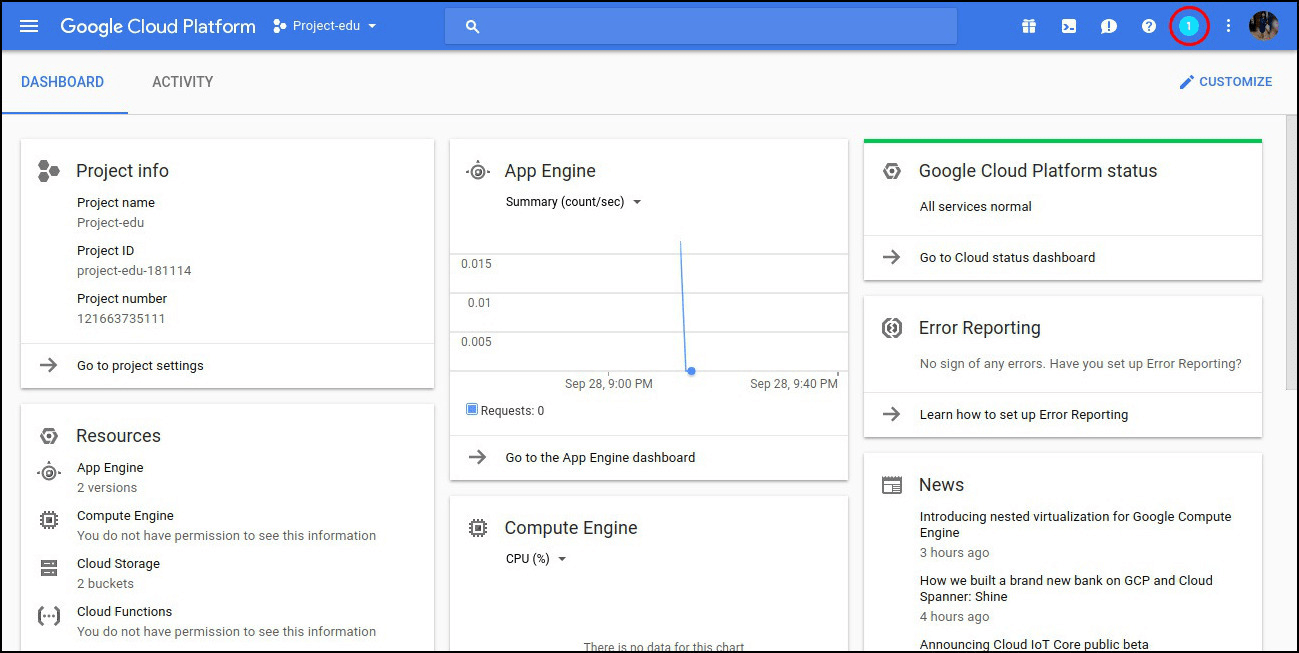
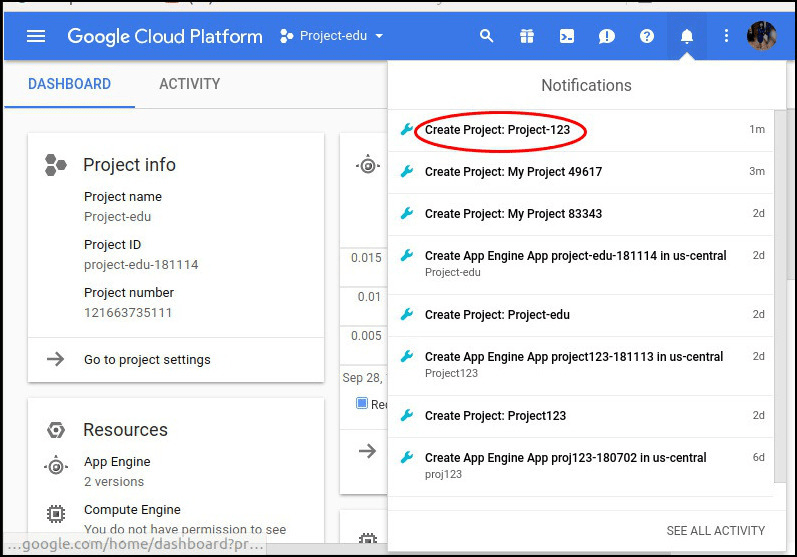
After few seconds, you will see a notification in the top right corner of the window. Click on the notification icon and select the notification message Create Project: project-name. An empty project screen will open.
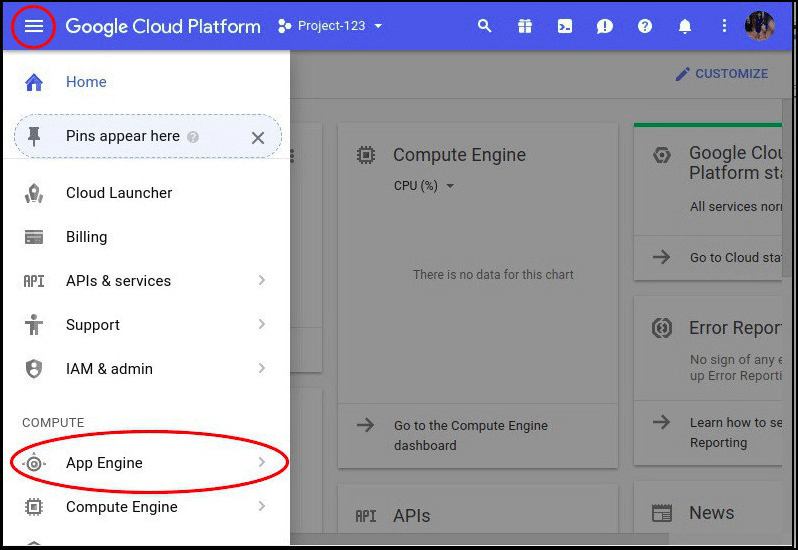
Click on the menu icon (☰) to the left of Google Cloud Platform in the upper left side of the screen, and select App Engine from the dropdown menu.
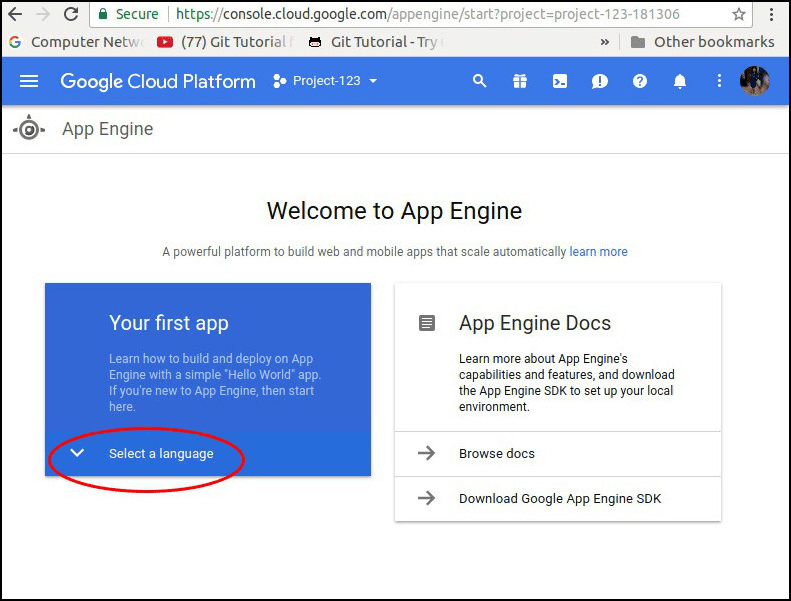
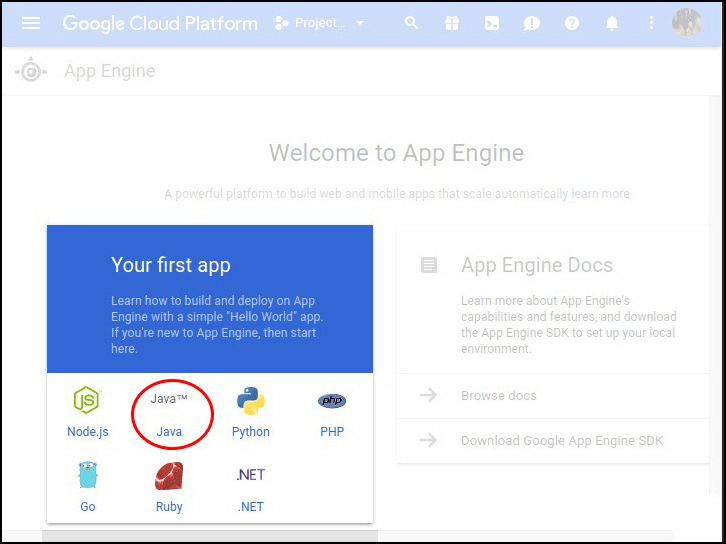
Open the Select a language menu and select Java.
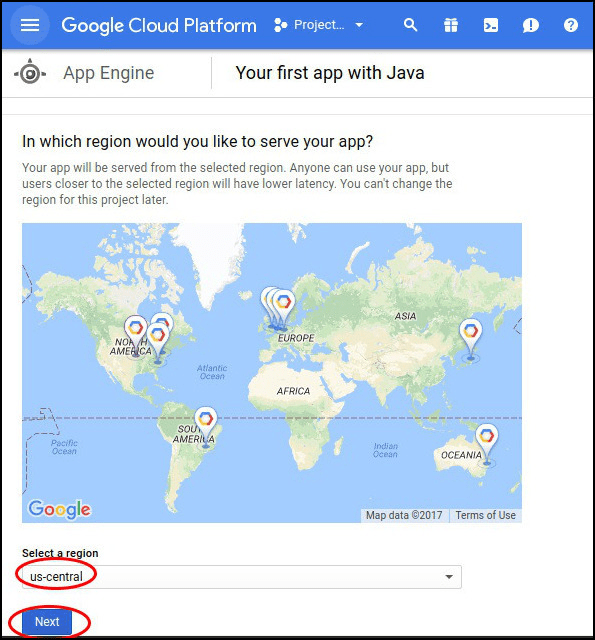
Select your preferred datacenter location and click Next.
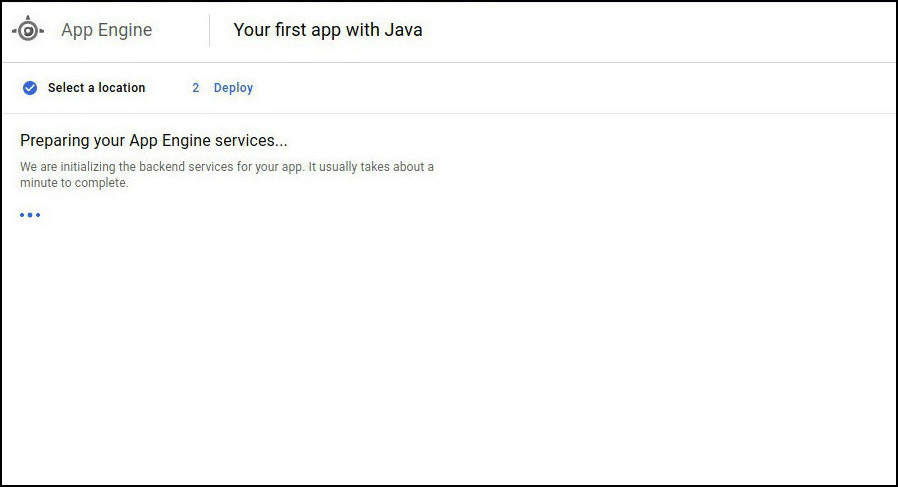
Google will then configure the server. This may take a moment.
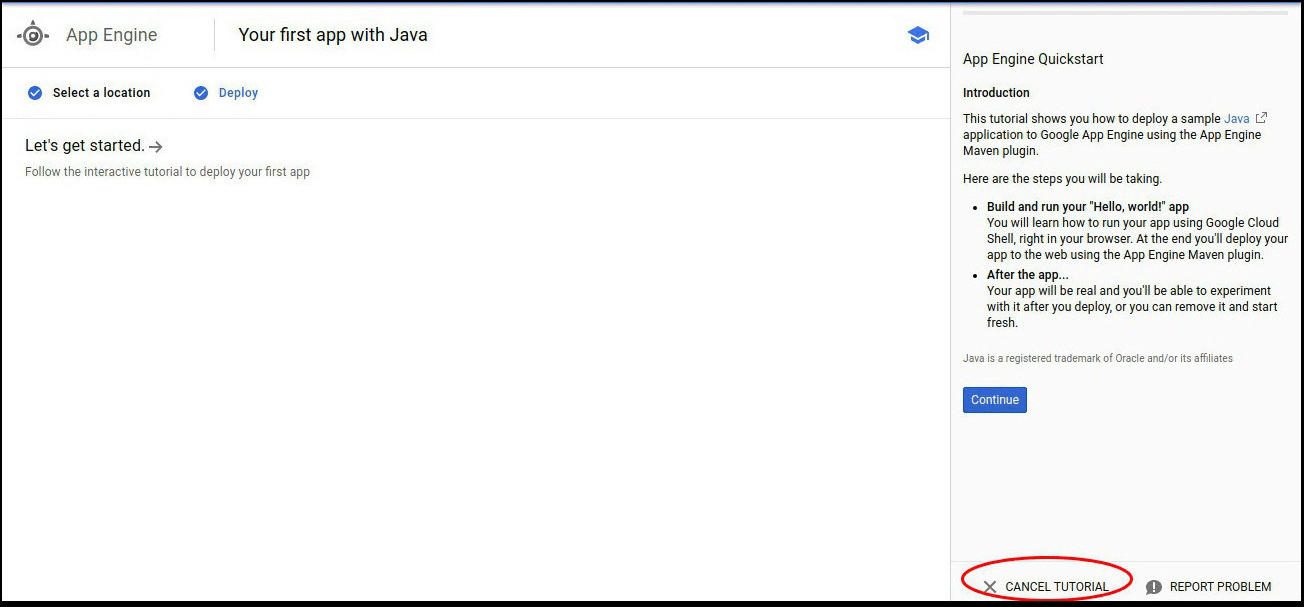
When this completes, you will be directed to begin a tutorial to install a sample application. Choose Cancel Tutorial and confirm that you want to not perform that tutorial.
Launch the ODK Aggregate installer on your computer. (See download info here.)
Before launching, change the installer's permissions to enable running it as a program:
Right click on the file.
Select .
Check Allow executing file as program.
Or, from a terminal, go to the directory where you downloaded the installer and change permissions:
$ chmod 554 "ODK Aggregate vN.N.N linux-installer.run"
(Use actual name of the file, which will be different.)
Unzip the downloaded file before running the installer within it.
When you attempt to run the installer, macOS will prevent it. Go to to enable running the installer.
On launch, you may need to approve running an unsigned installer.
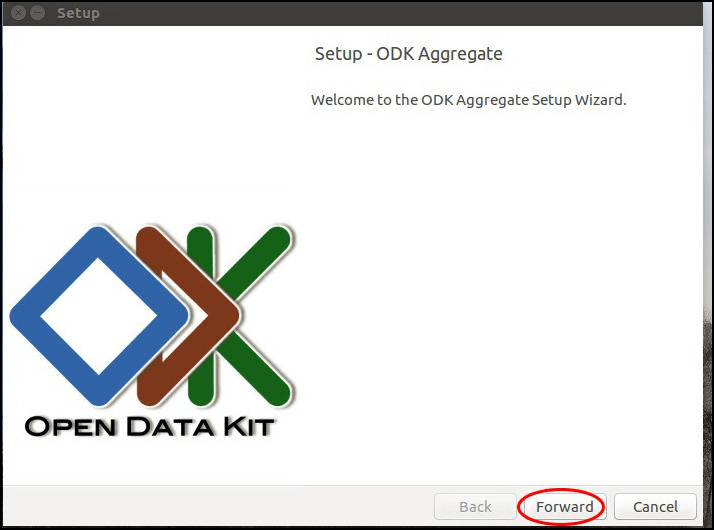
The installer will guide you through configuring ODK Aggregate for App Engine. Click on the Forward button each time you complete a step to move ahead.
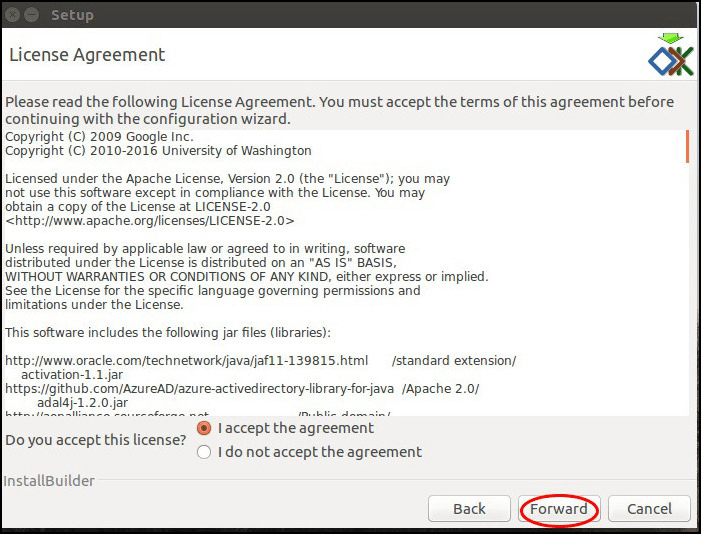
Accept the license agreement.
Select a parent directory under which an
ODK Aggregatedirectory will be created to contain the configured software. Click on the folder icon to choose a directory.
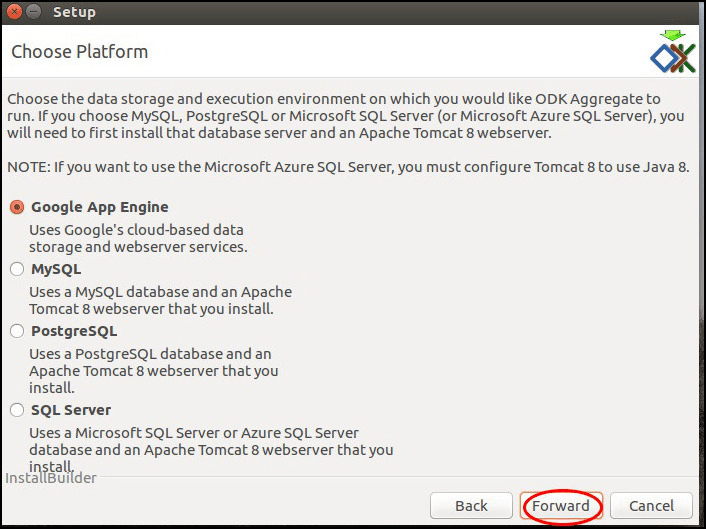
Select Google App Engine as the platform for the Aggregate server.
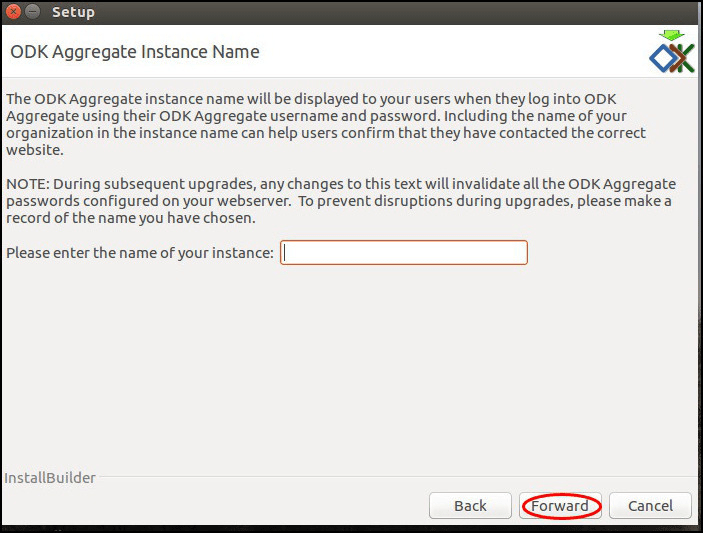
Enter a name for your ODK Aggregate instance.
Note
The Aggregate instance name will be displayed to your users when they log into Aggregate using their username and password.
The instance name does not need to be the same as the Project Name you set in Google App Engine. However, it might be helpful to use the same name.
Tip
Including the name of your organization in the instance name can help users confirm that they have contacted the correct website.
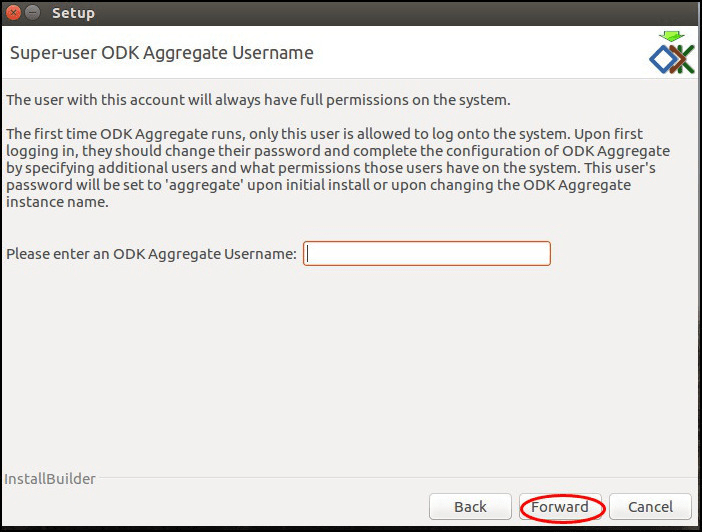
Enter a superuser name in the next window.
Note
The superuser will have full permissions on the system.
The password for this user will be set to
aggregateinitially.Only this user will be allowed to log onto the system when Aggregate is run for the first time.
Upon first logging in, the superuser should change the password and complete the configuration of Aggregate by specifying additional users and what permissions they will have on the system.
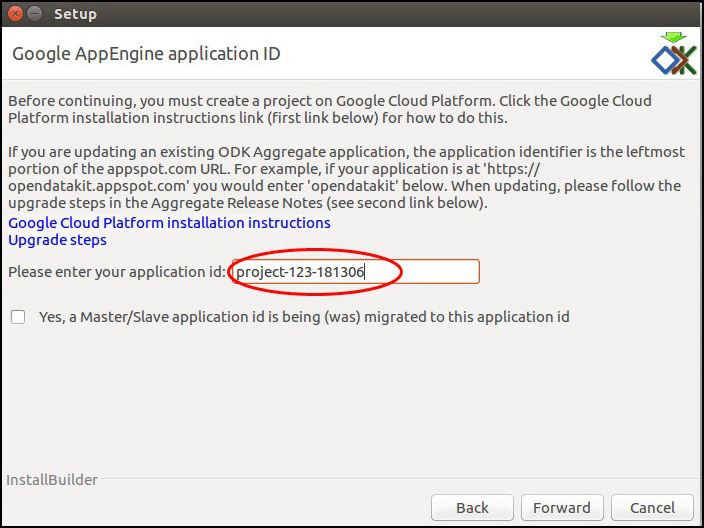
Enter the ID of the project you created on the Google Cloud platform.
The installer will configure Aggregate and launch an upload tool.
Tip
Depending on your Java version, security settings may prevent the upload tool from running. A possible workaround is to add
file://to the Exception Site List.Enter the Gmail account that you specified when setting up the App Engine project and click the Get Token button.

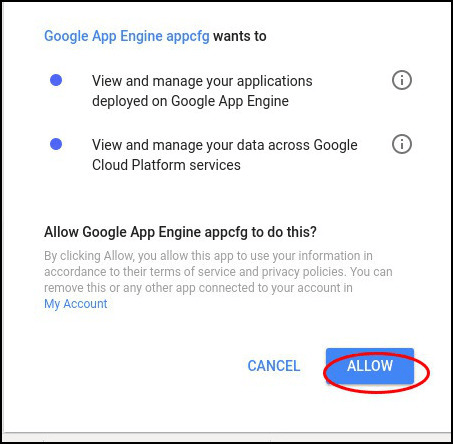
Your default browser will open a Google dialog screen asking you to choose a Gmail account. Select the account you specified earlier when setting up App Engine, and then allow Google App Engine appcfg to view and manage your App Engine instances and datastores. Click Allow. This will take you to a screen with instructions to copy a code.
At the same time, the install wizard should display a popup dialog box.
Tip
If the popup dialog does not appear, relaunch the upload tool:
Close the upload tool.
Open a terminal.
cd to the directory you specified earlier.
run
uploadAggregateToAppEngine.sh
Close the upload tool.
Open a Finder window.
Navigate to the directory you specified earlier.
Run uploadAggregateToAppEngine.app
Close the upload tool.
Open a file explorer window.
Navigate to the directory you specified earlier.
Double-click ODKAggregateAppEngineUpdater.jar
Re-enter the email address, and click Get Token again. The popup dialog should now appear.
Copy the code from the browser into the installer's popup dialog and click OK.

Tip
The text box on Google's site is not as wide as the code. Be sure to copy the entire code.
If everything went well, you should see a status message letting you know the
Action Succeeded.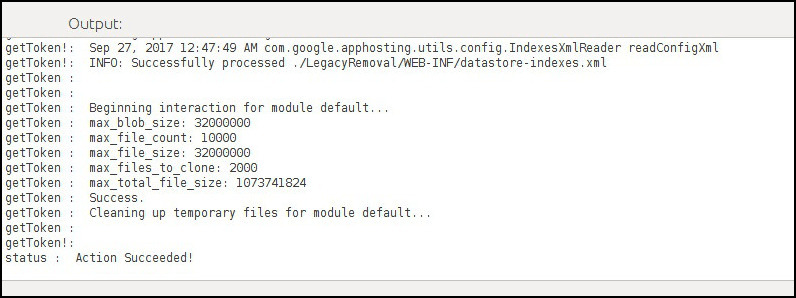
Tip
If the output does not look like that, you may have waited too long between getting the code and pasting it into the tool. Click Delete Token and try again.
If you see a failure message in the output window, it is likely that you have several different Gmail accounts and Google has gotten confused during the token-issuing process. In you suspect this is the case, click Delete Token and try again:
When the browser window opens, before selecting an account, copy the URL.
Open a Private Browsing or Incognito Window in your browser.
Paste the URL into the private window.
Proceed with the other steps as above.
Click Upload ODK Aggregate.
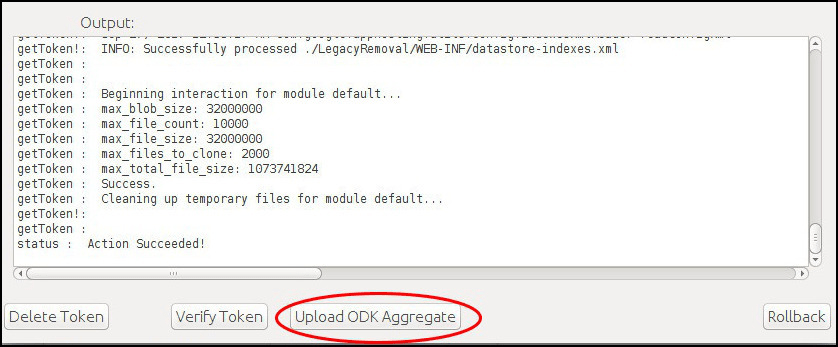
Clicking on Upload ODK Aggregate will generate a long list of progress messages in the Output window. You will see a number of warnings and errors. Don't worry, this is expected.
For reference, here is a list of few of those errors:
  listBackends : Warning: This application uses Backends, a deprecated feature that has been replaced by Modules, which offers additional functionality. Please convert your backends to modules as described at: https://developers.google.com/appengine/docs/java/modules/converting.

  listBackends! : WARNING: Error posting to URL: https://appengine.google.com/api/backends/delete?backend=background&app_id=project-123-181306&
  listBackends! : 500 Internal Server Error

  listBackends : Unable to list backends: Error posting to URL: https://appengine.google.com/api/backends/list?app_id=project-123-181306&
  listBackends : 500 Internal Server Error

  deleteBackendBackground : Warning: This application uses Backends, a deprecated feature that has been replaced by Modules, which offers additional functionality. Please convert your backends to modules as described at: https://developers.google.com/appengine/docs/java/modules/converting.

  deleteBackendBackground!: WARNING: Error posting to URL: https://appengine.google.com/api/backends/delete?backend=background&app_id=project-123-181306&
  deleteBackendBackground!: 400 Bad Request

  deleteBackendBackground : Unable to delete backend: Error posting to URL: https://appengine.google.com/api/backends/delete?backend=background&app_id=project-123-181306&
  deleteBackendBackground : 400 Bad Request
Finally, you should see the message
status : Action Succeeded!.Once the installer has run and uploaded the ODK Aggregate configuration to App Engine, return to the Google Cloud Platform console.
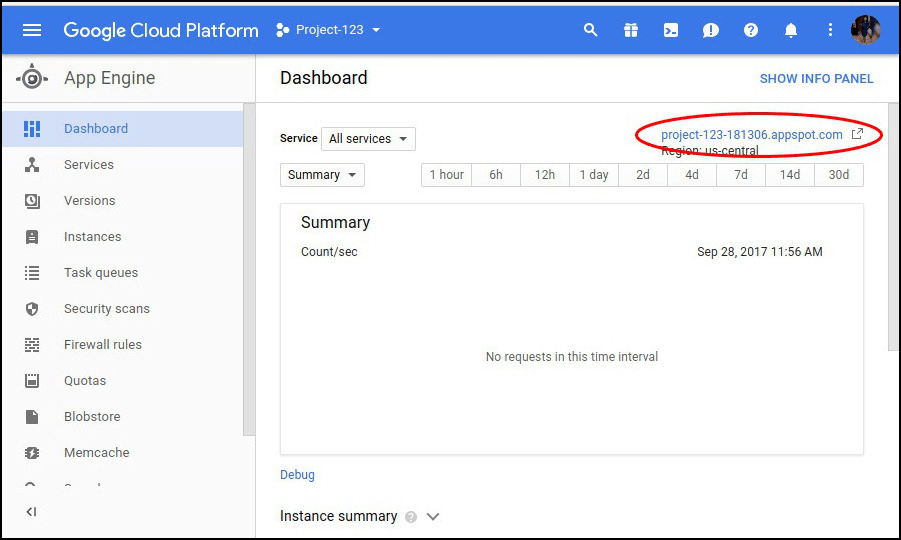
Open your Aggregate server from your project's screen, by selecting and clicking on the project's URI.
Log In with the superuser username that you specified in the installer (the initial password for this username will be
aggregate), and access the site administration screens for your server.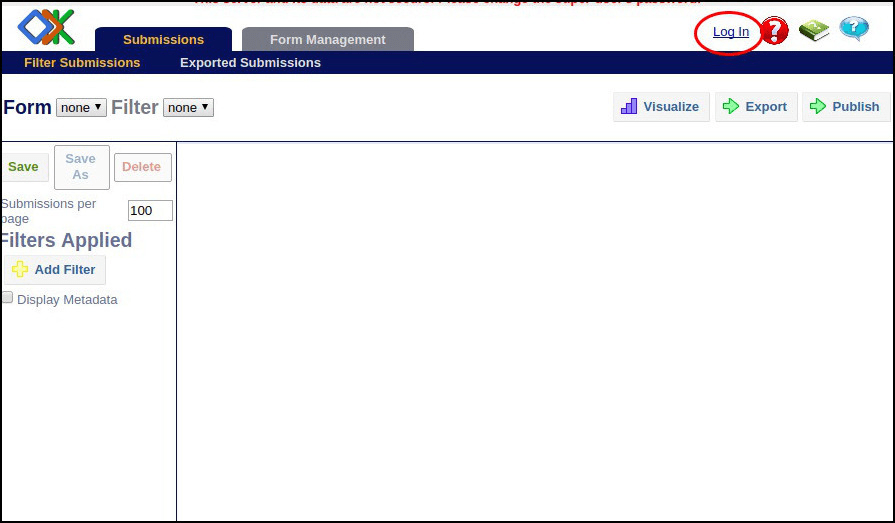
Go to to change your password. You can also add additional users.