OAuth2 Service Account
Publishing your data into Google Spreadsheets requires a Google Oauth2 Service Account.
Note
Google requires a credit card or banking details to use the Google Cloud Platform that the Oauth2 Service Account runs on. The billing details are used for identity verification.
Google throttles requests for all of its APIs. This impacts ODK Aggregate's Map visualization (which requires an API key) and the publishing to Google Sheets.
If you have difficulties with any of these, go to the Google Cloud Platform project in which you created your service account, navigate to the API Manager tab, navigate to the appropriate API (either via the Dashboard list or via the links on the library sub-tab).
If the API is enabled, you will have a graphical overview of your use of the API. Click on the Quota heading on the page to see the quotas for the API. By clicking on the pencil icons to the right of these quotas, you will get a pop-up from which you can request an increase in a quota.
The quota that most critically needs to be increased is the Google Sheets quota for write requests per second per user. A better limit is 500 per second per user, or perhaps higher if your forms have many fields and/or repeat groups.
The Google API Key used by the Maps visualization is created and managed on the same screen as the Google Oauth2 Service Account.This page guides you through the creation and uploading of these two credentials into ODK Aggregate
Create the Google Credentials
Credentials are associated with a Google Cloud Platform project.
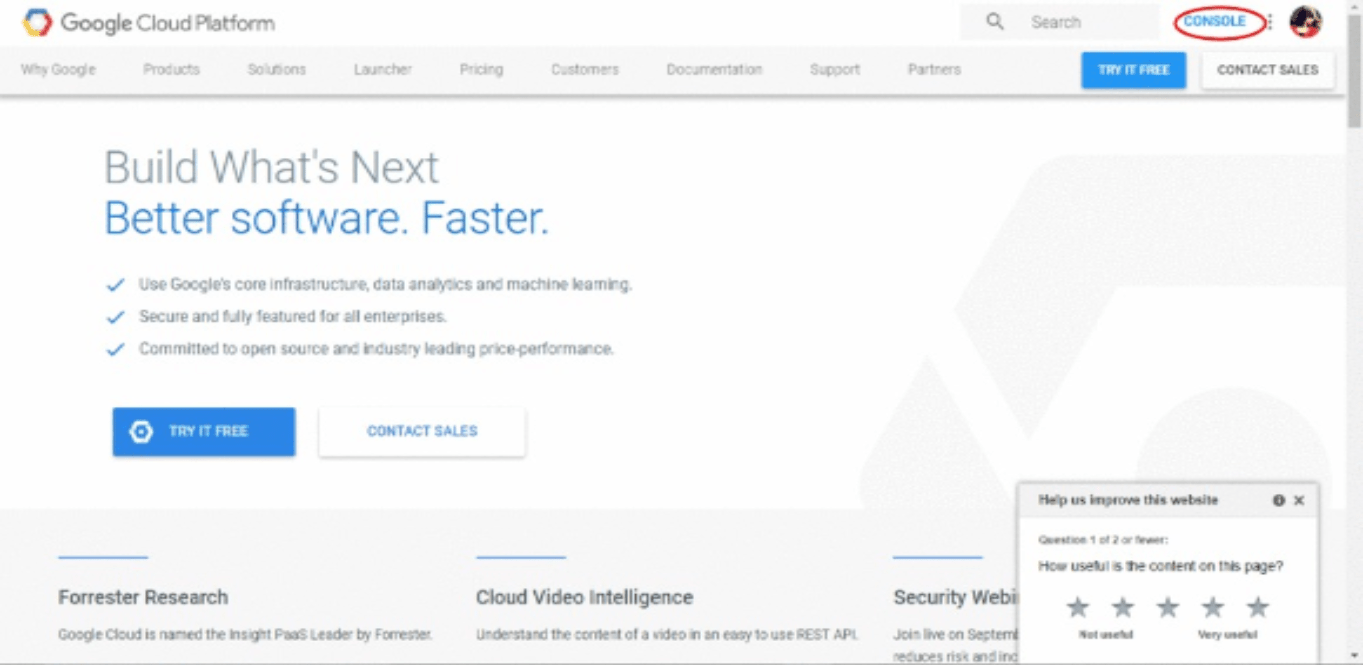
If you are using App Engine for your ODK Aggregate server, then you have already set up a Google Cloud Platform project – you just need to navigate to it. Otherwise, you will need to create one. In either case, go to Google Cloud Platform and click on Console:
If you have never configured a Google Cloud Platform project, please refer this section to configure a project using App Engine under which aggregate server would run.
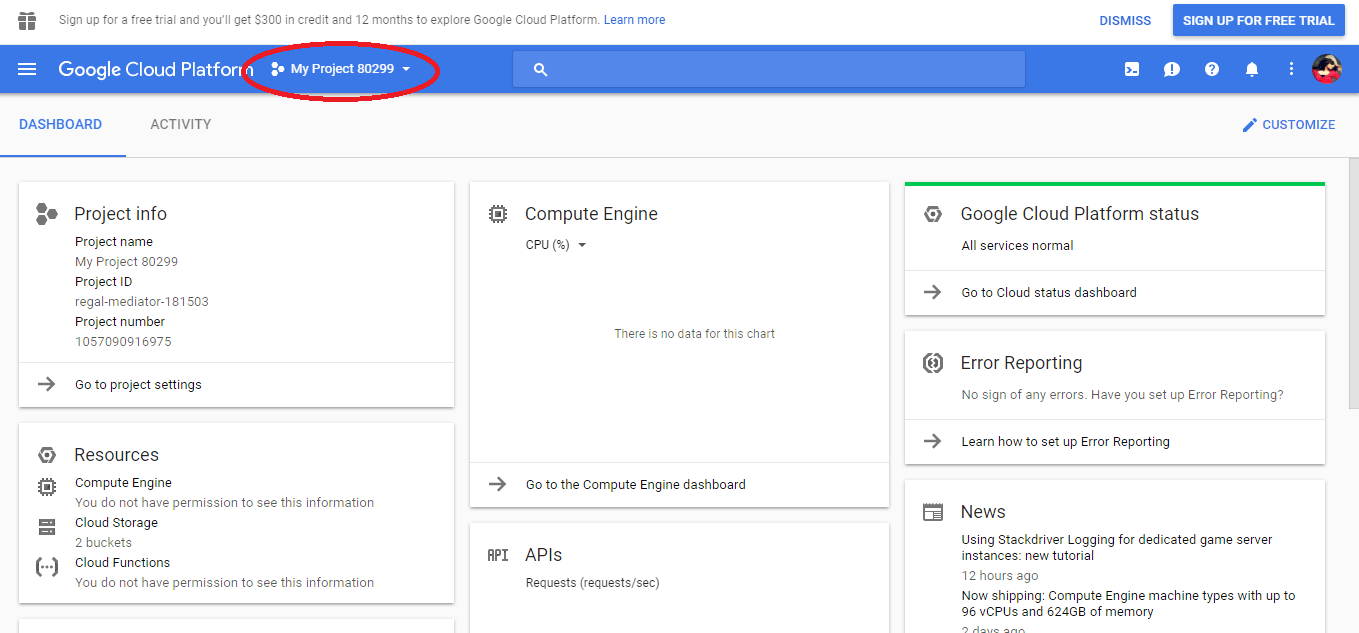
If you have already configured you should be able to see the project screen, showing the project name in the upper-left side of the screen.In this case, I named my project "My Project 80299" and project id "regal-mediator-181503".
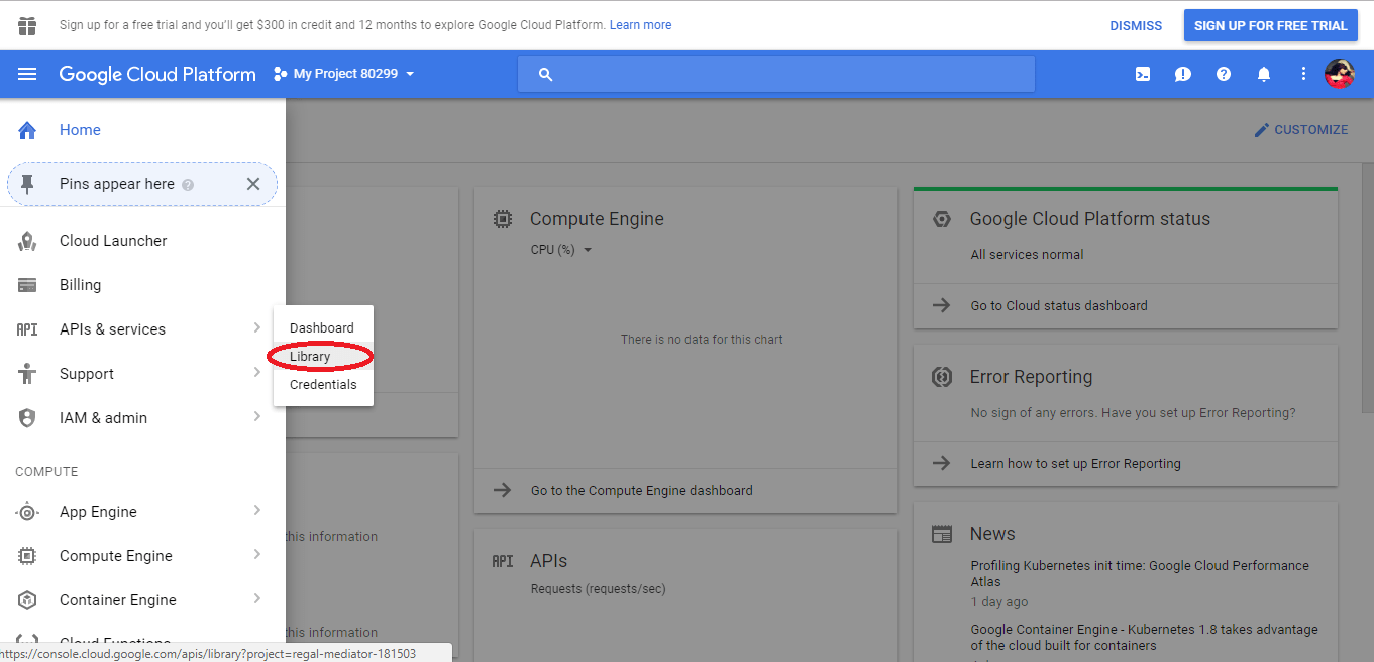
Click on the menu icon(three horizontal bars) in the upper-left side of the screen.
Now select APIs & services from the menu and then select Library option
This will take you to the lists all the application APIs that Google offers.
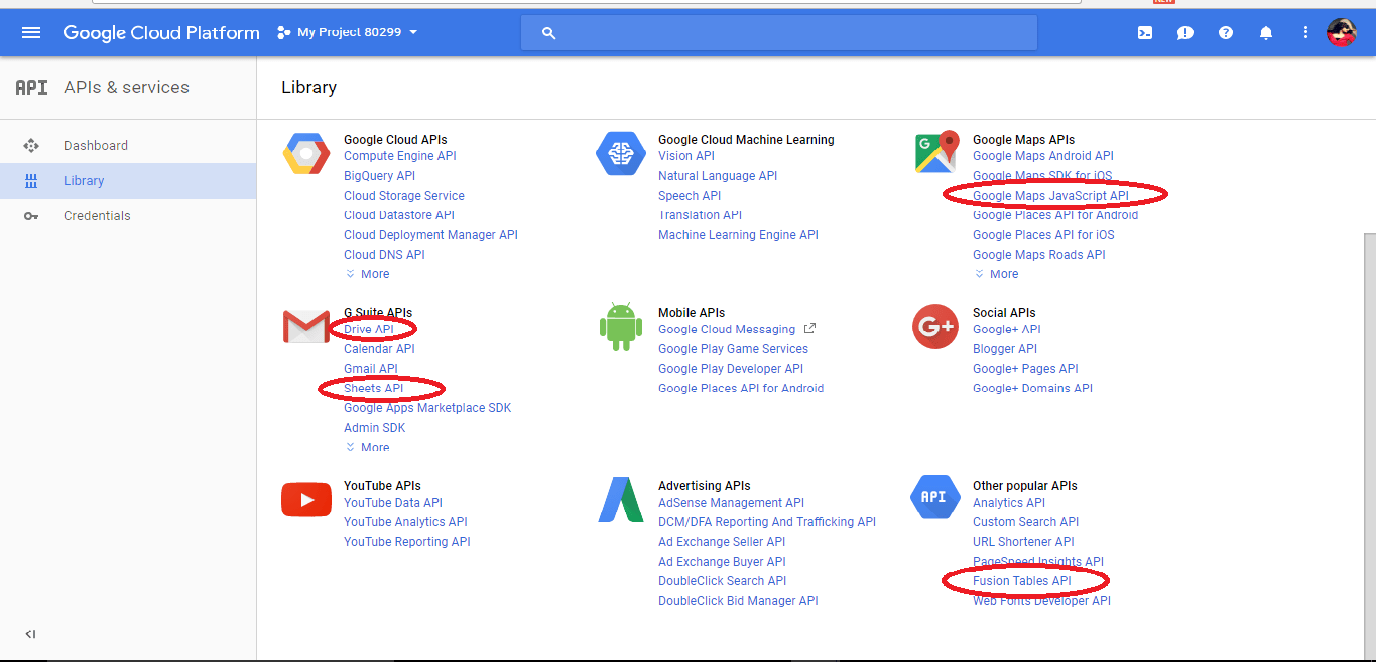
To be able to publish to Google Sheets, and to be able to view maps, we need to enable this project to use these application APIs:
Google Maps Javascript API v3
Drive API
Sheets API
The Sheets API is under the same section heading as the Drive API.
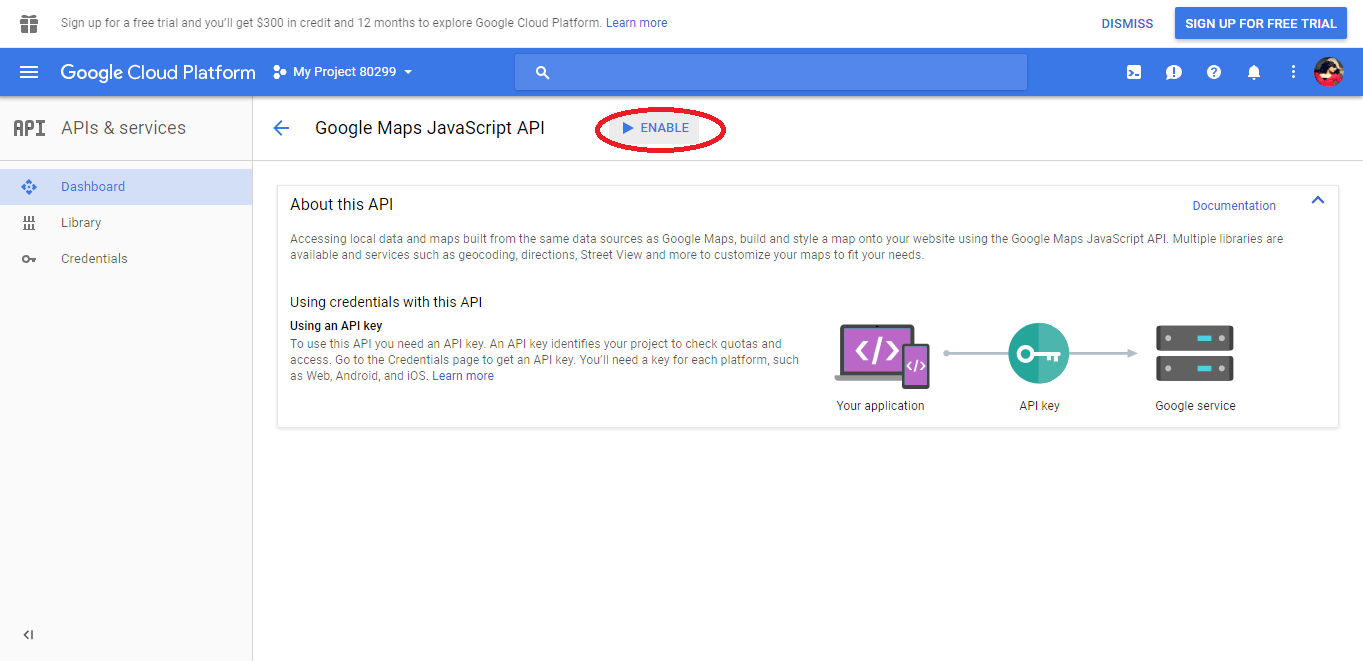
For each of these APIs, click on the API. This takes you to an information page for that API. On that page, click on the Enable button. E.g., on the Google Maps Javascript API v3 page, it looks like this:
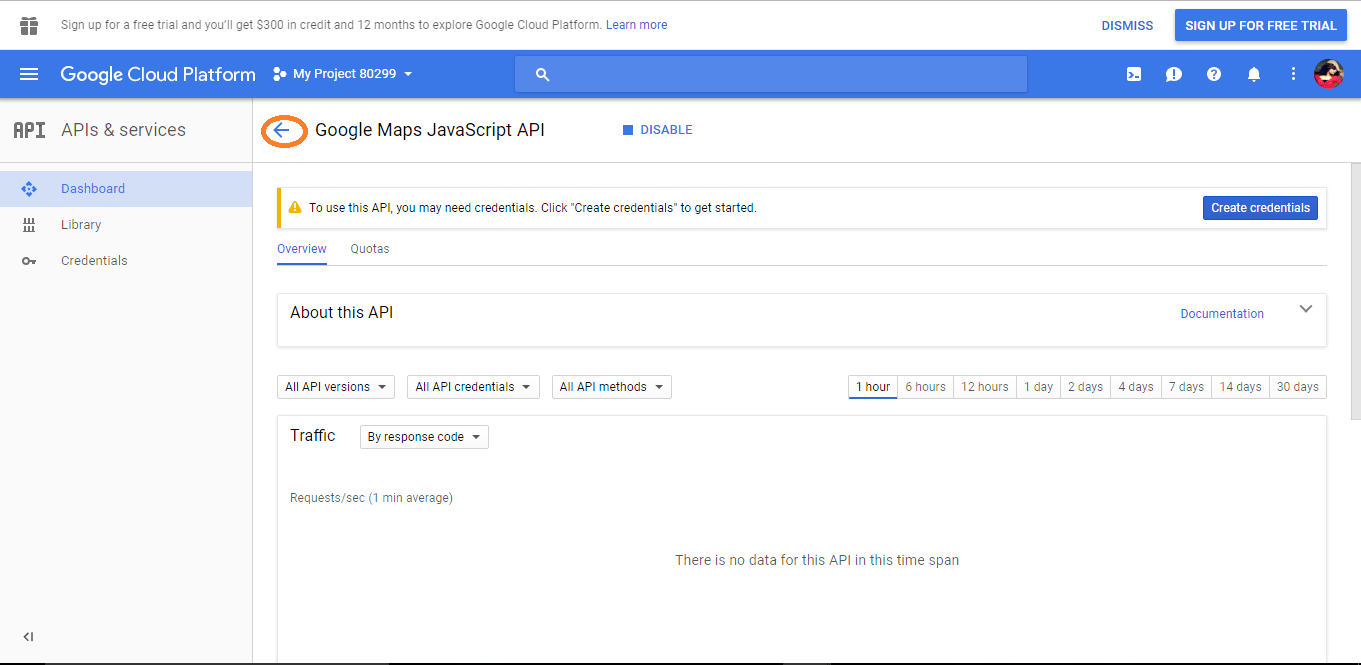
After clicking on Enable, if you have more application APIs to enable, click on the back-arrow within the page to return to the list of application APIs (and repeat the previous step):
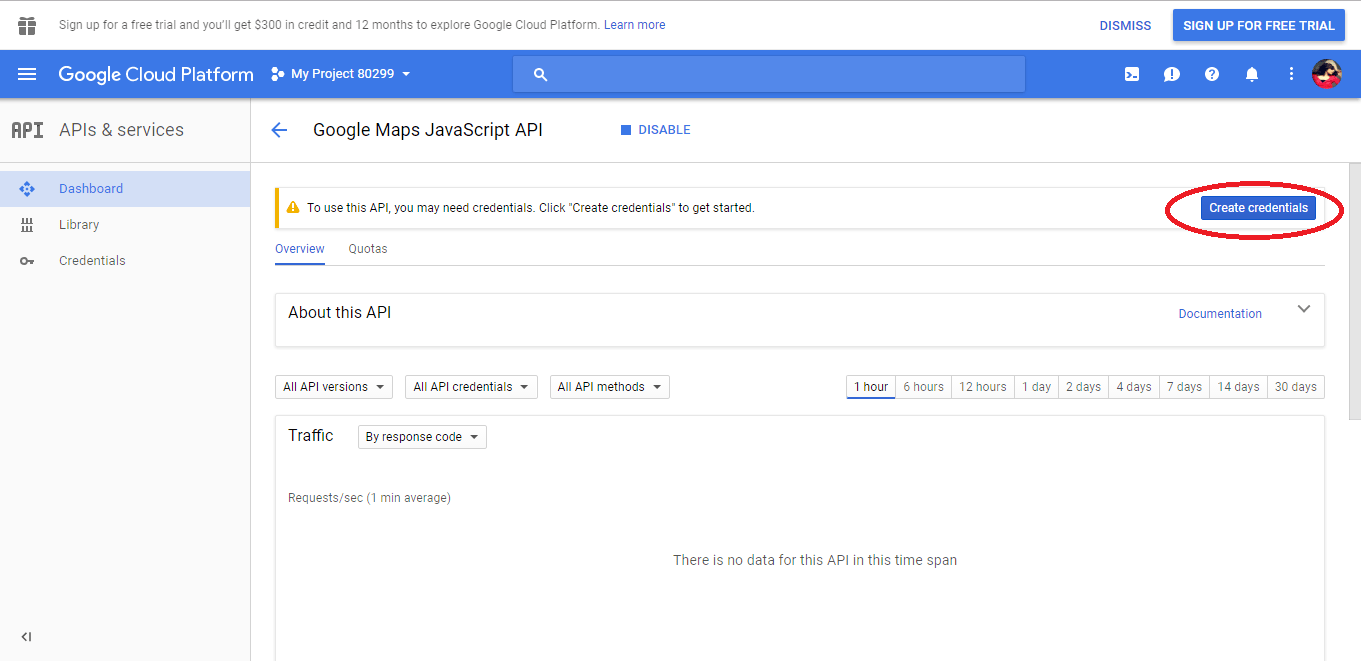
Otherwise, after enabling it, click on the Create Credentials button:
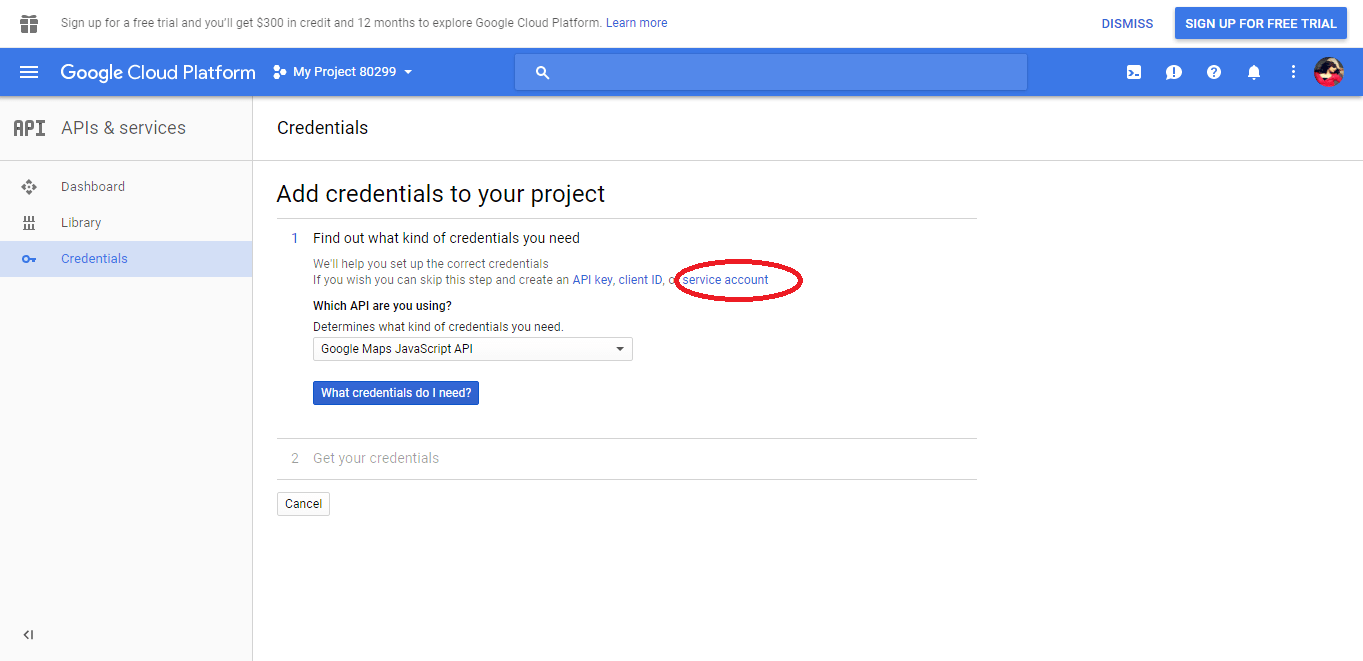
And on the credentials page, choose to create a
service account.
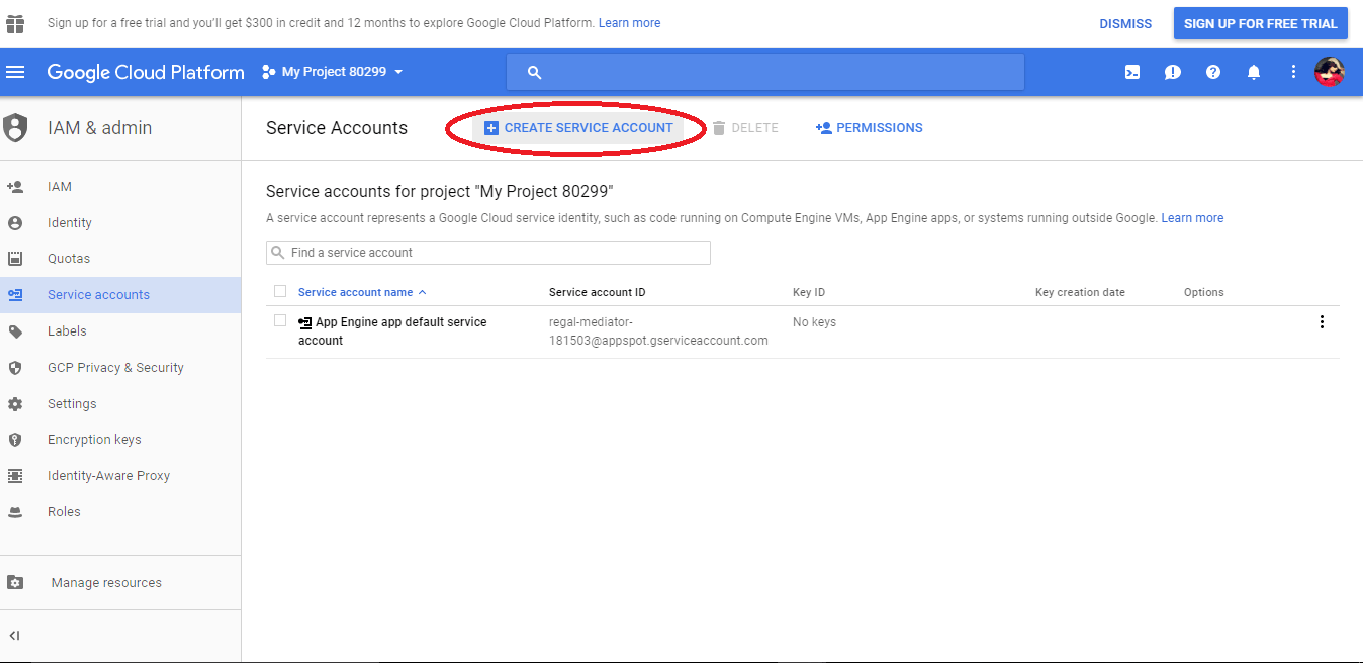
This takes you to the list of service accounts for your Google Cloud Platform project.Click on Create service account.
Note
If you are using App Engine, there will already be a service account listed that was created and is used by Google's infrastructure. Please ignore that.
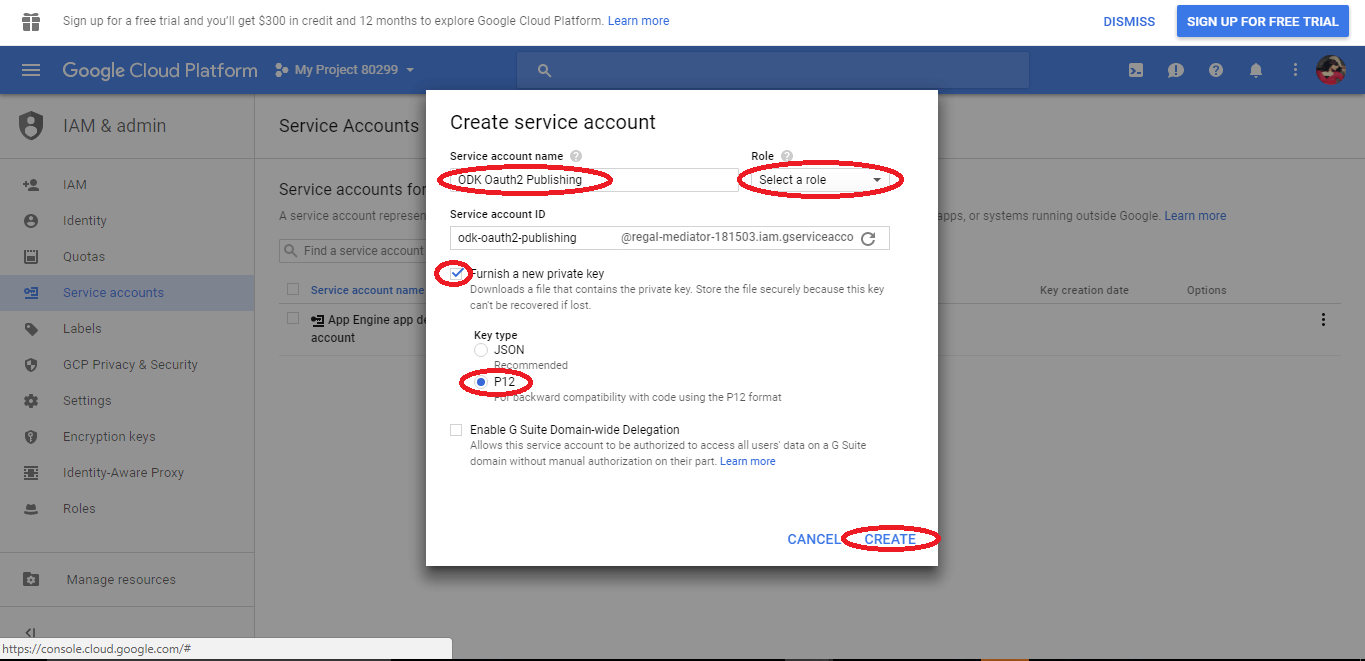
On the next screen, enter a name for the service account (e.g., "ODK Oauth2 Publishing"), choose to furnish a new private key, select a role, and request the P12 format. Then click Create:
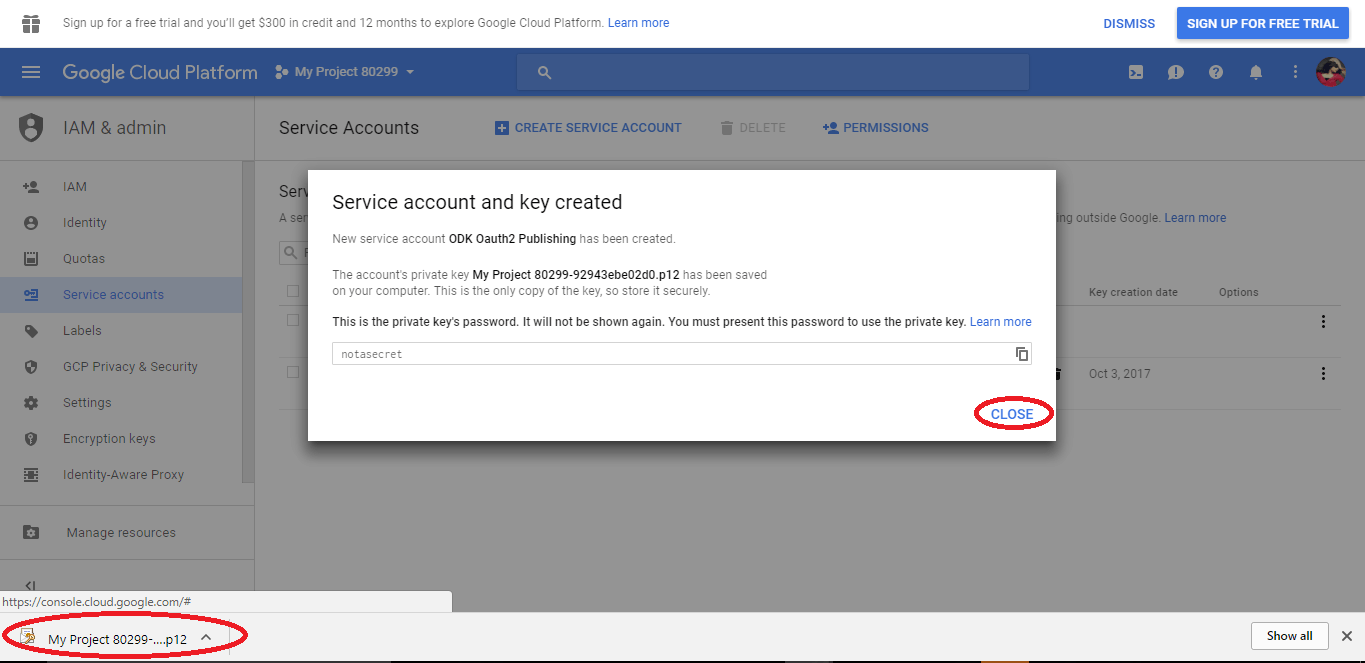
The private key for this service account will begin downloading (it will have a .p12 file extension). After it has downloaded, click Close.
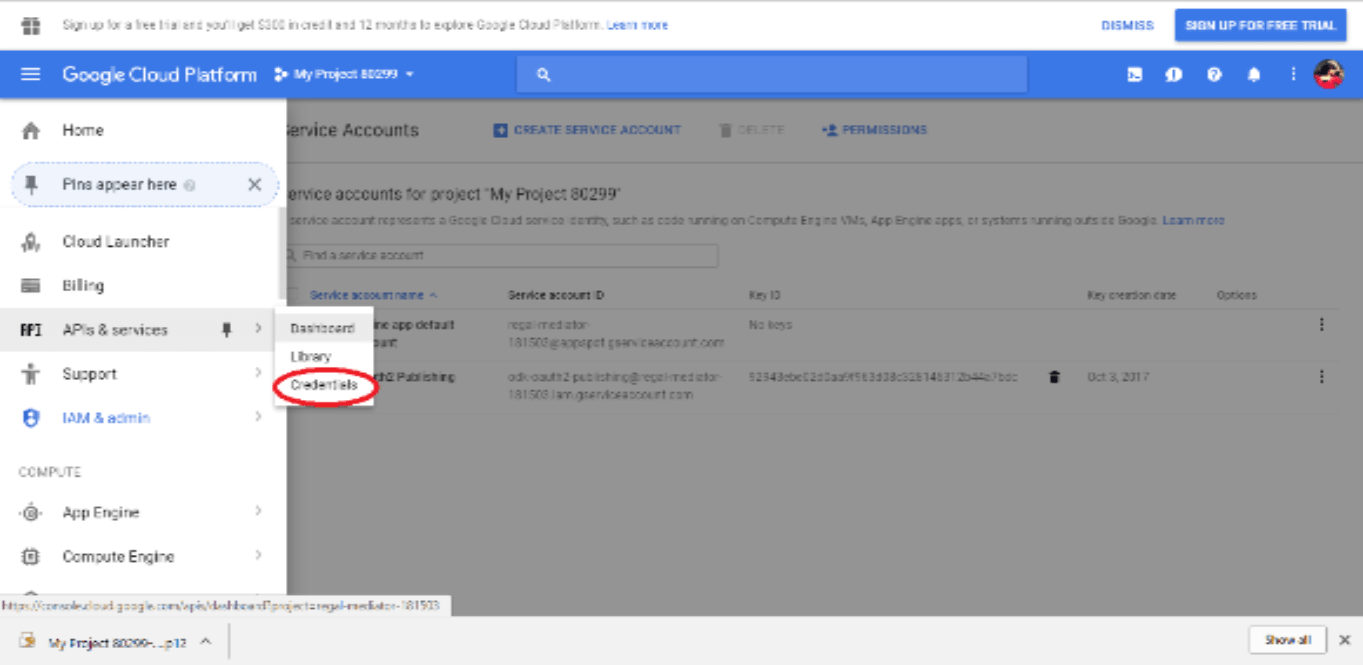
This returns you to the list of service accounts. Click on the the menu icon to the left of Google Cloud Platform and select APIs & services from the menu and then select Credentials option.
Choose Create credentials and select
API Key.
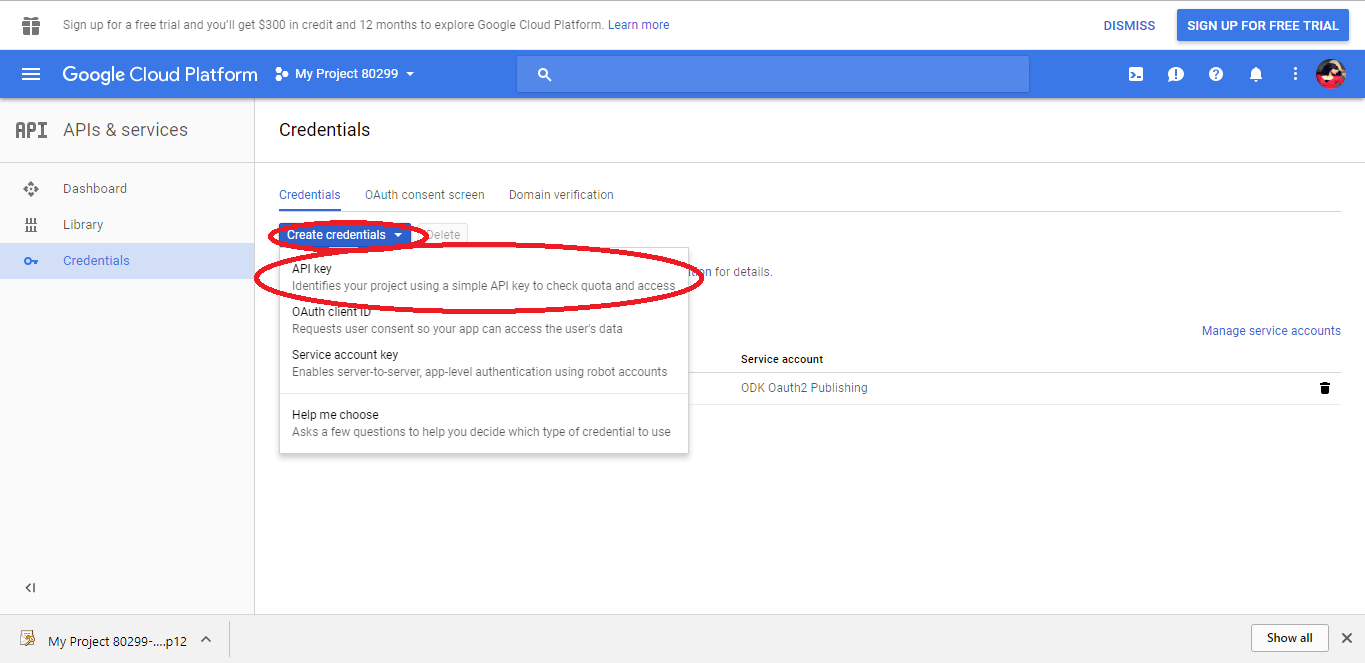
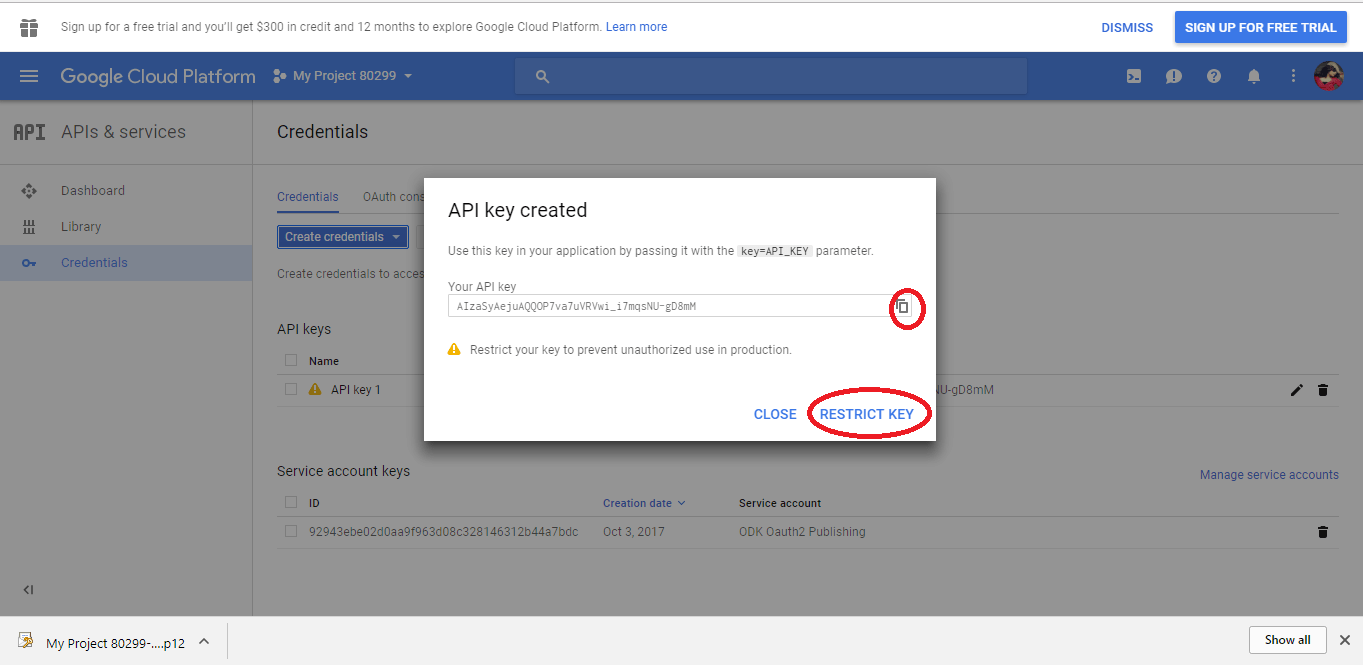
After selecting
API keyan API key will be generated, copy it as it will be used further and click on Restrict Key.
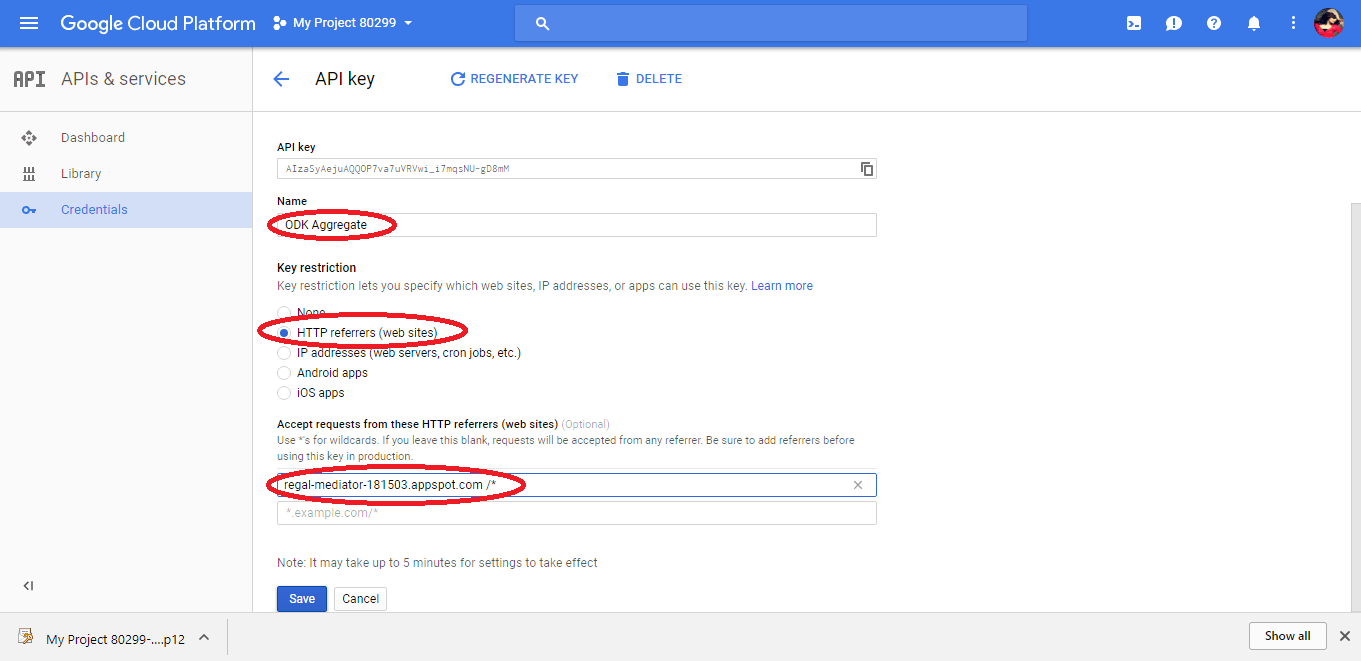
Enter a name (e.g., "ODK Aggregate"), enter the hostname (and port, if nonstandard) of your ODK Aggregate server, followed by a slash and star and choose the key restriction(HTTP referrers). Then click Save:
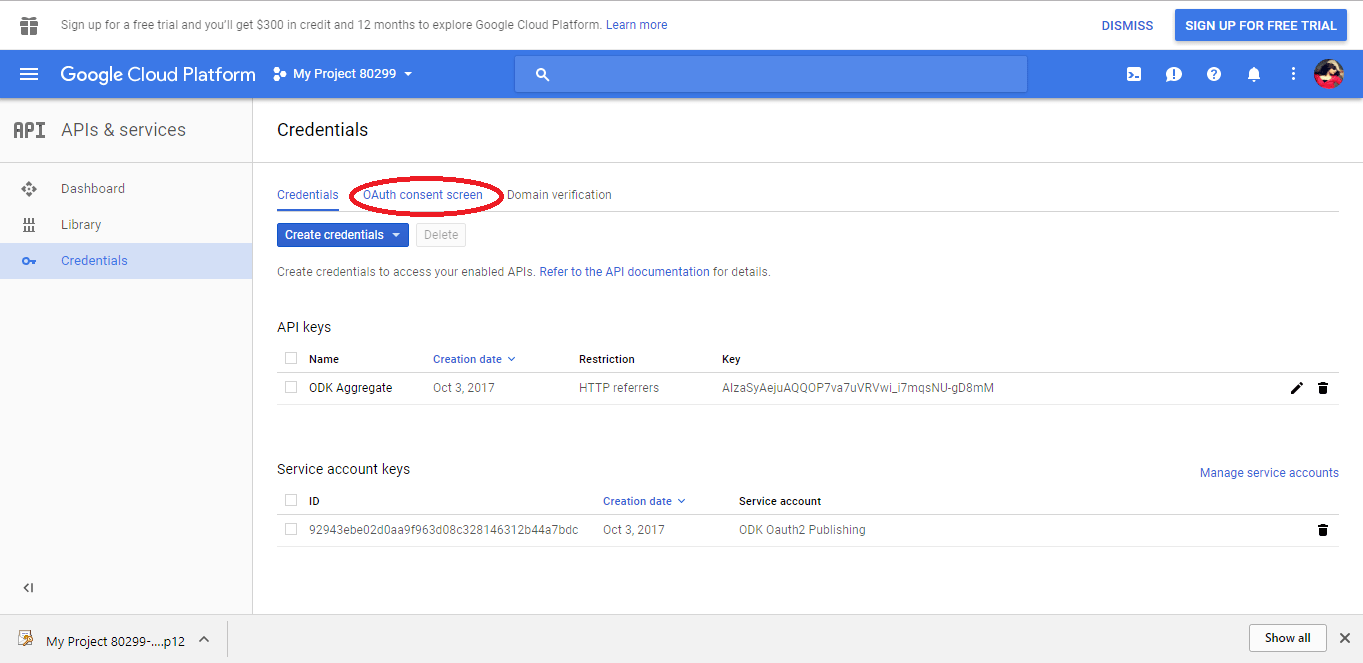
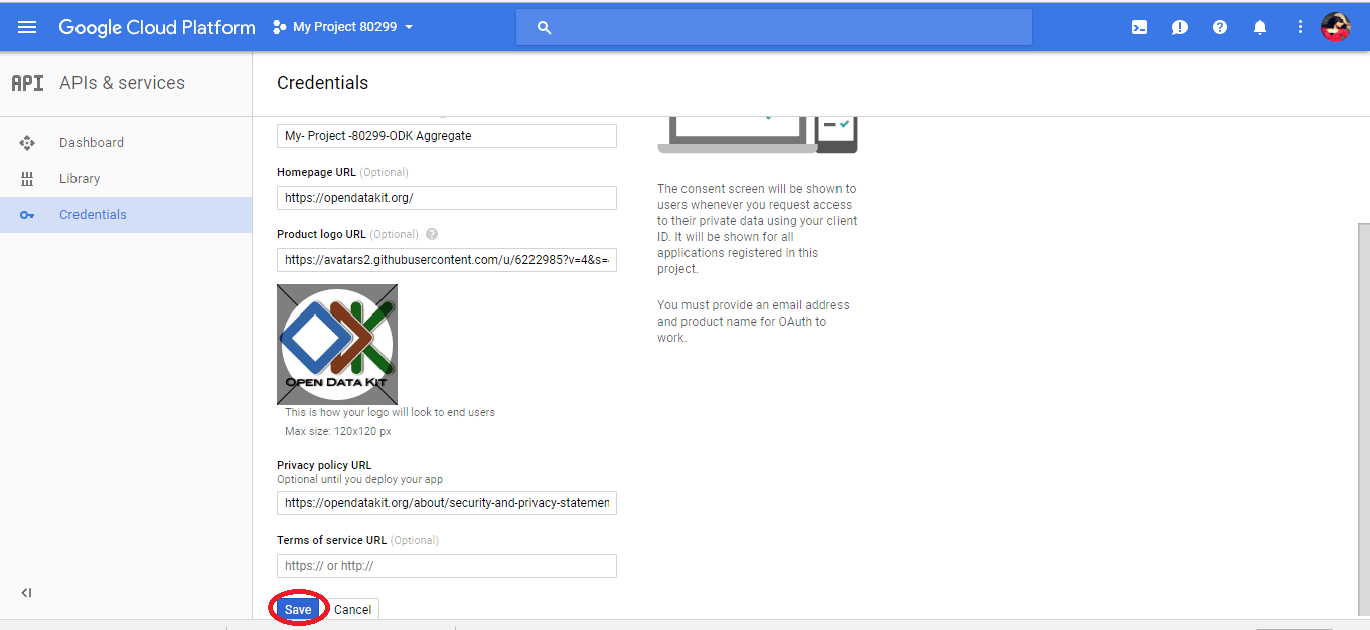
You will be redirected to credentials page, now click on OAuth consent screen tab.
Enter a product name and email address on this screen and fill in any additional fields that you might want to provide.Click Save.
Once again, click on the Credentials tab if not redirected, select the
ODK Oauth2 Publishingkey that you created above, and chooseManage service accounts:
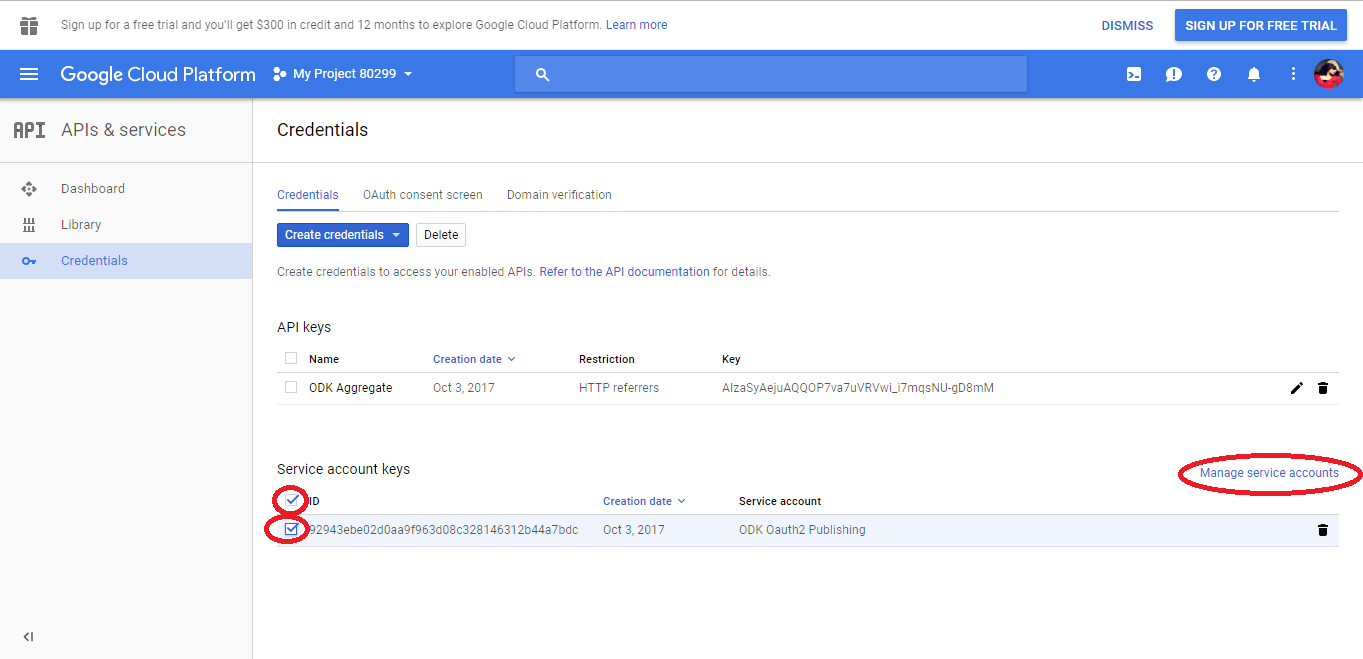
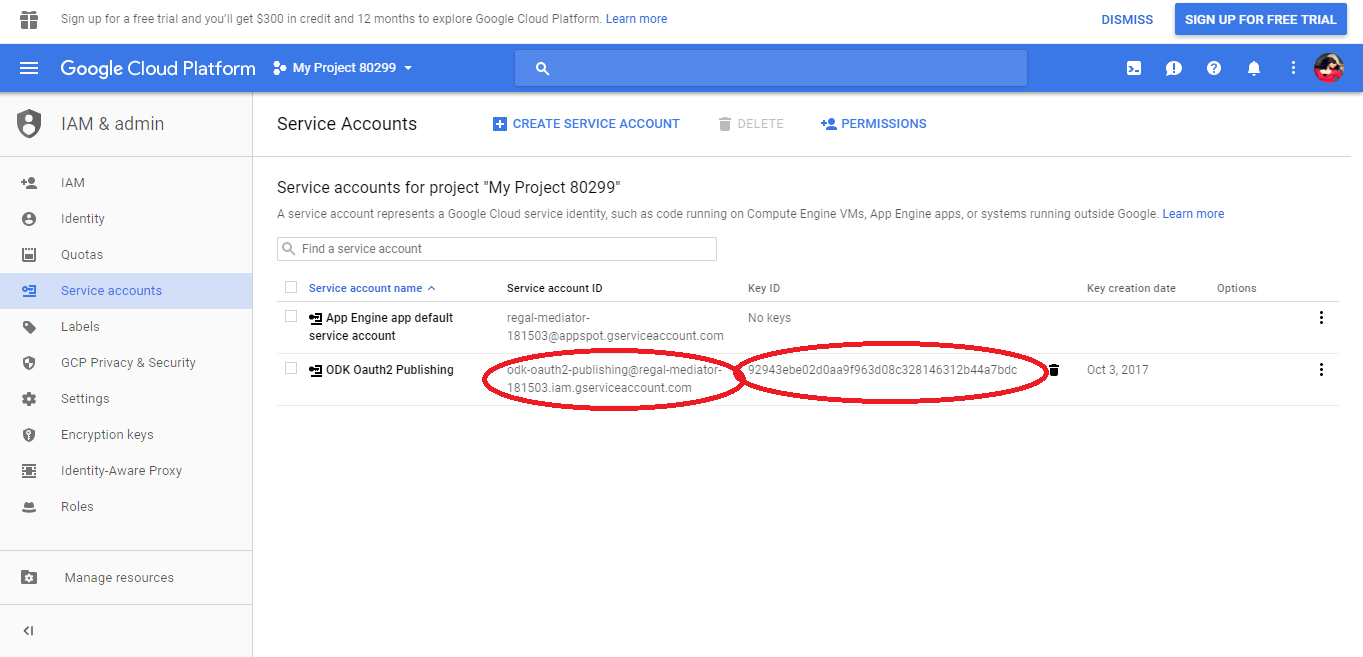
This takes you to details about that ODK Oauth2 Publishing service account. Keep this browser screen open; you will need to cut and paste values from this screen into ODK Aggregate. This is what those details look like:
Note
The Service Account information and the downloaded private key file must be uploaded to ODK Aggregate to enable publishing to Google Spreadsheets.
The API Key is for use by Google Maps.
Entering Credentials into ODK Aggregate 1.3 and higher
Once you have created the credentials , you need to upload these credentials to ODK Aggregate.
The same credentials can be used across multiple ODK Aggregate servers.
To upload the credentials:
Log onto ODK Aggregate as a Site Administrator. Click on the Site Admin then click on Preferences tab.Now, click on Change Google API Credentials.
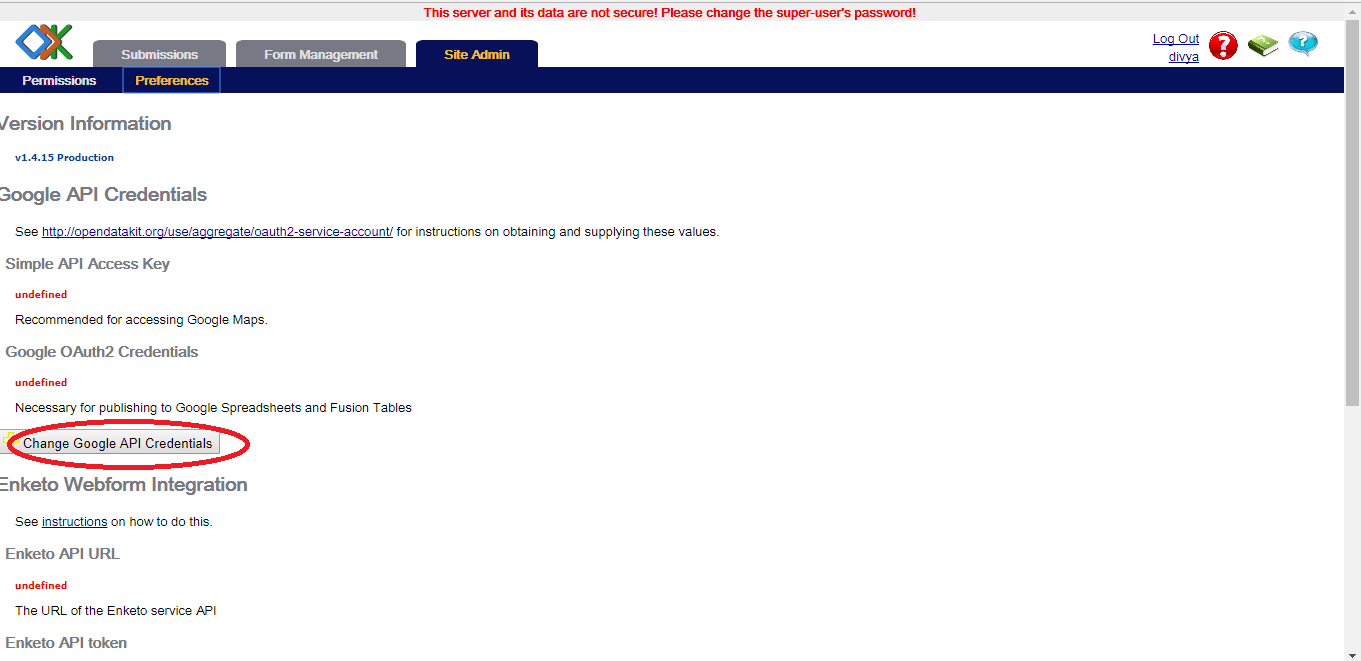
This will bring up the Google API Credentials Upload dialog.From the Google website, copy and paste the API key into ODK Aggregate's
Simple API Keyfield.Click on Choose File and select the previously-downloaded (from Step 1, above) P12 private key file.
From the Google website, copy and paste the Service account section's "Key ID" into ODK Aggregate's
ID (Key ID) or perhaps Client IDfield.From the Google website, copy and paste the Service account ID (it looks like an Email address) into ODK Aggregate's
Service Account ID (looks like an Email address)field:

Click on Upload Google Credentials. This should present a successful-upload pop-up:
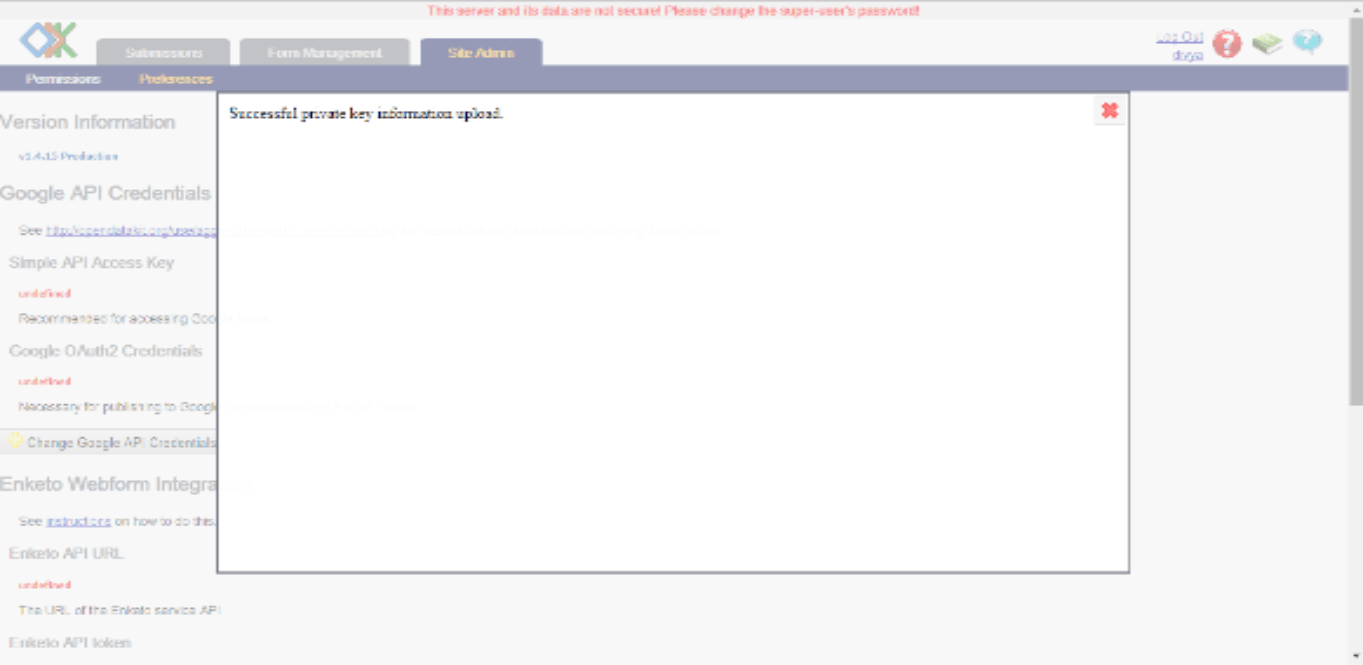
Click on the X to close that pop-up. The
Simple API Access KeyandGoogle OAuth2 Credentialsshould be updated:
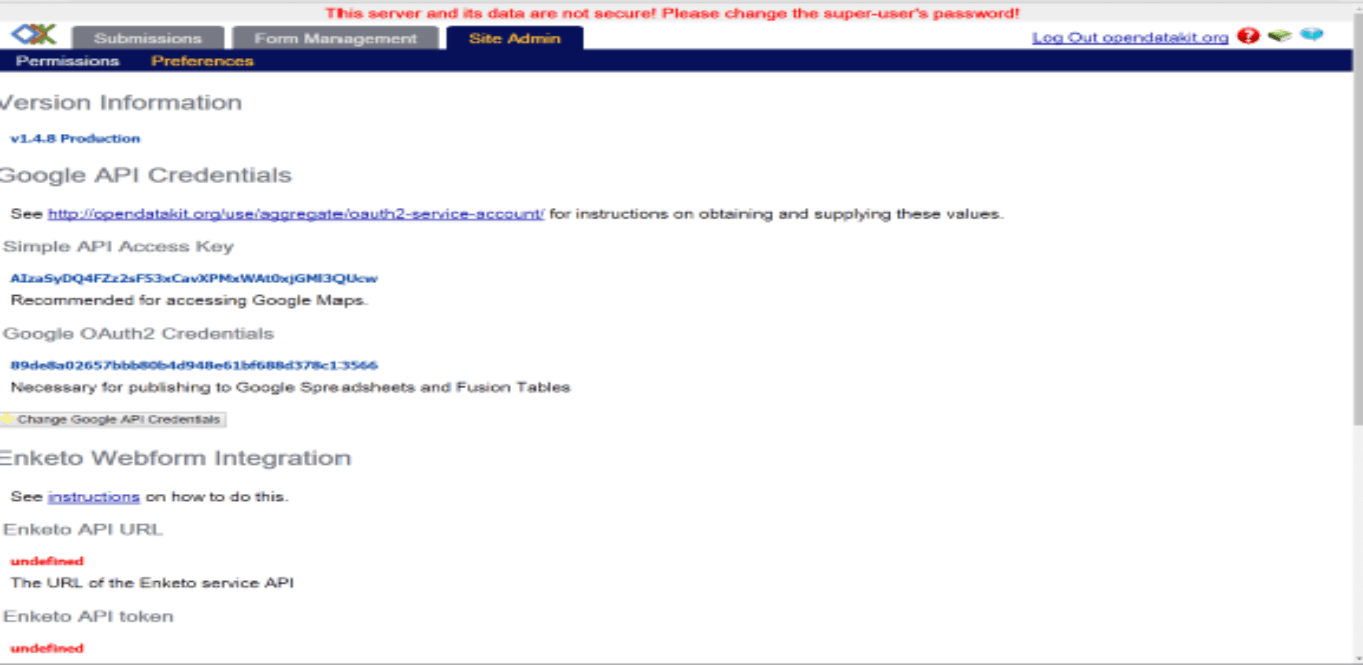
Your ODK Aggregate server is now configured to support publishing of data to Google Spreadsheets.
Tip
If your publishers seems to be stalled in an Active Paused or Paused state, this is most likely caused by exceeding Google's quota limits. See this section for how to navigate to a pop-up from which you can request a quota limit increase.